How do you do Bubble Paintings?
Duration Activity: Approx. 1 hour
Bubble painting is a great, creative activity that is a lot of fun to do with children and can also be used to foster a positive sense of well-being and mindfulness in teenagers and adults.
The beauty about bubble painting is that it does not require many items to get started, and is easy to carry out. The kids absolutely love it!!
I have set out below the instructions to get started, but there are various ways to get creative and explore other techniques to produce different results.
Table of Contents
Equipment Needed for Bubble Painting

Apron
Paper or card
Water-based paints
Washing up liquid
Cups
Straws
Bubble Painting Instructions
Bubble painting allows for lots of creativity, but there are some basic steps to follow for the best results. With a few simple materials and techniques, both kids and adults can learn how to make stunning works of bubble art.
Now to get started:
Step 1: Cover the working area or table - we use an old plastic table cloth, the key to remember is that the cover should be impermeable as there will be spillages. We also put down a layer of sketch paper across the table, as the bubbles will overflow, creating interesting patterns and prints on the paper as well.
Step 2: Mix half a cup of water with a generous amount of washing up liquid and paint and stir thoroughly.
Step 3: Here comes the fun part – using a straw, blow into the cup and watch the coloured bubbles erupt from the cup.

Step 4: If your children are blowing through the straws, be sure to keep an eye on them to make sure they do not get it wrong and accidentally take a drink !! To be on the safe side, always use non-toxic paints.
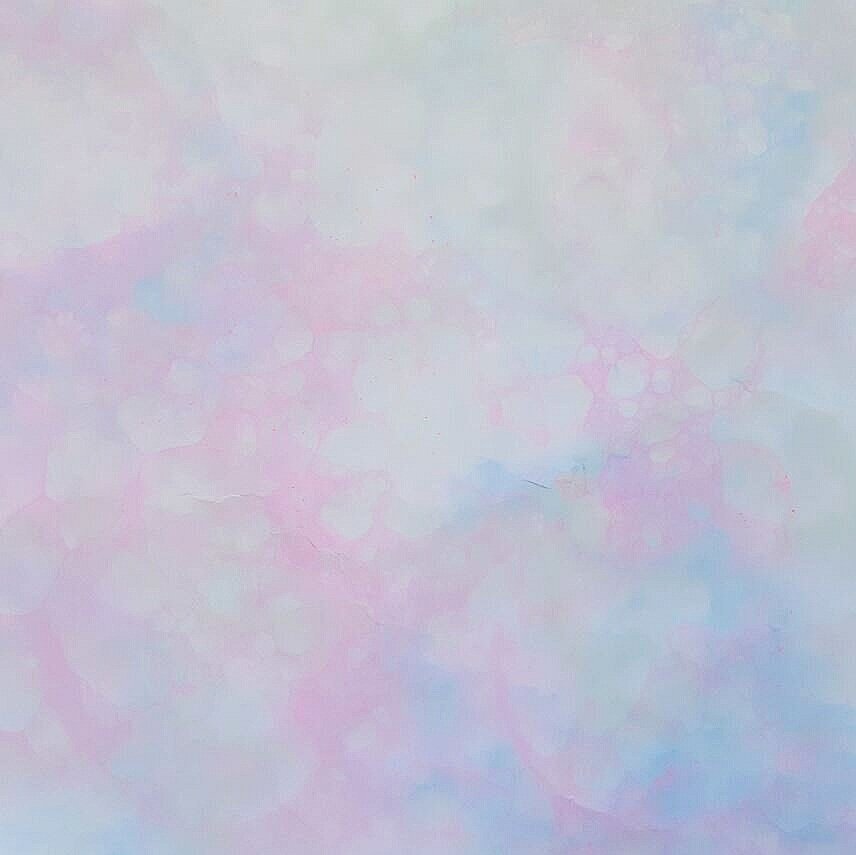
Step 5: Once the bubbles start to erupt, lay your sheet of paper or card over the top of the bubbles. This will create an imprint of the bubbles, producing lots of interesting patterns. Repeat this process over and over again, using different coloured paints.

Step 6: To experiment with the bubbles, try picking up the overflowing bubbles from the cup and flicking them over the paper or using the straw to blow the bubbles across the paper.
Step 7: Allow the paper to dry and wait for the results to emerge.

Fun Variations and Ideas for Bubble Painting
Once you master the basics, there are endless creative ways to experiment with bubble painting. Here are some fun variations to try with different surfaces, paints, textures and themes.
Alternative Surfaces
Bubbles can be printed on more than just paper. Consider using:
Ceramic tiles, glass or mirrors - Smooth surfaces work well.
Wood panels or canvas - Give a thicker base for the bubble prints.
Large stretched canvas - For big bubble art pieces.
Textured surfaces - Adds depth to the bubble circles.
Unique Paint Options
Experiment with paints besides basic tempera:
Metallic paints - Gold, silver, copper create shiny prints.
Neon or glow in the dark paints - For cool lighting effects.
Food coloring or liquid watercolors - Allow translucent prints.
Glitter paints or puffy paint - Adds 3D texture to the bubbles.
Textured Paints
For bumpy bubble prints, try mixing the paint with:
Fine sand or glitter - Gives the paint grainy texture.
Baby oil or glycerin - Helps slow the popping.
Thickening powder - Increases viscosity for textured look.
Thematic Ideas
Give your bubble art a fun theme or color pattern:
Rainbow - Use paints in color order ROYGBIV.
Under the sea - Blues and greens with sea creature cutouts.
Seasonal - Red/green, pastels, golds for holidays.
Let your creativity shine by playing with different materials and themes for unique bubble art painting experiences. The possibilities are endless!
This can be a messy activity, particularly if being carried out with over excited children. I would suggest having paper towels or tea towels ready to clear up any spillages.

I hope you have found this guide helpful and enjoy this activity as much as we do. If you have made bubble art, I would love to see it! You can email me at sarahransomeart@gmail.com.
For more craft activity ideas with children, click here, and for other art therapy suggestions, click here.