7 Immersive Art Activities for Kids

There has been a huge growth in the number of immersive art exhibitions in the last few years.
Immersive art refers to art that fully engages the viewer's senses and transports them to another world or to create a different perspective. It can be experienced through a variety of mediums, such as digital art, modelling, virtual reality (VR), sensory art, installation art, performance art, and projections.
In my blog post explaining why immersive art is so popular, I note how immersive art exhibitions appeal to children as they are vibrant and exciting and they can feel more involved with the artworks, which keeps their attention for far longer than in more traditional art galleries.
I have a number of blog posts that list some fantastic immersive art exhibitions currently on display in some major cities, such as London and New York. Visiting an immersive art exhibition in person is not always possible, so below I have listed some simple immersive art activities that are perfect for children to do at home or in a classroom setting.
Table of Contents
1. Create a Scavenger Art Hunt
2. Create Outdoor Artwork with Natural Materials
1. A Scavenger Art Hunt
In a normal scavenger hunt, items are hidden in an outdoor setting. Children are given a list of the items, which they have to find and gather together, either individually or in teams.
A scavenger hunt can become a fun, immersive and interactive art activity by turning the found items into artworks at the end of the hunt.
It provides a way to engage children in the creative process. It can be adapted to suit the age of the children and can be indoors or outdoors, depending what space you have available.
To set up a scavenger hunt art project, you can follow these steps:
Choose items that are suitable to be used in artworks at the end of hunt, some examples are as follows:
- Dry pasta, buttons, twigs, leaves, feathers.
- Some standard art equipment will be required, such as paper/card, glue or paints. These can also be included in the hunt or set up separately.
NOTE: An optional extra is to consider having a theme, such as a particular colour or only natural objects.
Write a list of all the items in the scavenger hunt to give to the children, this can be a simple list in pen or paper or typed and printed, if you need quite a few copies.
Depending on how many people are taking part, you could create teams.
Now it is time to send the children out to find the items.
Once all the items have been found, the children can use them to create their own artwork.
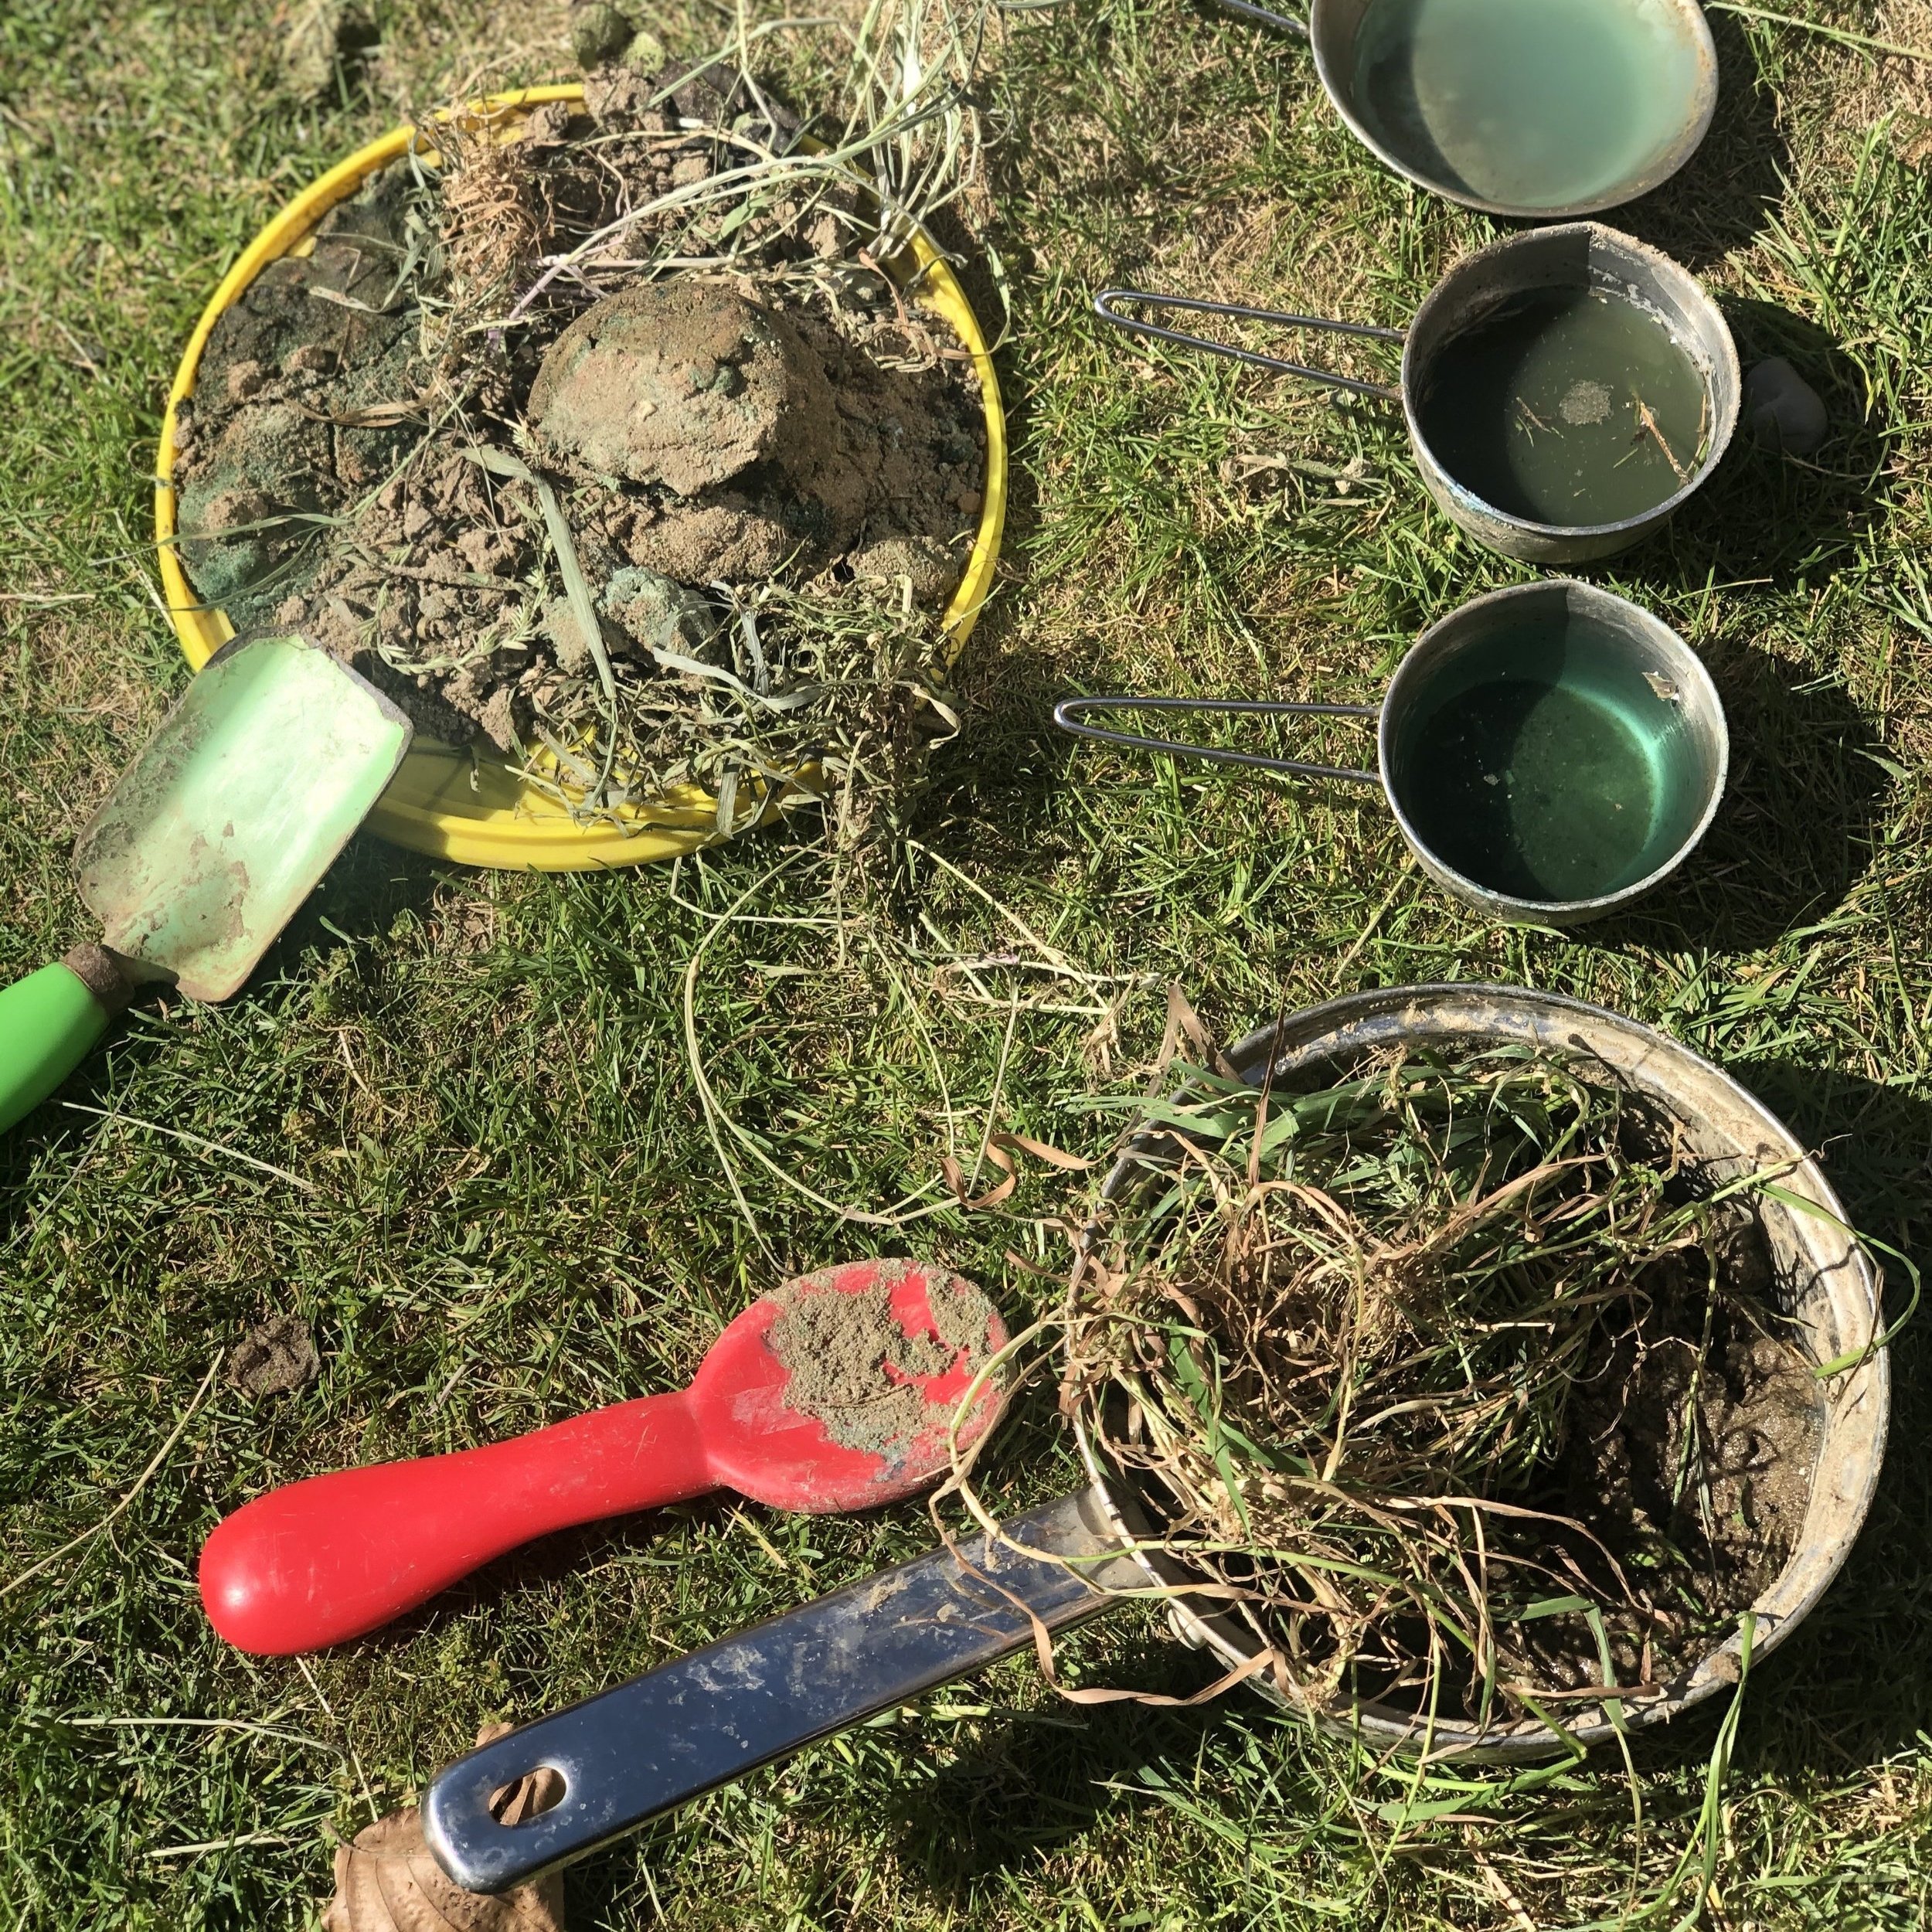
2. Create Outdoor Artwork with Natural Materials
Creating outdoor art using natural materials, likes twigs and leaves, is a great way to connect kids with nature and inspire their creativity and is a fantastic free activity.

Here are some steps to follow for an outdoor art project:
Choose a location to carry out your art project. This can be in your garden, but other locations like nature reserves, woods, or the beach are a great alternative.
Gather materials for your project. Depending on your location, this may include leaves, twigs, bark, logs, rocks, conkers, acorns, flowers or shells. Give your child time to explore the area and gather materials, as this is part of the fun.
Now it is time for your children to use their imagination. Perhaps they could make a star out of twigs, create a birds nest out of mud, sticks and leaves. It can be flat on the ground or they can build up their materials to create more of a sculpture. I find the more I let my children lead the activity, the more interesting the results!
The idea is that the artworks remain outdoors. Take photos as a memento.
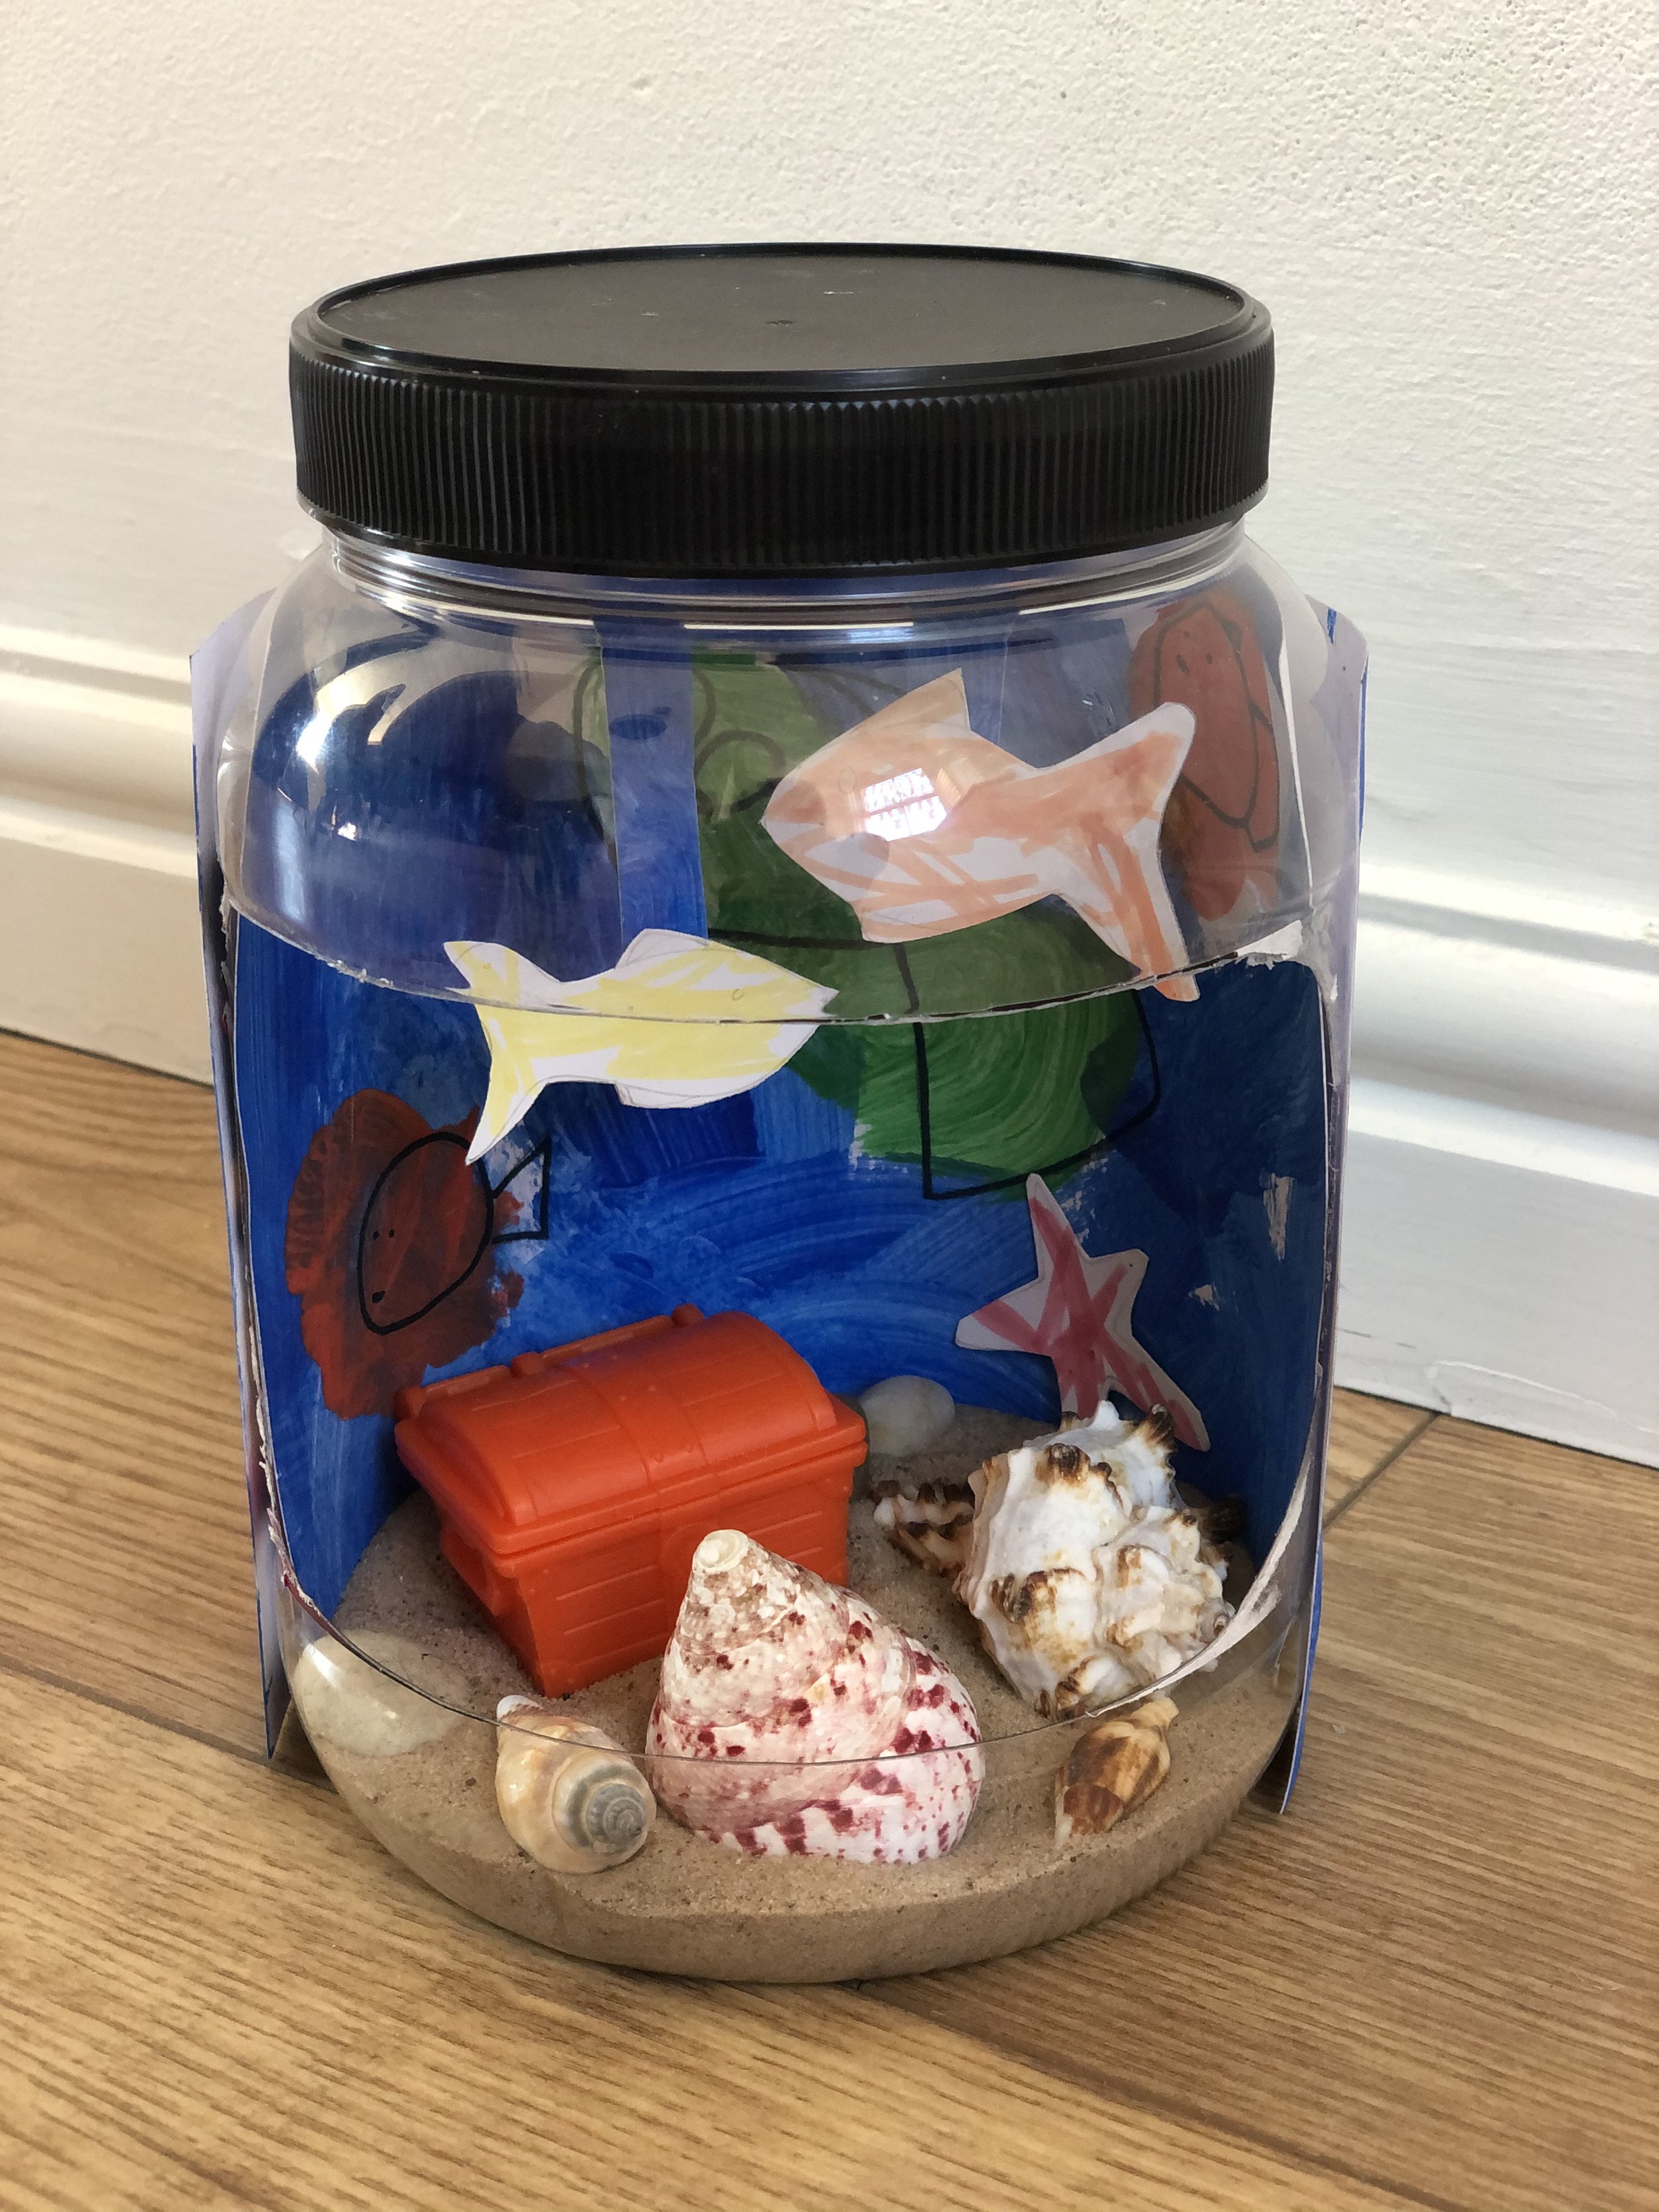
3. A Sensory Art Project
Sensory art is a great immersive activity, as it is a way for kids to explore different textures, scents, and sounds. I have listed some key steps below to help you set up your sensory art project. This activity can be as neat or as messy as you or your children would like!
Here are some steps to follow for a sensory art project:
Set up a number of boxes or stations around the room or outdoors.
Each box or station should contain a different item, ideas include soft items such as cotton wool, feathers, sponges, and some harder items such as pasta or cardboard shapes. You could perhaps include some spices to add colour and aromas. You could even include Play Doh.
Give the children time to explore the different boxes and gather inspiration for their artwork. They will have fun just playing with the items at first, before they decide what artworks they want to create.
Once the children have gathered their chosen items together, they can begin to create their artworks. If they are creating a picture, they will need strong paper, but cardboard or sheets of plywood would make a fun alterative to paper. If they plan to make a sculpture, the dough will be the primary materials. For a salt dough recipe, please click here.
4. Make Shadow Art
Shadow art is an immersive way for children to explore light and shadow and create unique and dynamic artwork.
Here are some steps to set up a shadow art project:
Set up a light source such as a lamp or torch in a dimly lit or dark room.
Create cut-out shapes from cardboard, such as animals, geometric shapes, or letters, find objects around the home with different shapes and sizes or simply use your own hands.
Now it is time to create the shadows. Place the shapes and objects in front of the light and project the shadows onto a wall or large piece of paper.
The importance here is to encourage the kids to interact with the light and shadows to make their own shapes.
You could encourage your children to create a story about the shadow shapes or get them to sketch the shadows on to paper or take photographs.
5. Create a Sculpture
Getting children to work in 3D form is a great way for them to explore their creativity and spatial awareness. Creating sculptures using various materials can be a fun and engaging activity for kids of all ages. Here are some steps to set up a 3D art sculpture project:
Decide on what type of project your children want to carry out. This could be for example, a sculpture involving papier-mache, modelling clay, salt dough or recycled materials, like washing up bottles or drink cartons.
Give your kids time to explore the materials and gather inspiration for their sculptures and encourage them to think about how they can use the materials to create a 3D form.
Provide guidance and support as needed, such as showing them how to mix papier-mâché, how to mold clay or create salt dough.
These projects may need to be carried in stages so that time is allowed for the sculptures to dry before they can be painted.
6. Discover Virtual Reality Artforms
Virtual Reality (VR) is developing rapidly and there are all sorts of ways that this new technology can be experienced. VR allows the user to enter and immerse themselves in a different visual environment. At the moment VR headsets are only really suitable for children over 13-years-old.
There are number of VR apps that will help you and your children to create 3D spaces. Some examples include Tilt Brush, Gravity Sketch, and Color Space, but there are many apps to choose from, with many more being created regularly.
If your children are under 13-years-old and too young to use a VR headset, perhaps try a video game like Minecraft or Roblox. These types of games allow the game-player freedom to create their own worlds, using their imagination. It can be fun to share creative ideas with your children.
7. Creating AI Generated Art
Creating AI-generated art is a fun activity for children that allows them to explore their imagination. This process involves entering a text prompt into particular websites to create an image based upon this description. I have listed some pointers on how to get started below:
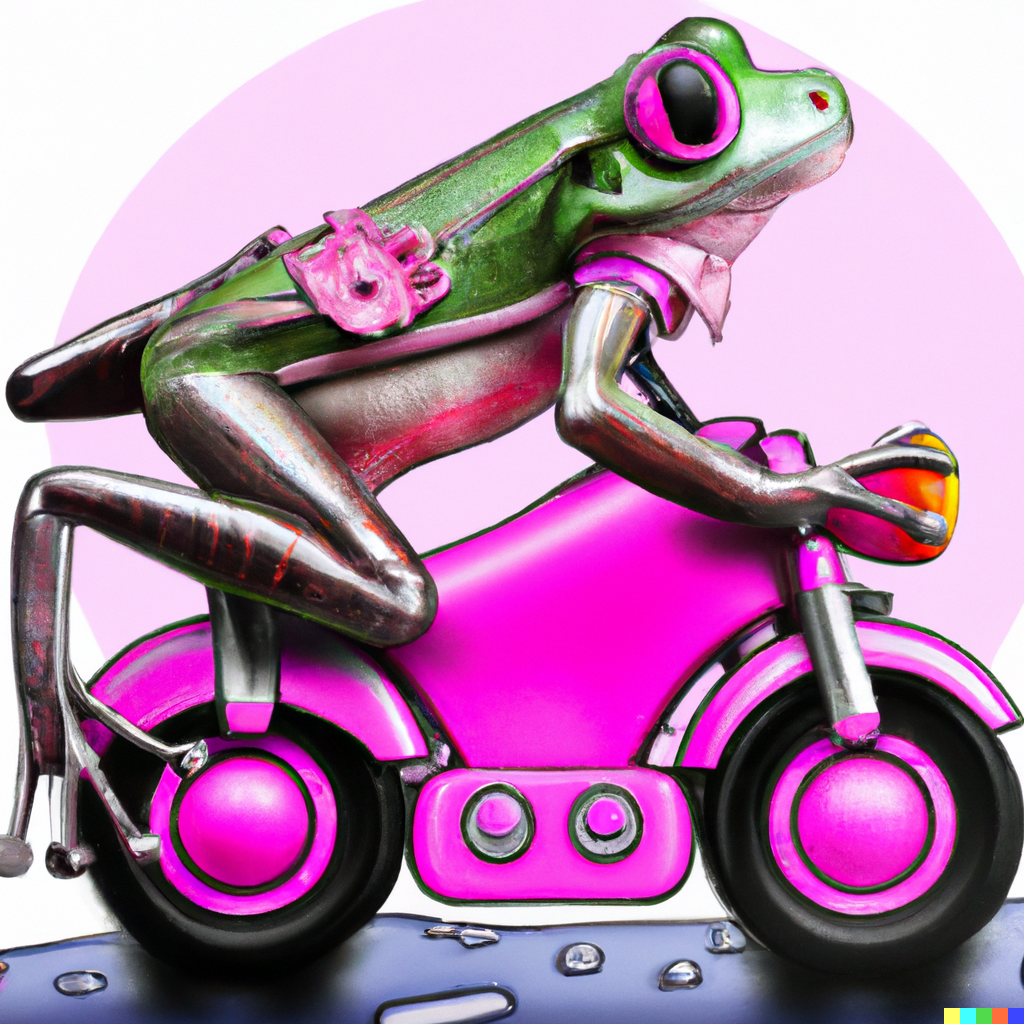
Start by searching for an online AI Generator. There are many free options available including Fotor, DALL-E 2 and NightCafe.
Discuss a theme and or image with your children that they would like to create, and encourage them to enter the text into the website. The AI website will generate an image based on this description.
It can be fun to keep creating new images to see what the AI comes up with and tweaking and refining previous descriptions. Be mindful that this is new technology and is still developing, so at this stage AI results are not perfect, but they are improving all the time.
As a secondary activity, you could ask your child to draw their own picture based on the image produced by the AI. This could be either on paper or in digital form using a programme like Procreate on an iPad.

I hope you have found this blog post useful. For further reading, here is a full list of other Arts and Craft ideas for Children. I’d recommend visiting the Twinkl website to find out more about the Benefits of Art for Children, including a wealth of useful links.
If you have any other ideas for immersive art activities for children you think I should include here, please email me at sarahransomeart@gmail.com.

