How to create a reduction lino print

If you want to add more than one colour to your lino print, there are a few different methods you can use:
A multiblock lino print
A jigsaw lino print or
A reduction lino print.
In this blog post I have described the necessary steps to create a reduction lino print and provide helpful tips to ensure your reduction lino print is a success.
Table of Contents
What is a reduction lino print?
Why is it called a reduction print?
How to create a reduction lino print:
1. Decide on a rough design
2. Confirm the design
3. Draw each colour onto a separate piece of paper
4. Create a registration jig
5. Prepare the paper with registration tabs
6. Transfer layer 1 to the lino
7. Carve and print layer 1
8. Transfer layer 2 to the lino
9. Carve and print layer 2
10. Transfer layer 3 to the lino
11. Carve and print layer 3
12. Your reduction lino print is finished!
What is a reduction lino print?
Reduction Lino Print Video Demonstration

A reduction lino print is a method to create a print with more than one colour where only one lino block is used.
The printmaker carves and prints the first colour, then carves more from the same block before printing the second colour, then carves more from the same block before printing colour three.
A reduction lino print can have as many layers as the printmaker would like.
The reduction lino print method requires some care and attention, for example; to the colour and detail of each layer and to how each layer is lined up (registration).

Why is it called a reduction print?
It is called a reduction lino print because the printmaker carves more and more of the lino block away as they carve each layer of the print, thereby “reducing” the lino.
How to create a reduction lino print:
1. Decide on a rough design

As creating a reduction lino print requires some planning, the first step is to get a rough design together and a rough idea of what each layer would be and what colour you think you’d like for each layer. This will give a basis to start from and the detail can be decided from there.
NOTE: The bottom layers of a reduction lino print should be light in colour. Each layer should be darker than the last layer. The top layer should be the outline of the image.
NOTE: The more layers you have, the more difficult it will be to plan and print, therefore if this is your first reduction lino print, I would suggest no more than three layers.
2. Confirm the design
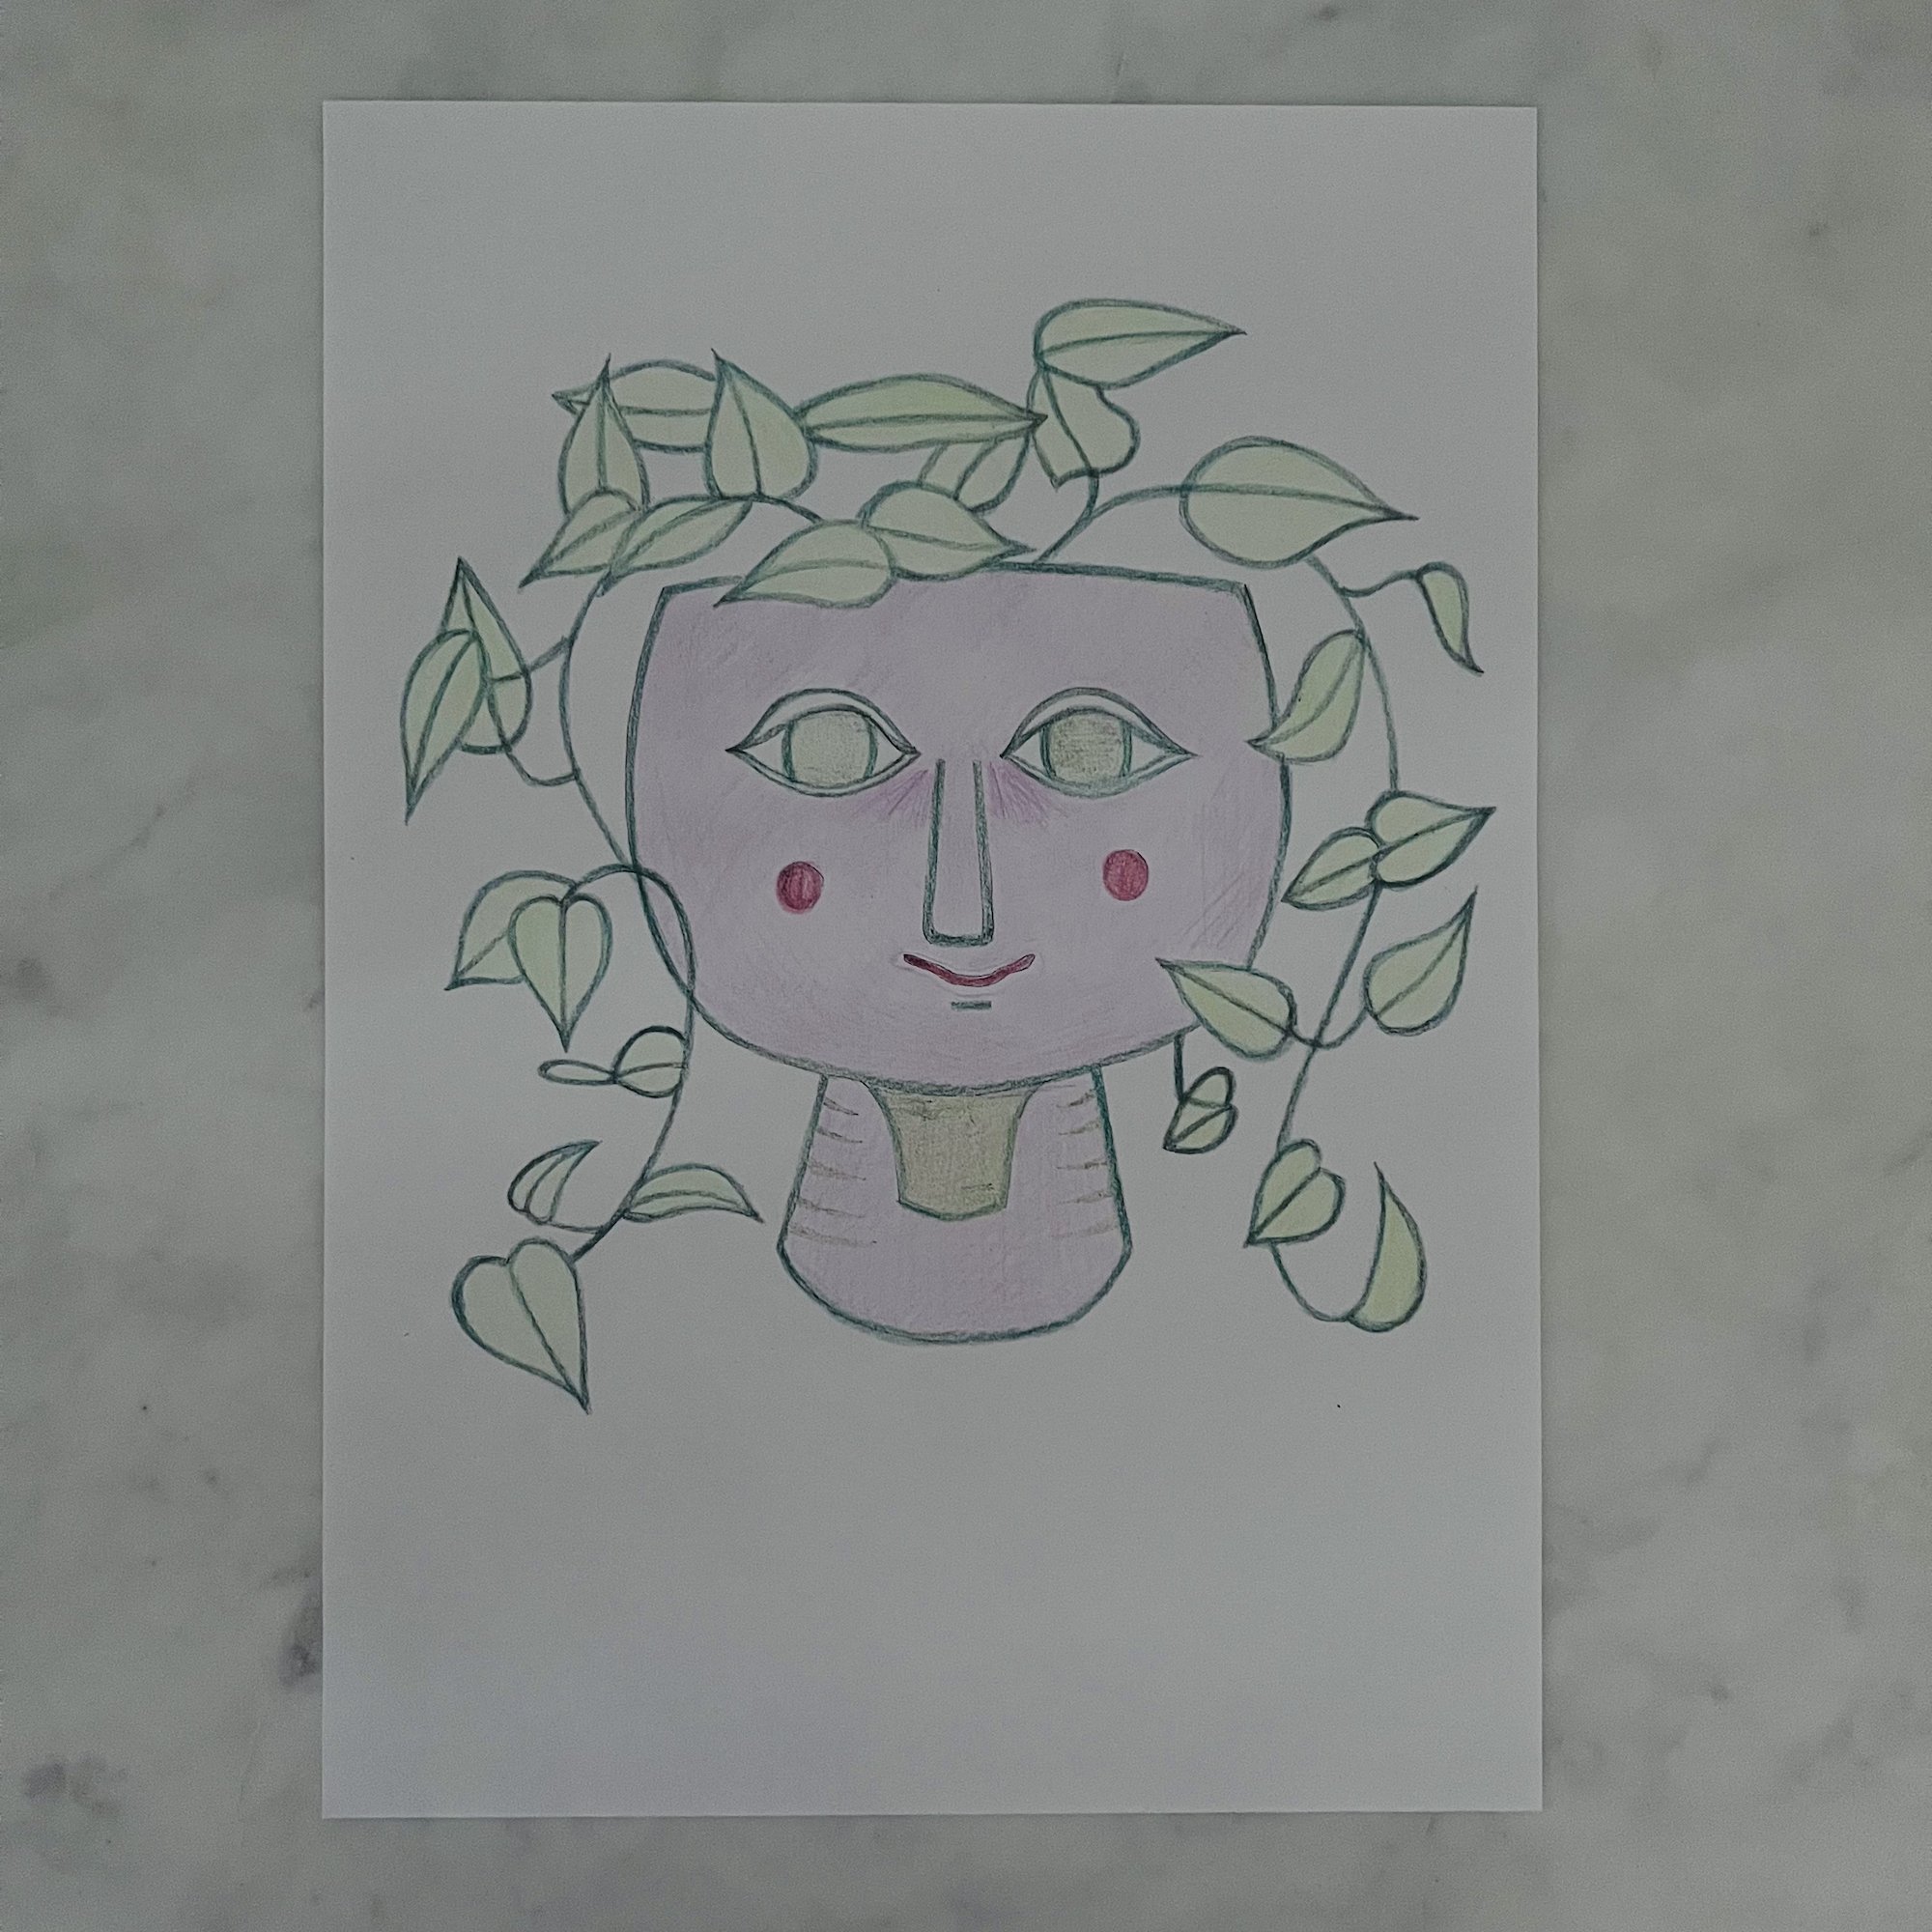
Draw an accurate version of your final design, use coloured pencils to give a good idea of how the final design should look.
3. Plan each layer of the print
Each colour will be a separate layer of the print.
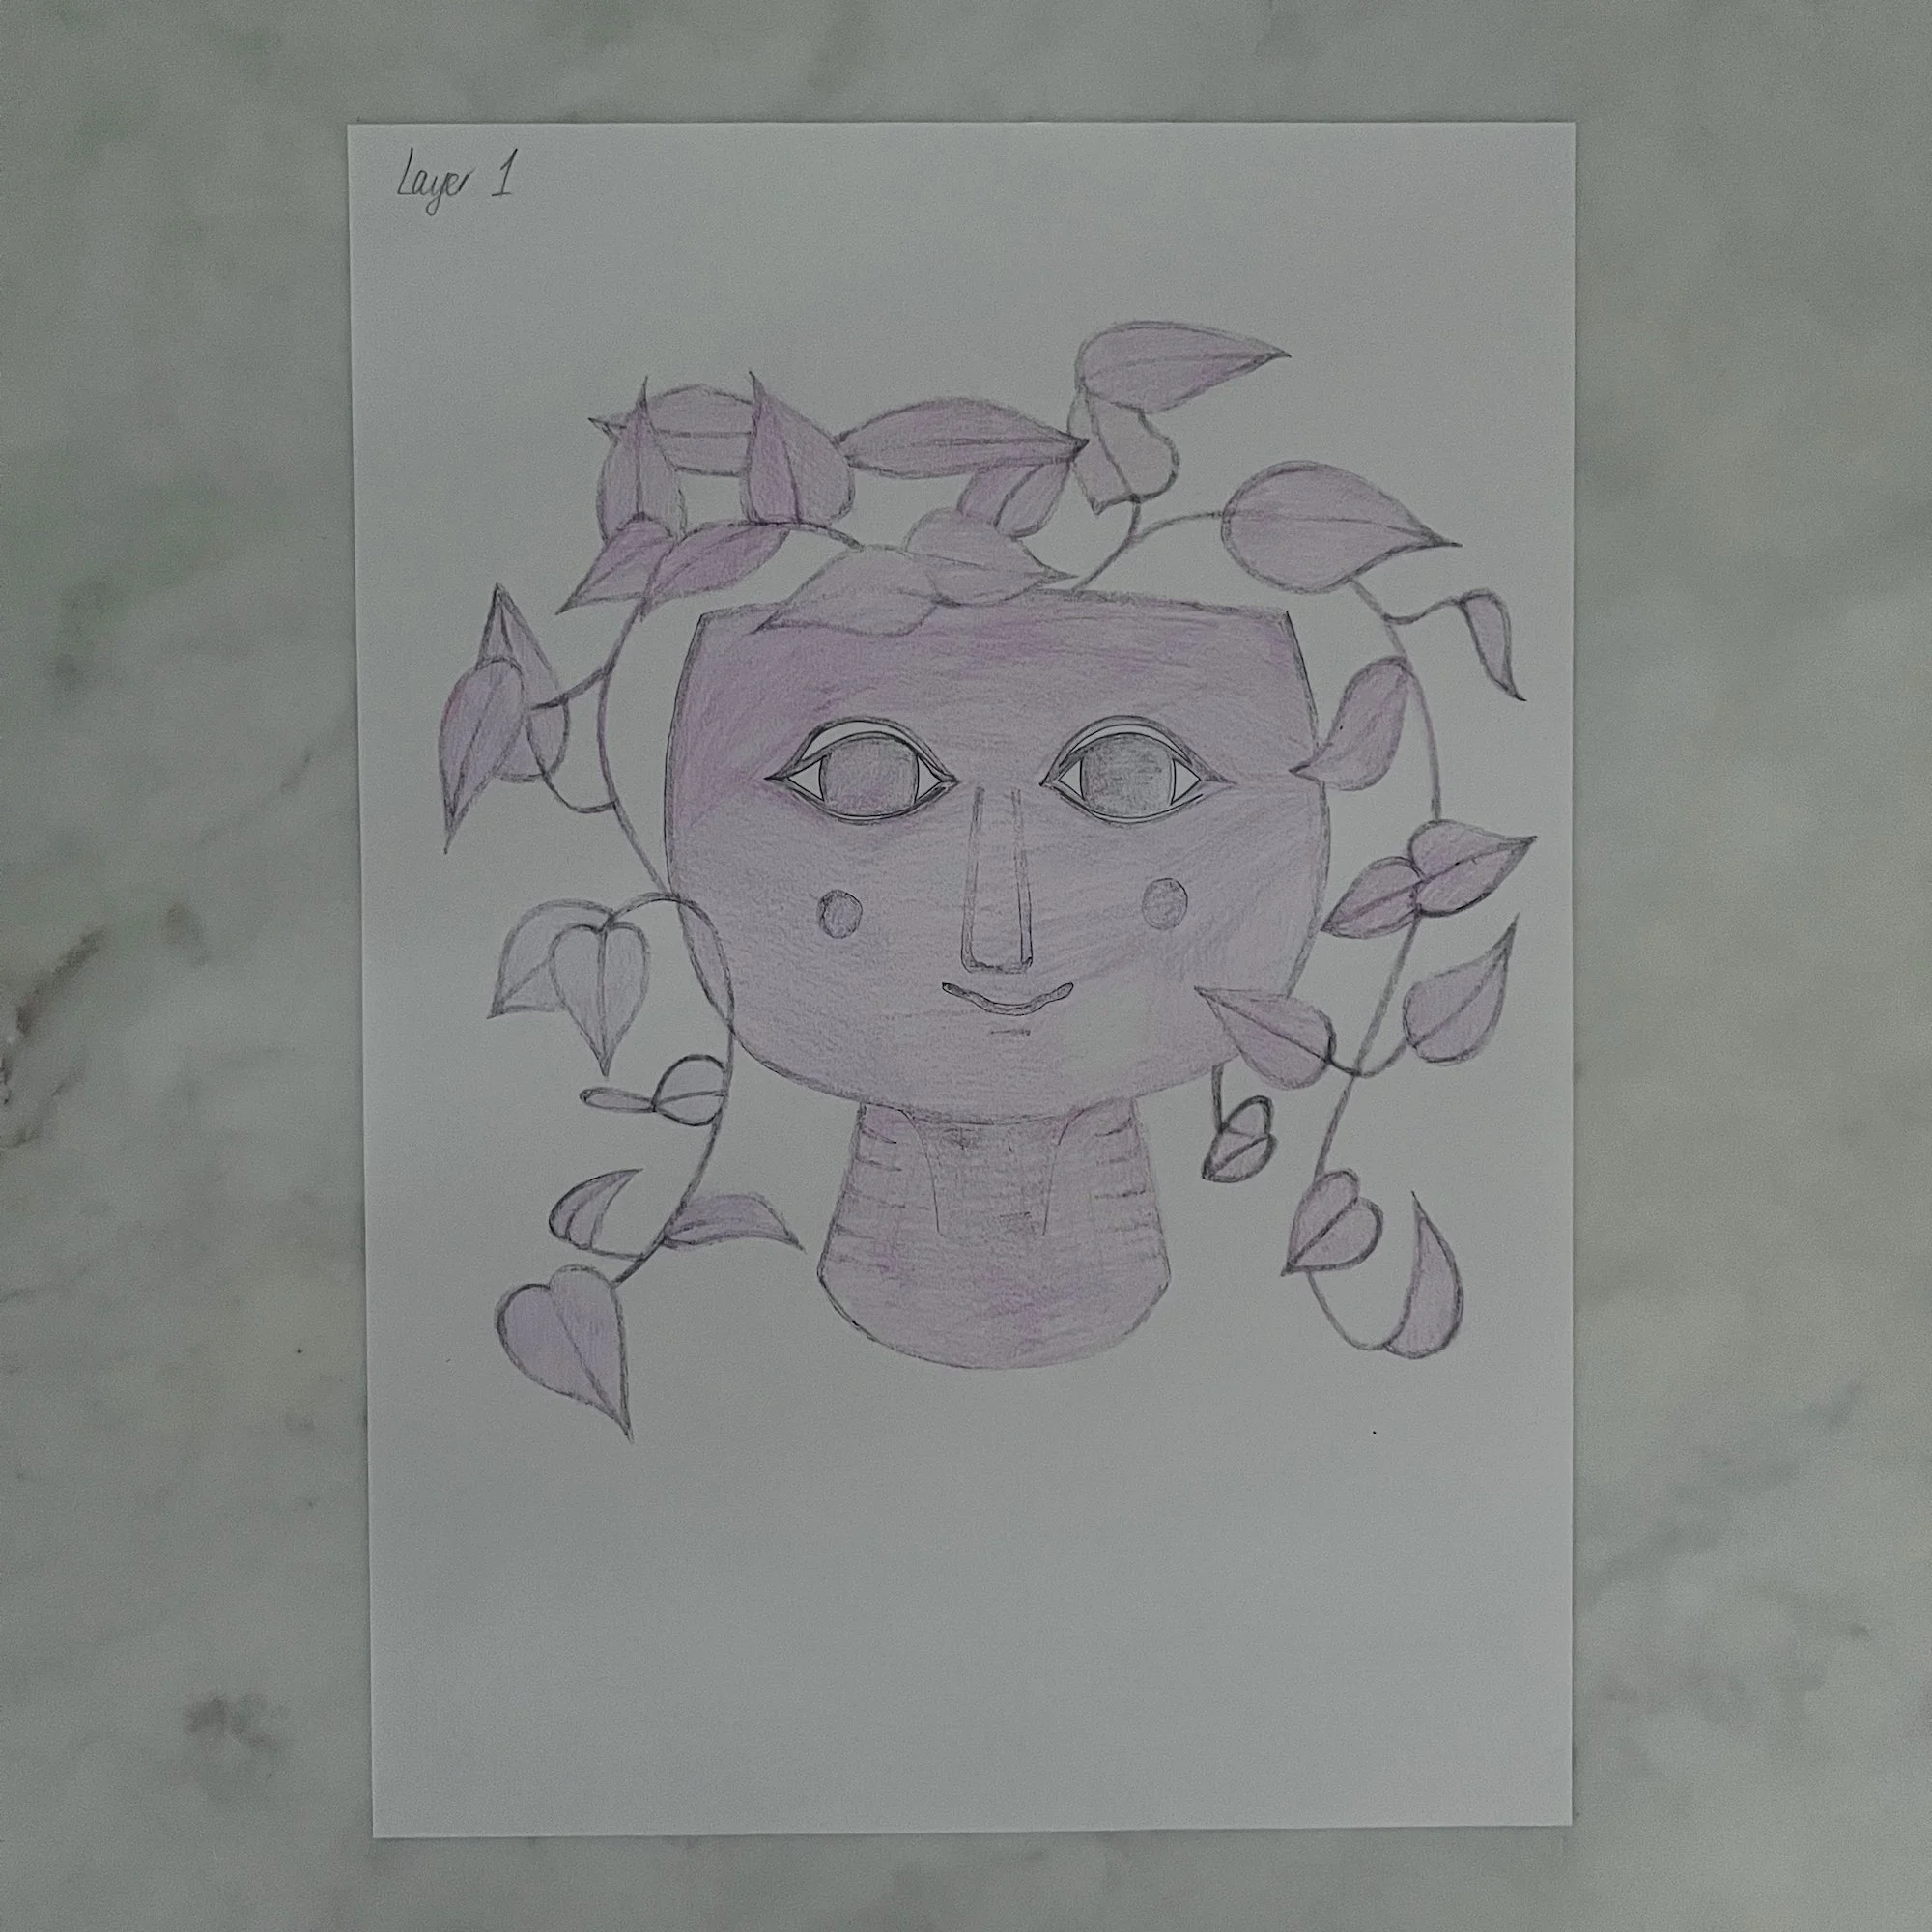
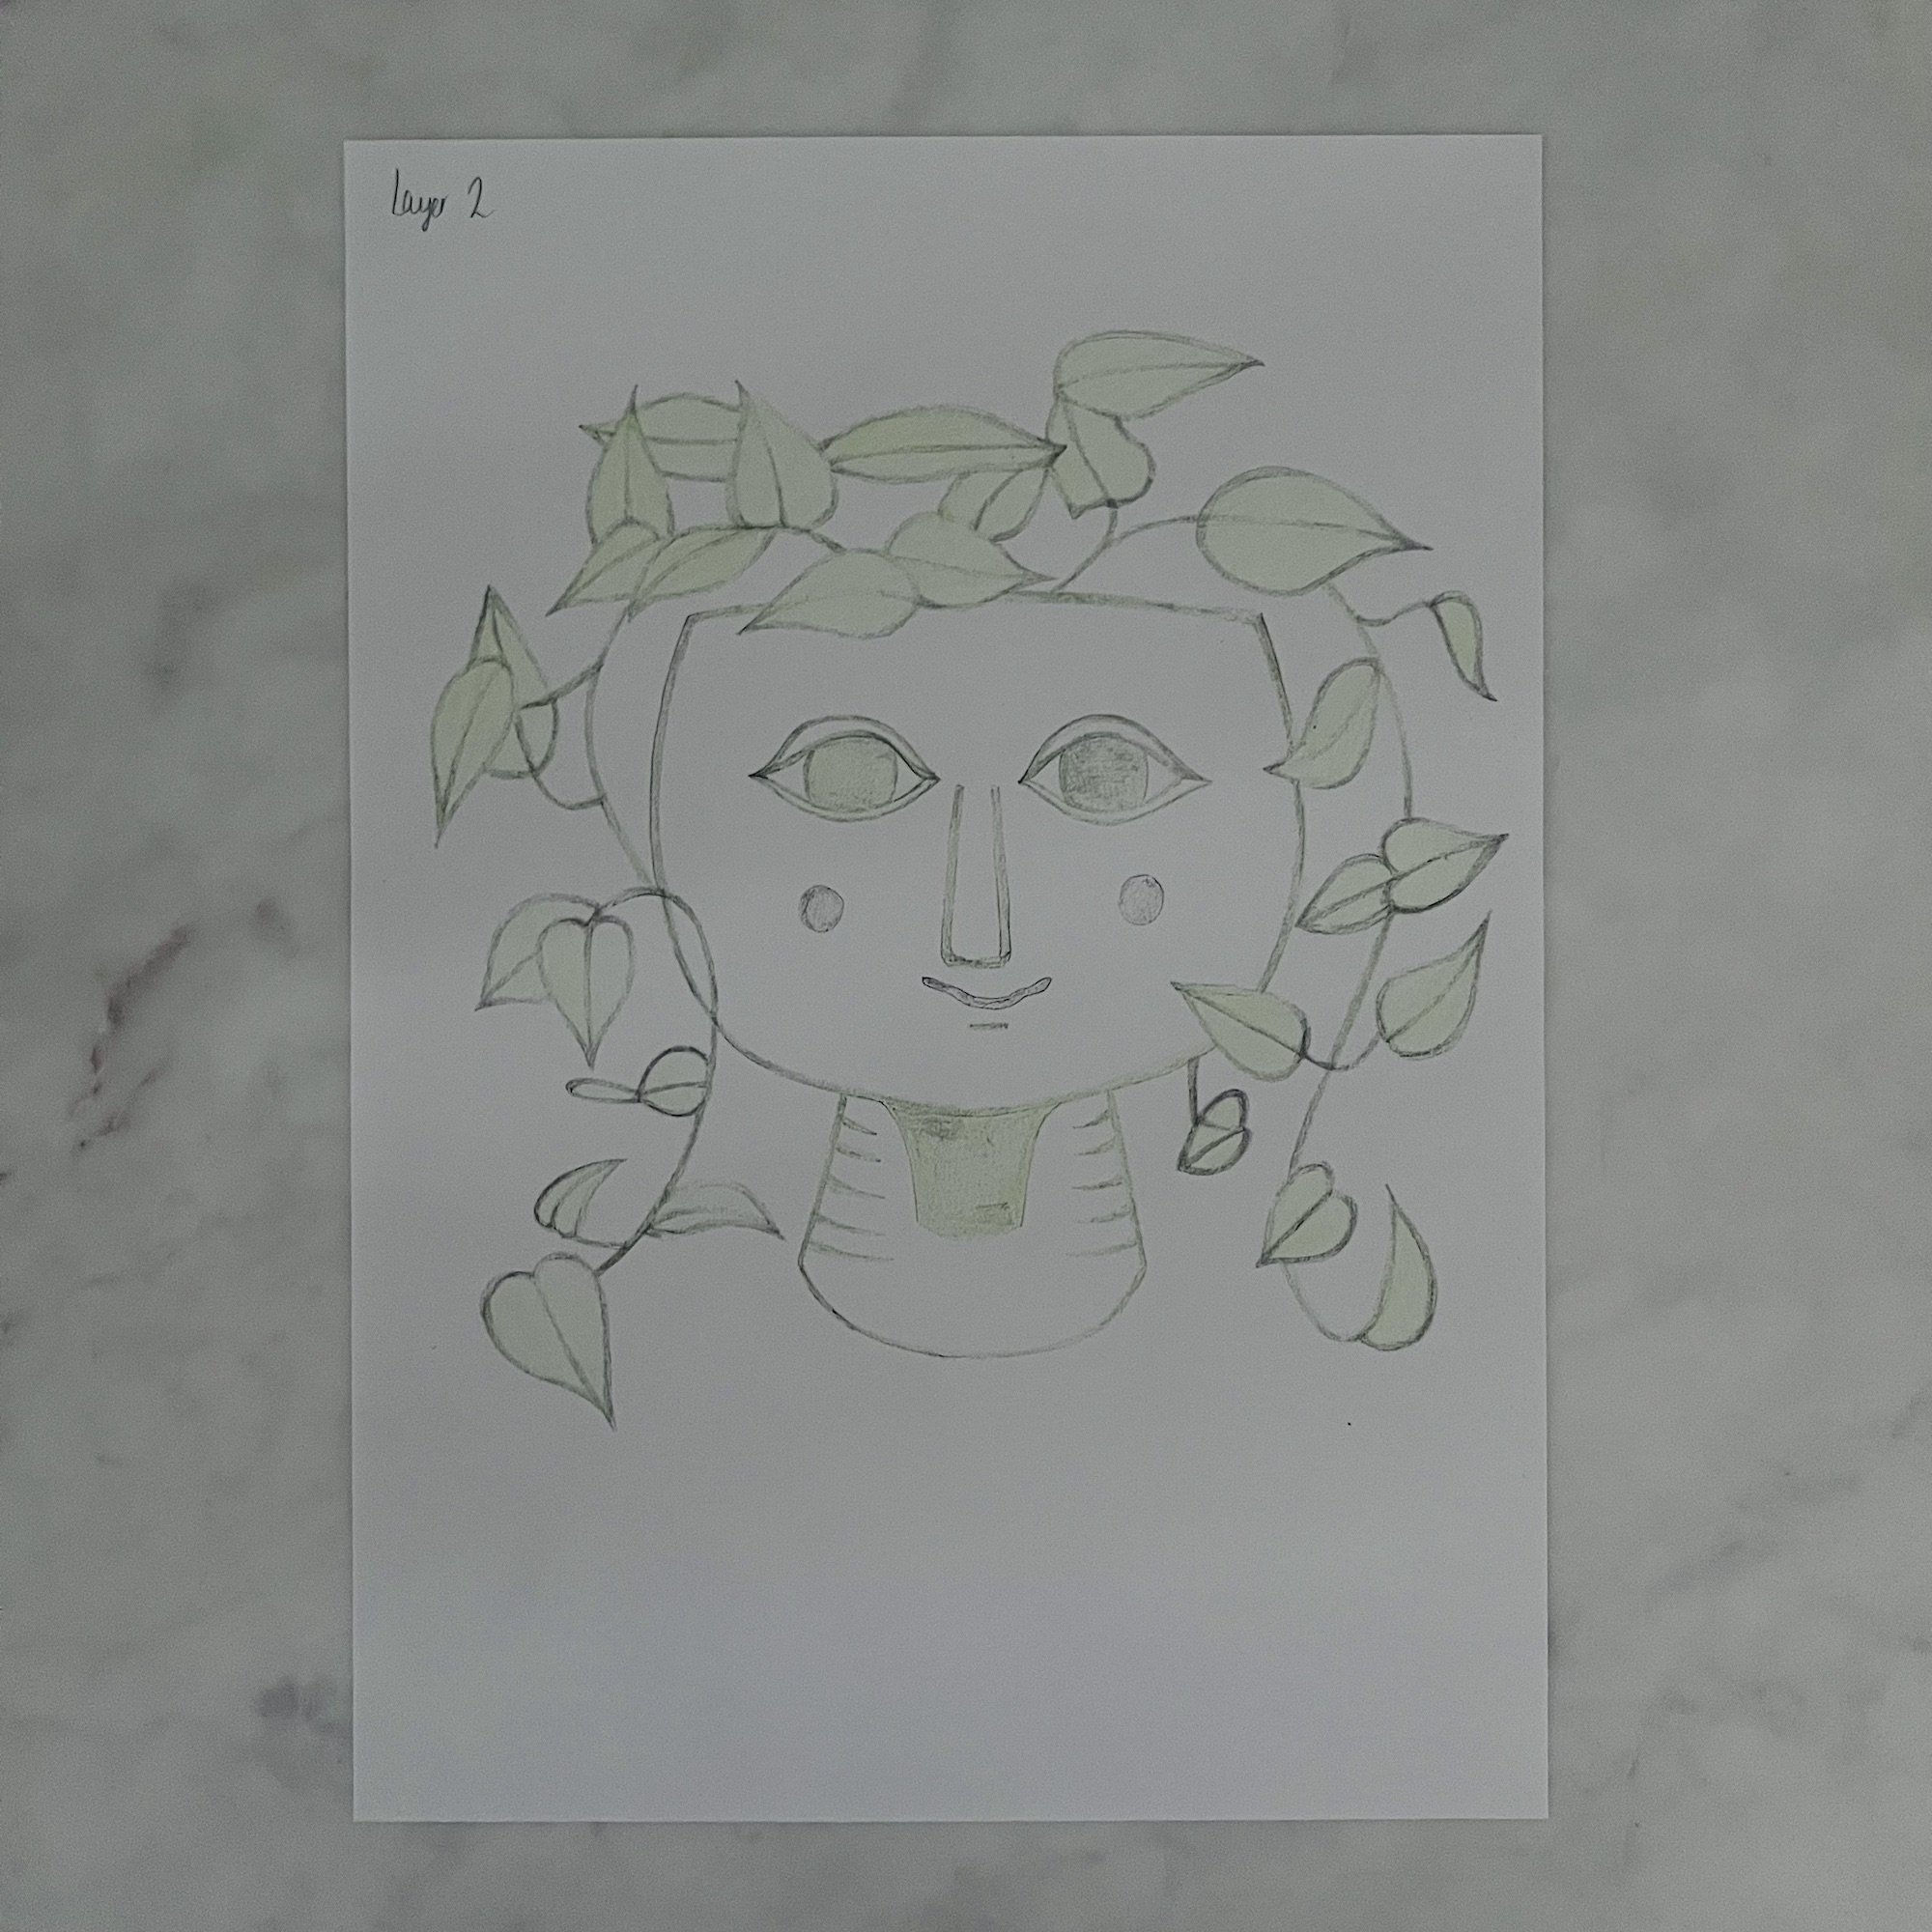
Trace each colour of the final design onto a separate sheet of tracing paper.
Transfer each colour onto a normal sheet of paper and colour it in your chosen colour.
Label each tracing paper and each sheet of paper with which layer it is.

The sheets of tracing paper for each layer will be used later to transfer your design to the lino.
The coloured-in sheets will be used as reference as you carve each layer.
NOTE: Remember that each layer adds more detail, and the colours get darker and darker.
4. Create a registration jig


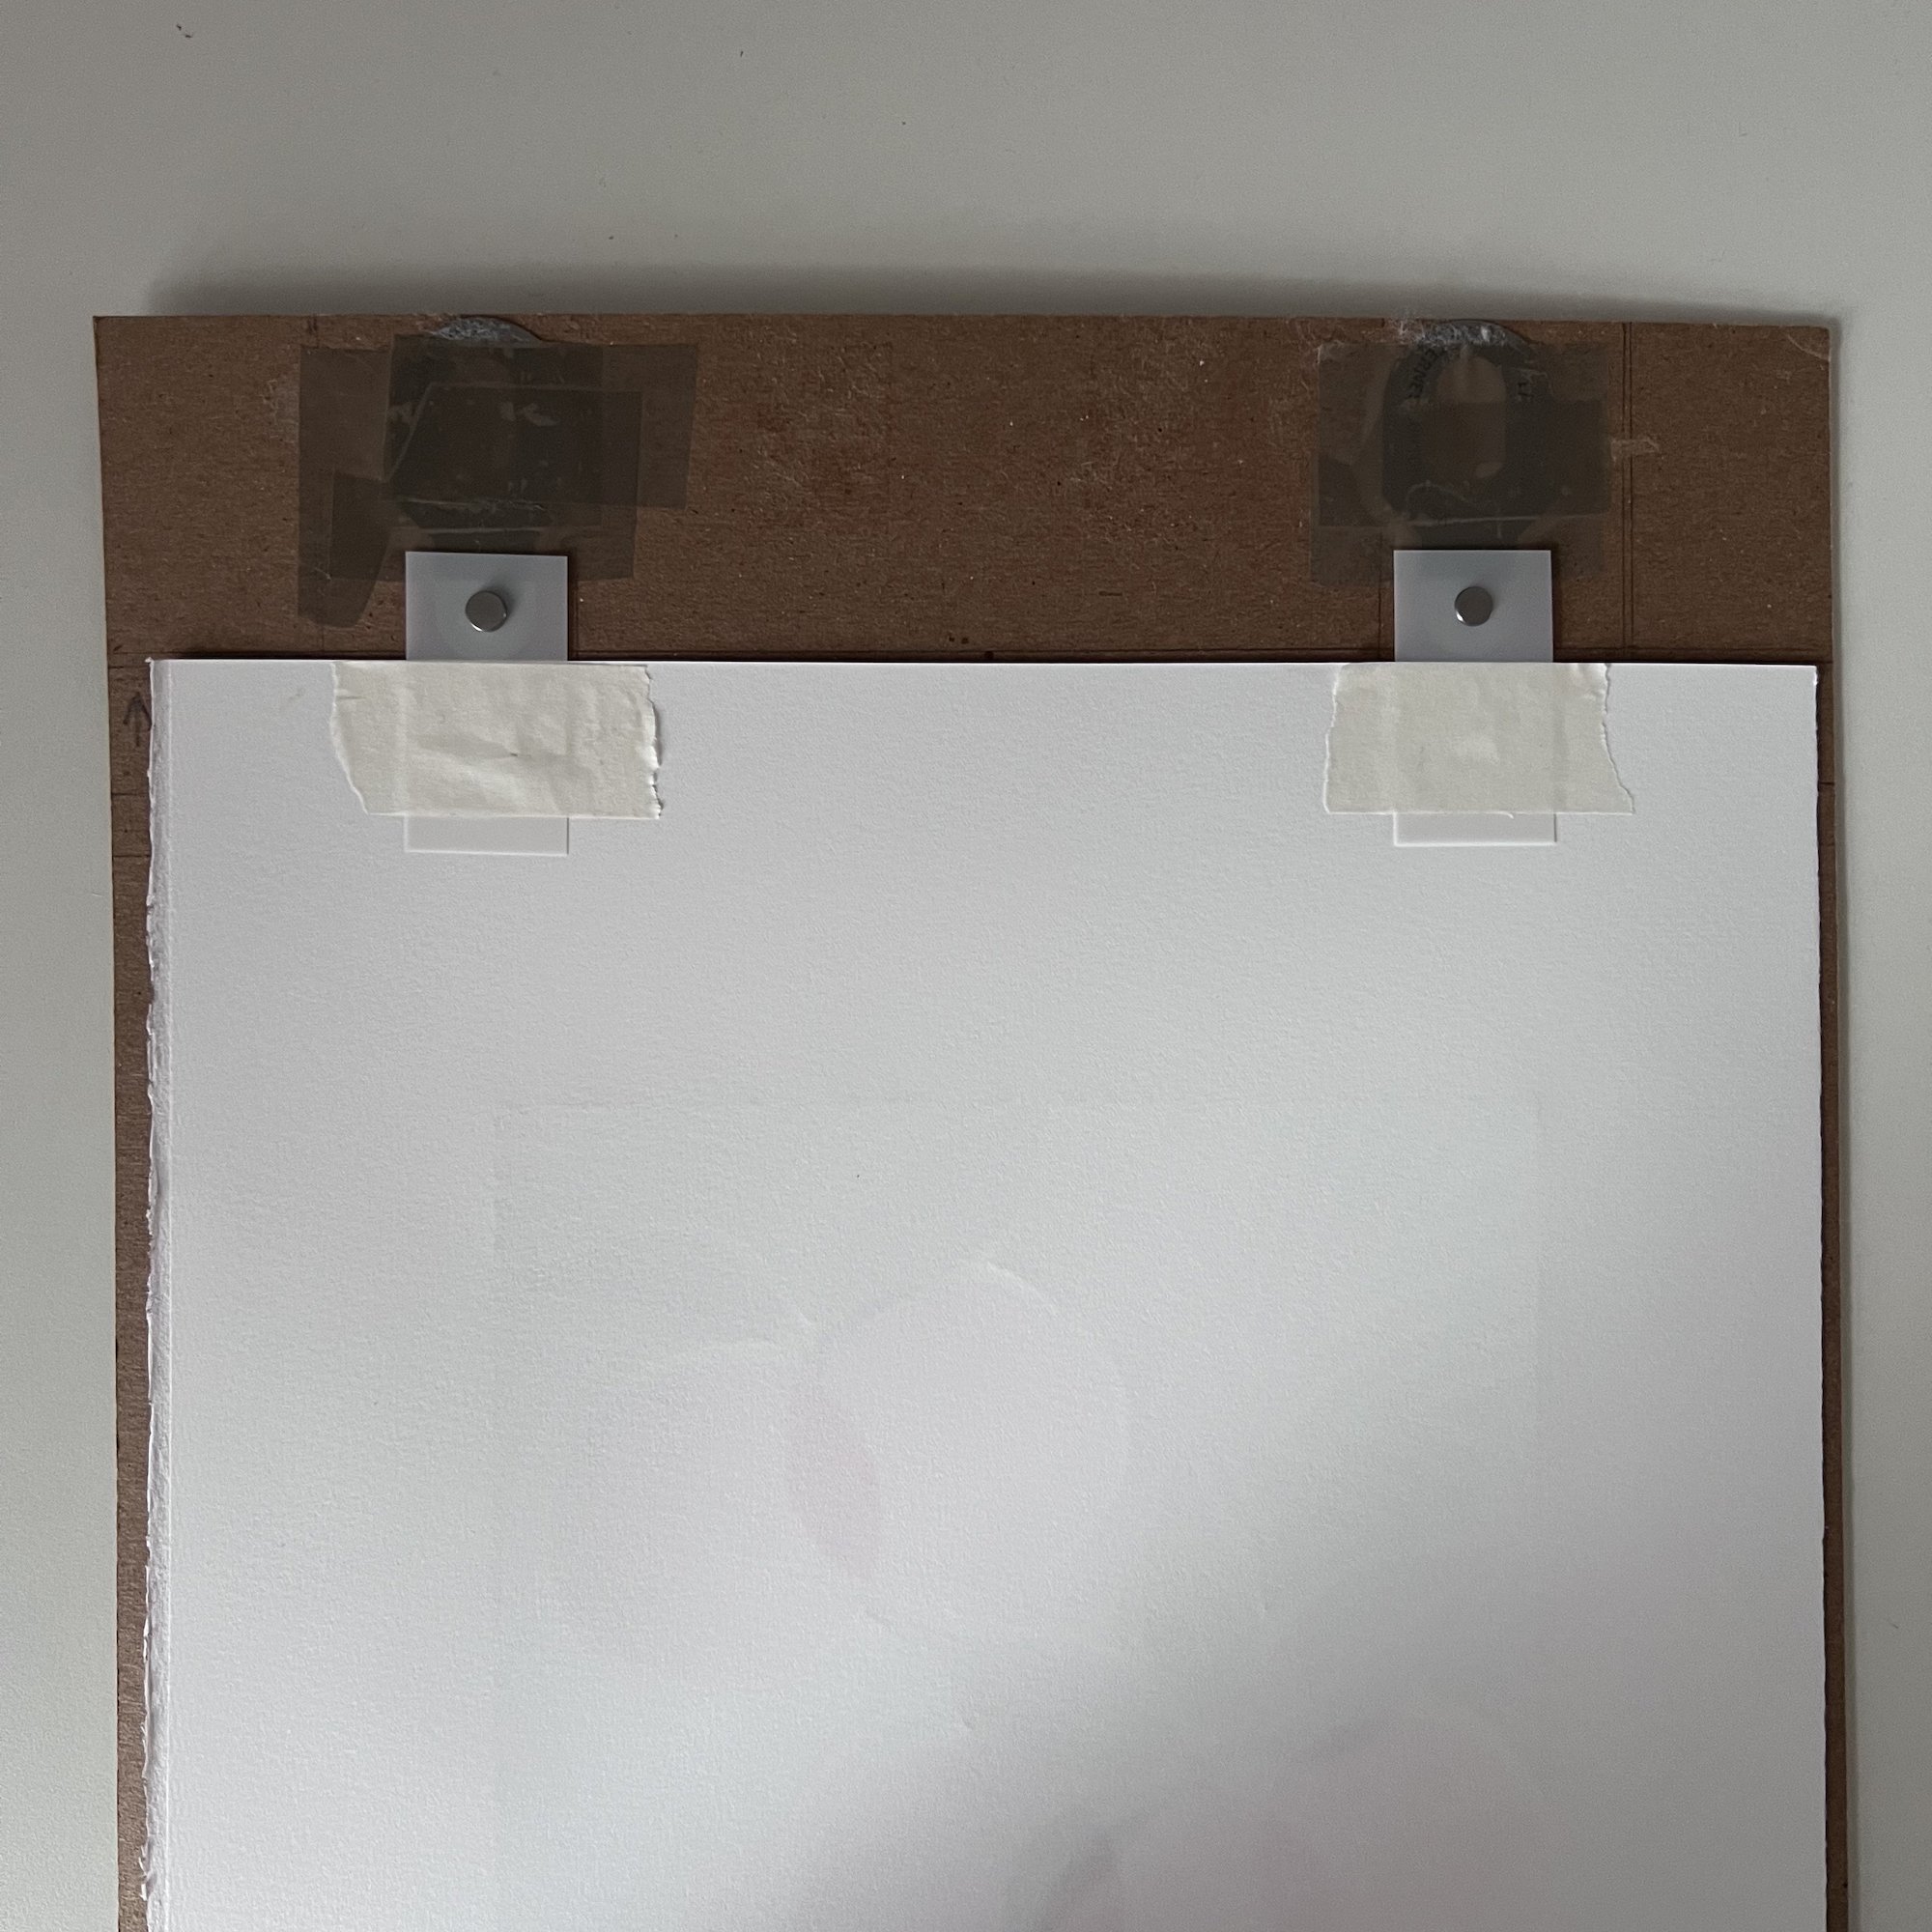
Lining up the layers so they print exactly on top of each other is called “registration” and is of paramount importance for a reduction print. This is done by creating a registration jig.
Get a large piece of thick card. Measure your lino block and cut out the correct size from the centre of the card.
Use Ternes Burton pins, taping them above the hole you have cut for your lino.
NOTE: Ternes Burton pins and stripping tabs should be purchased together. They are relatively inexpensive and can be used time and again. They are a really useful registration tool.
5. Prepare the paper with registration tabs
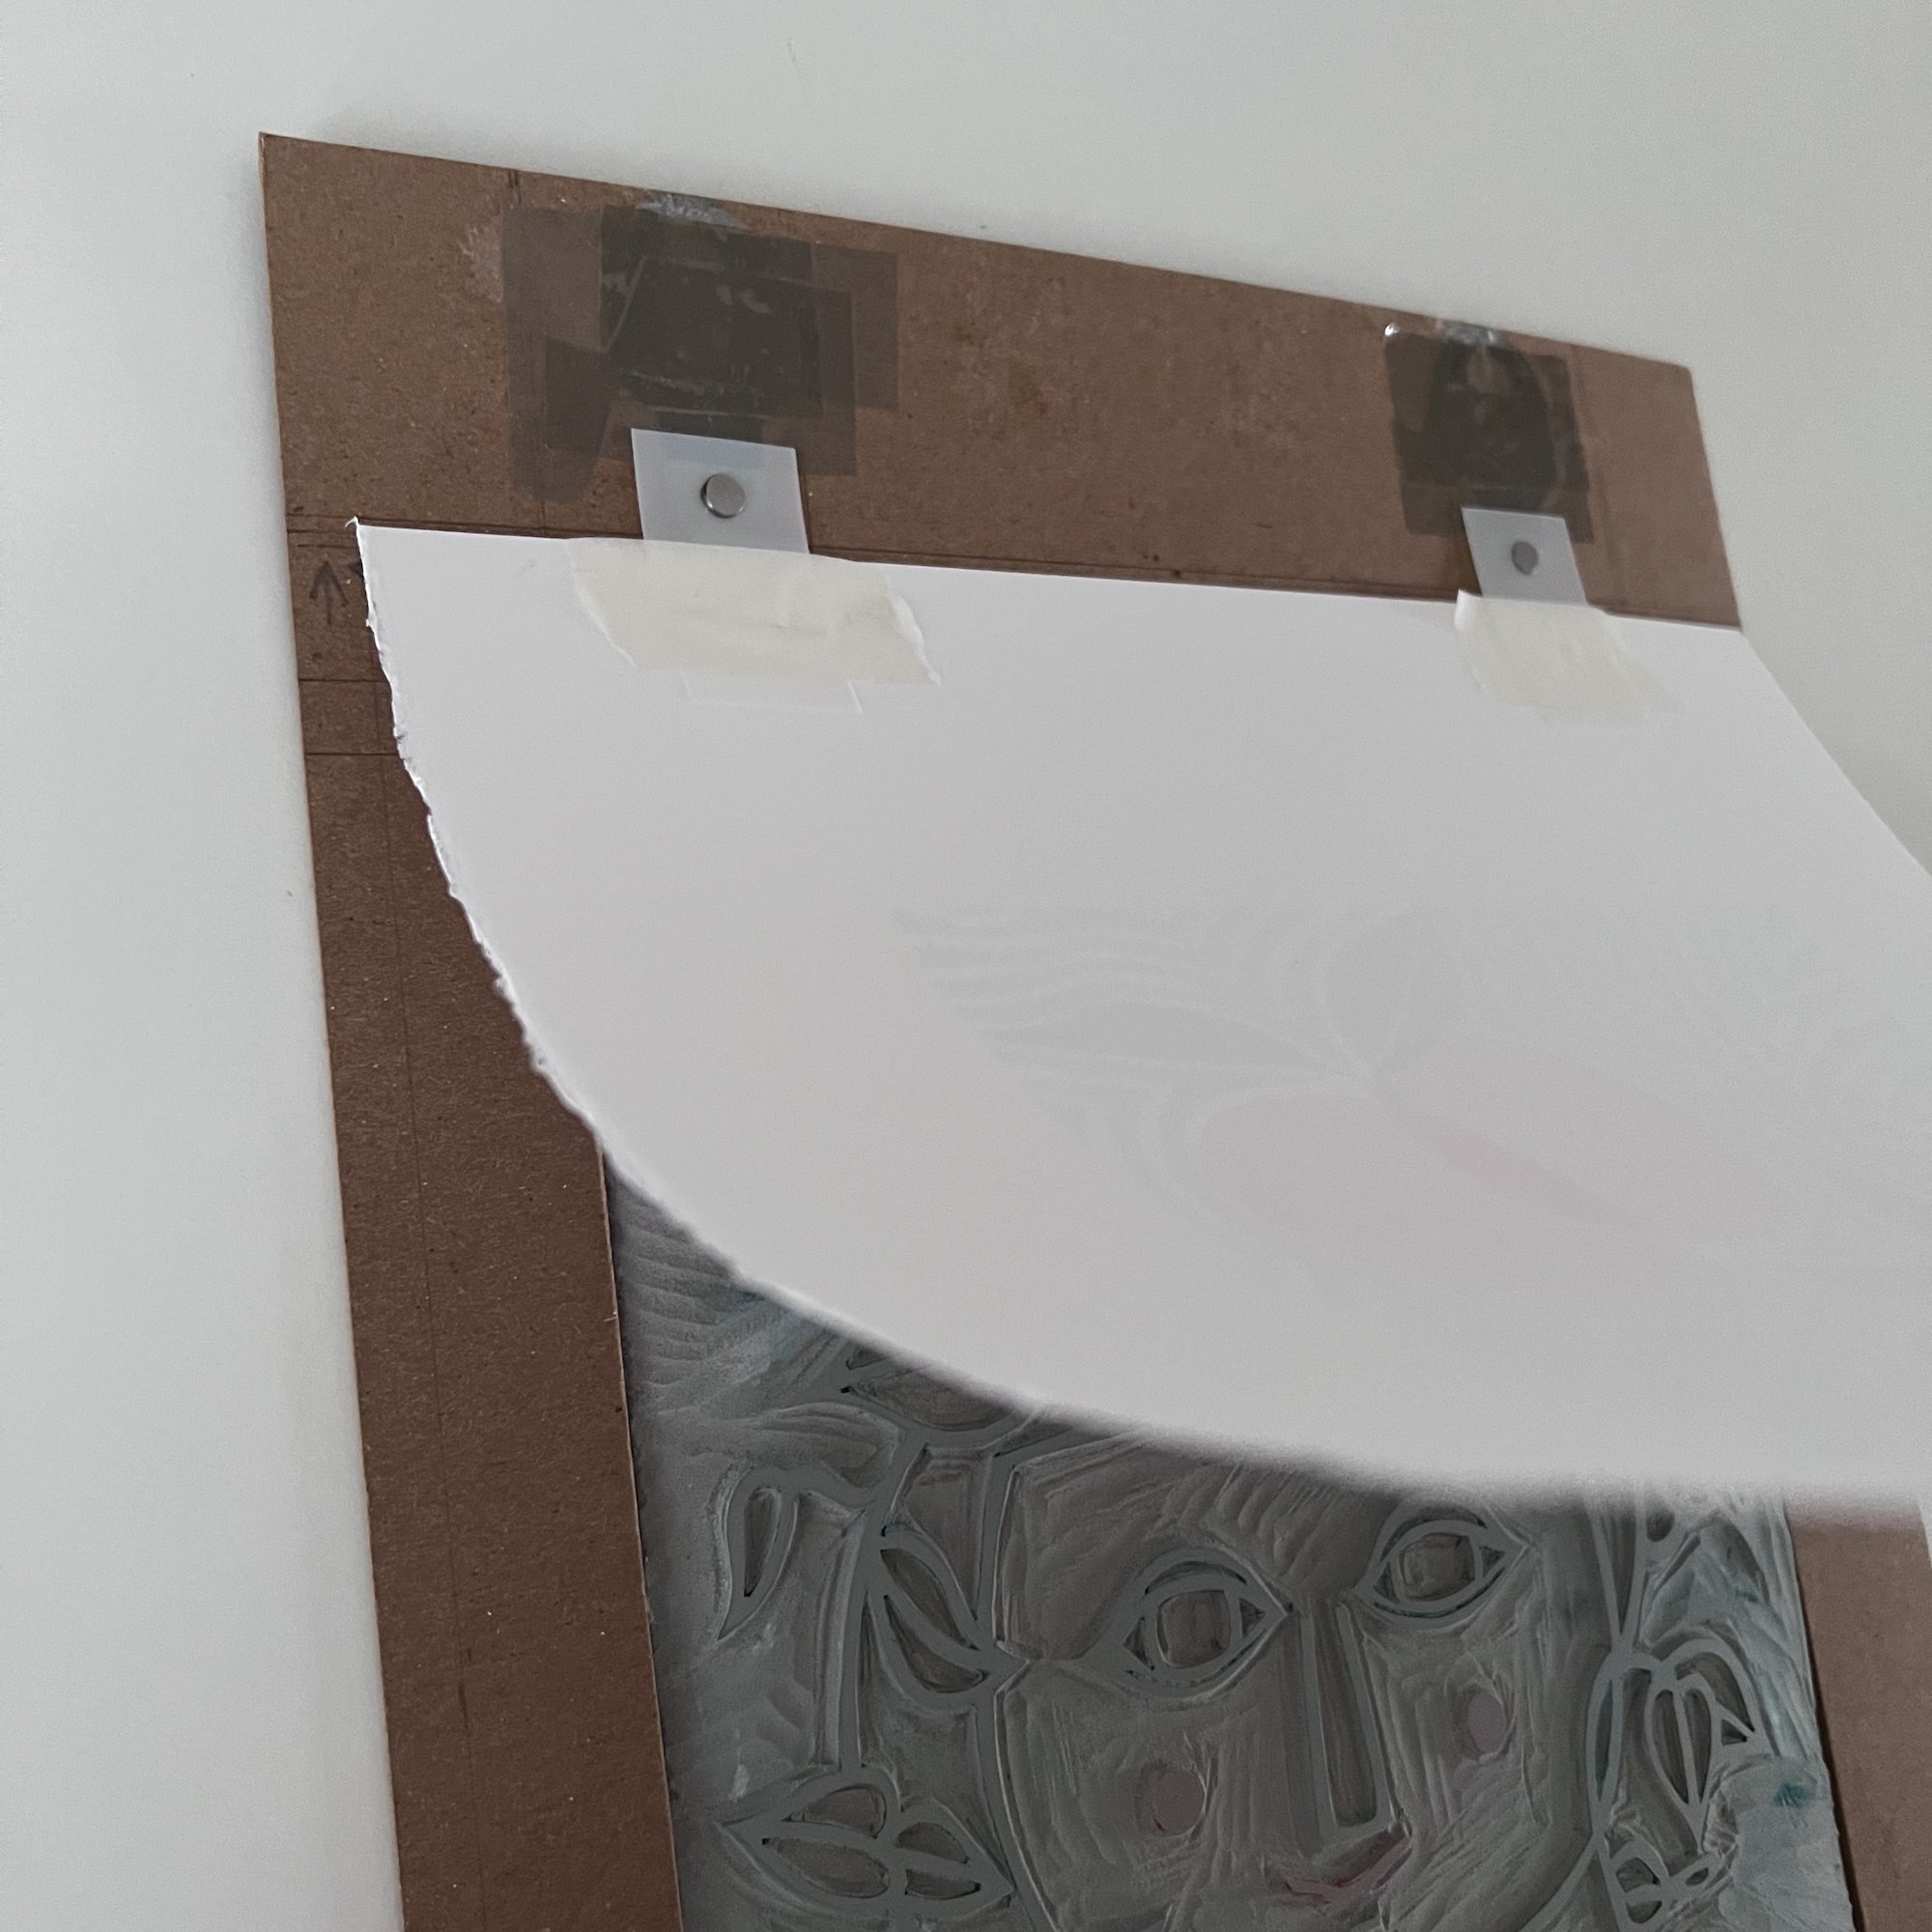
Measure and cut your paper to size. I used Somerset 250gsm paper, tearing it to size with a ruler.
Each piece of paper will require Ternes Burton stripping tabs to be attached to the back of the paper with masking tape. The tabs hook onto the Ternes Burton pins, ensuring that the paper is lined up in the same place for each layer.
6. Transfer layer 1 to the lino
Use the tracing paper you created in Step 3 to transfer layer 1 onto your lino.

7. Carve and print layer 1
This layer will be the lightest in colour and cover the most of the paper.
Depending what type of ink you use, this layer could take a few days to dry before you can print layer 2 (I have used Caligo safe wash relief printing ink).


NOTE: The lino block is blue in the first photo as I have applied an acrylic wash (watered down acrylic paint) to the block with a paint brush to help me see clearly where I would like to carve. This isn’t an essential step.
8. Transfer layer 2 to the lino
While you wait for layer 1 to dry, you can transfer layer 2 to your lino.
9. Carve and print layer 2
Carve your layer 2 and, when layer 1 is dry, print layer 2. Layer 2 will be a bit darker in colour than layer 1.
10. Transfer layer 3 to the lino

While you wait for layer 2 to dry, you can transfer layer 3 to your lino.
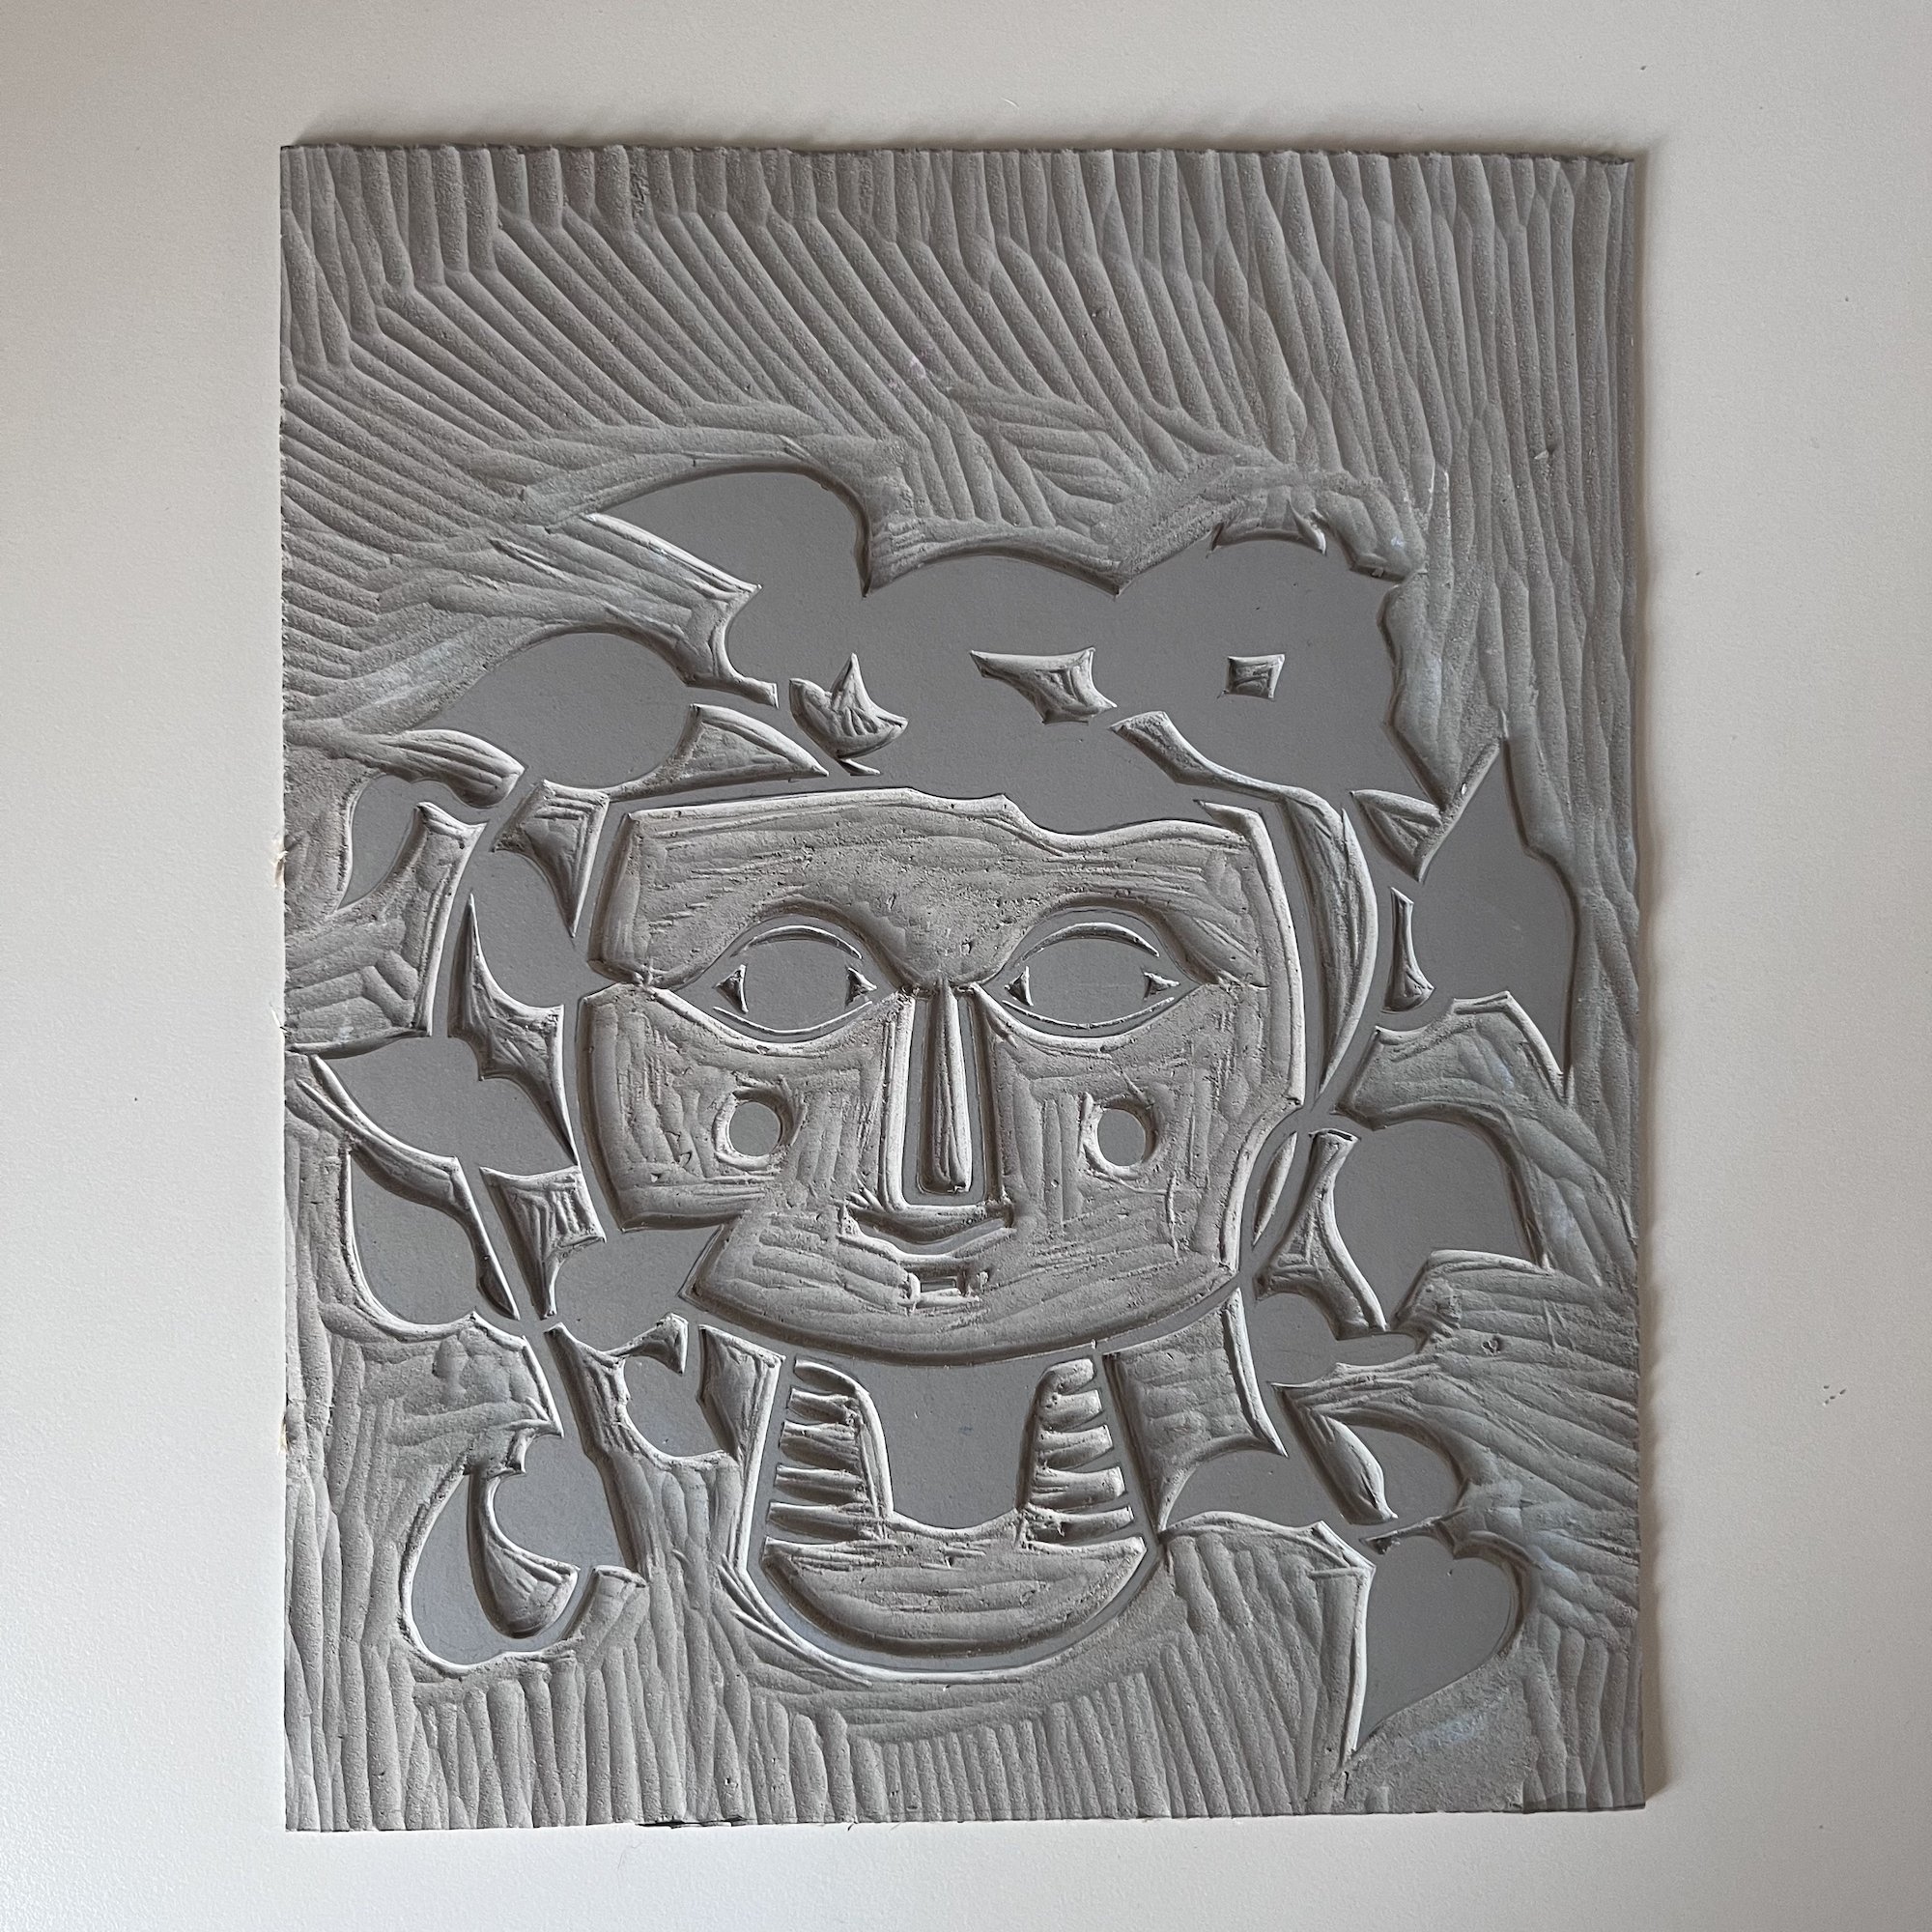
11. Carve and print layer 3
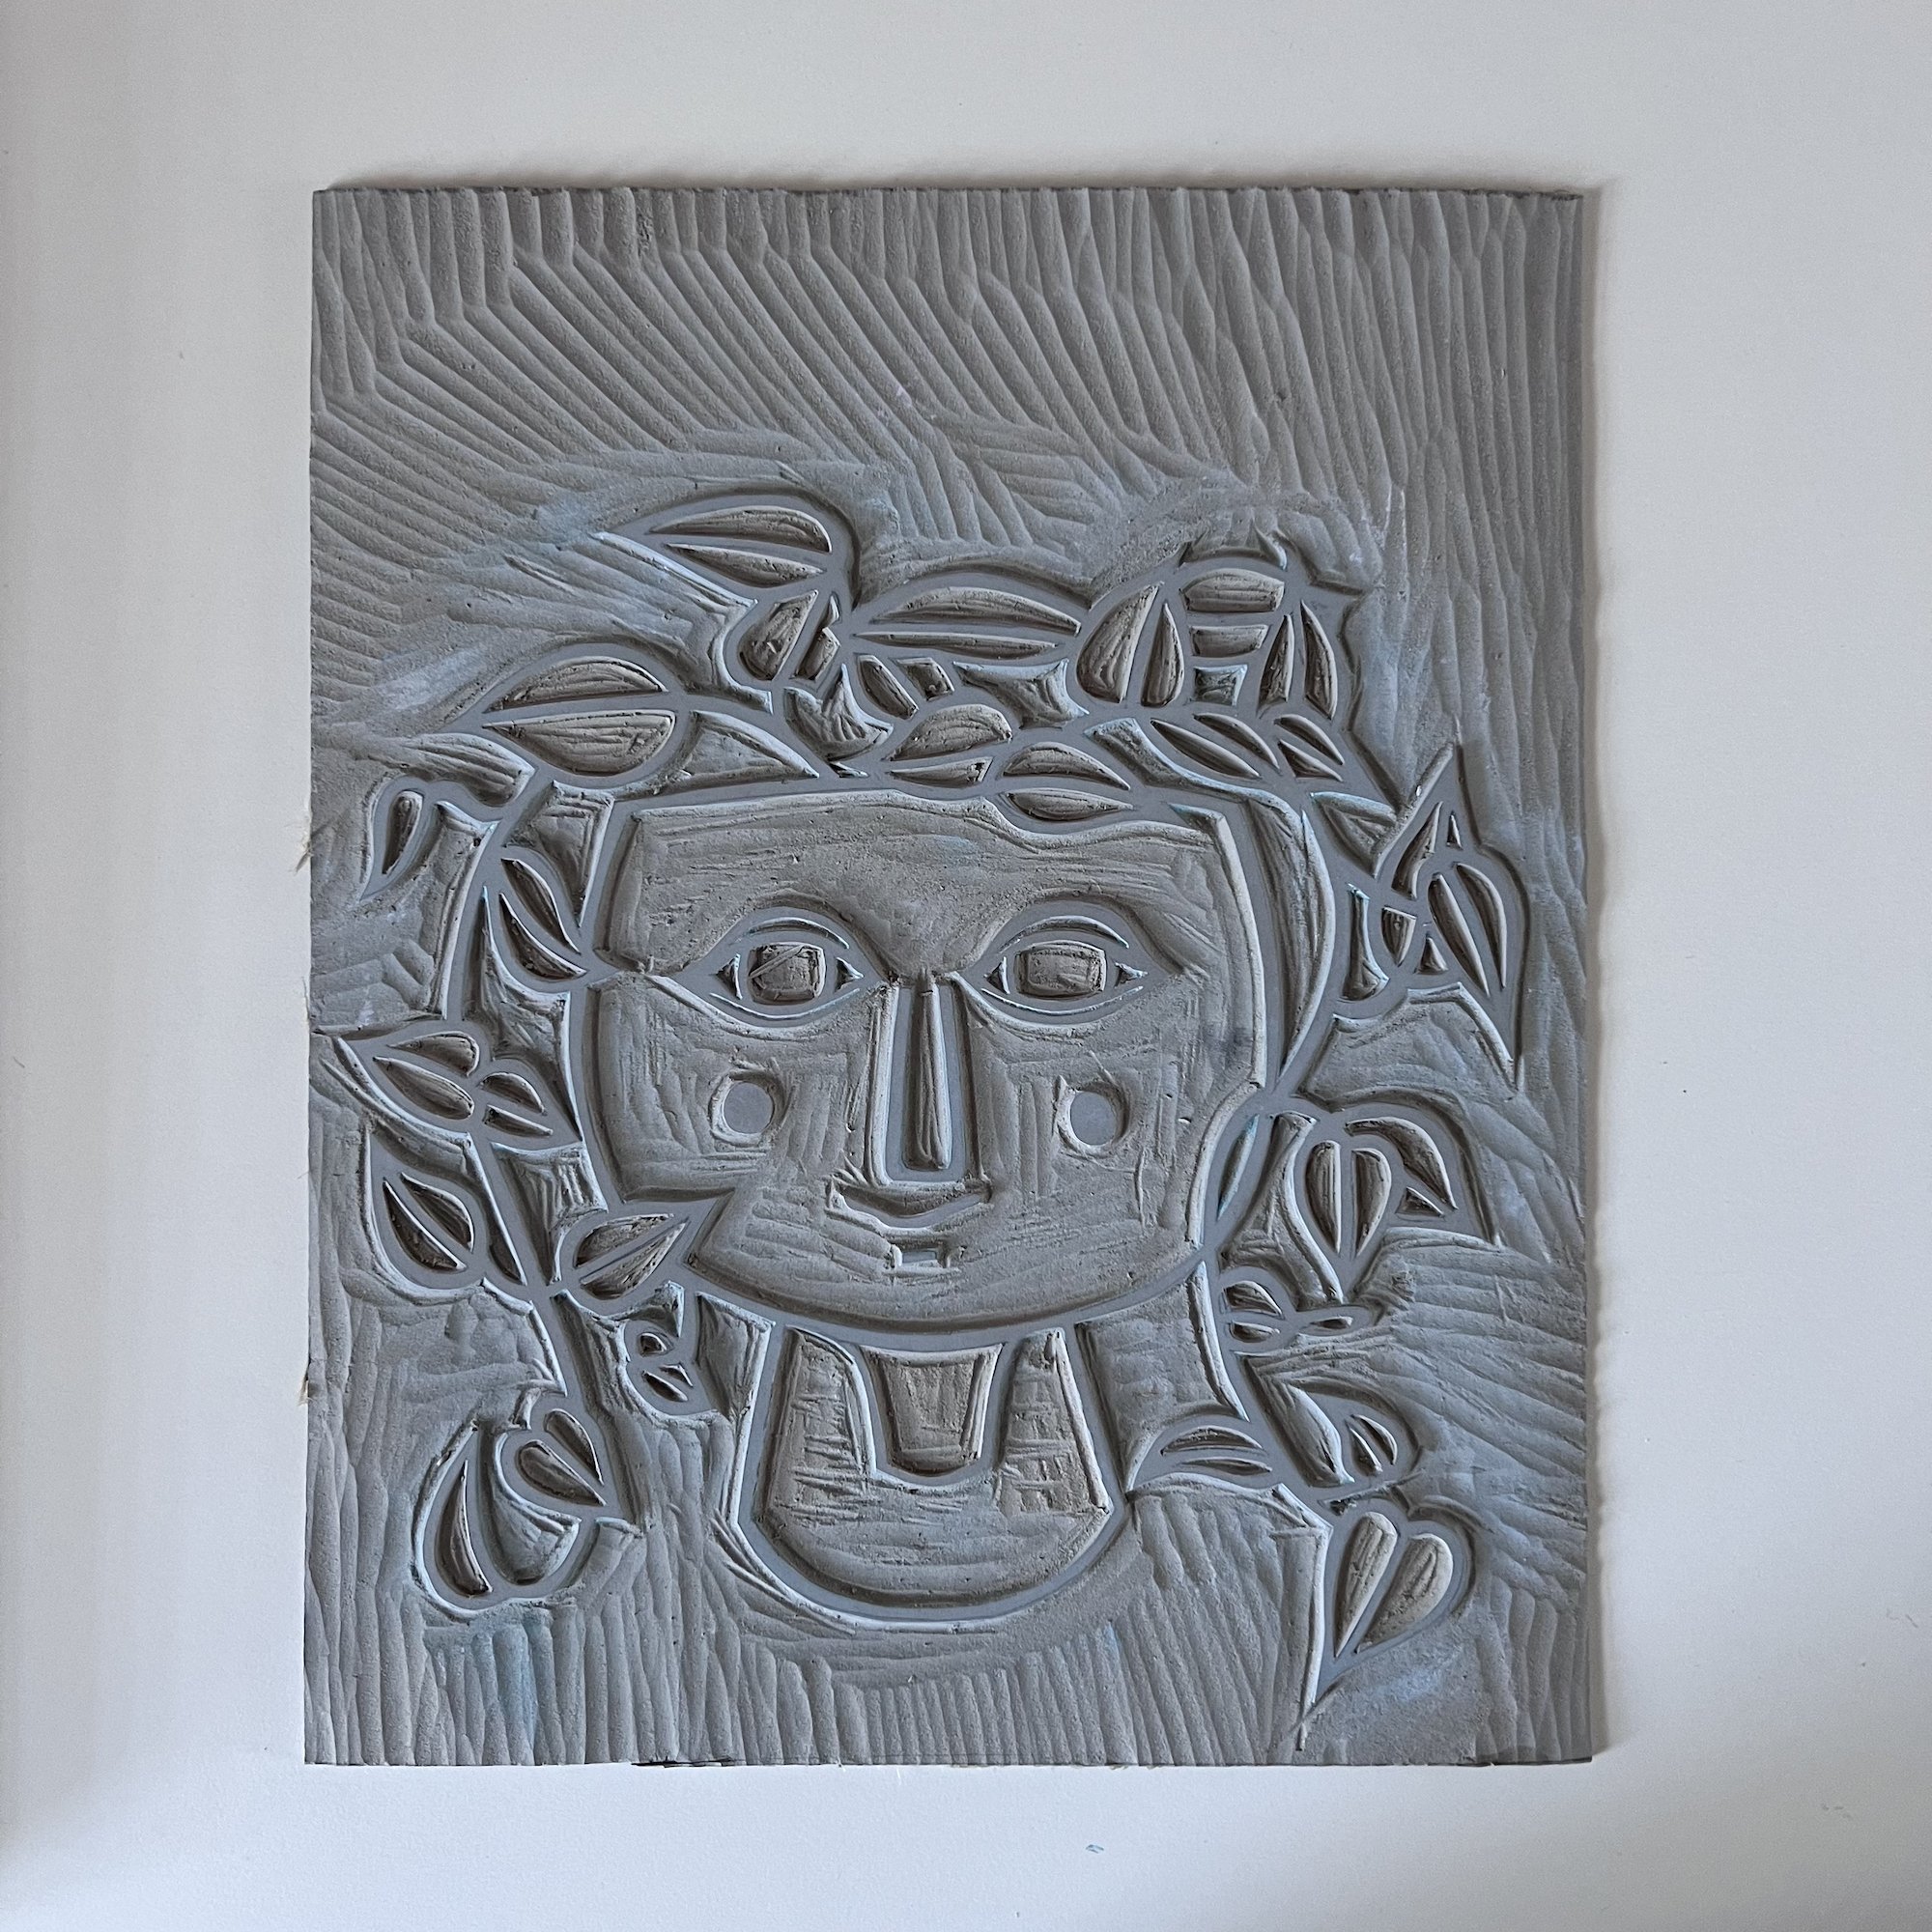
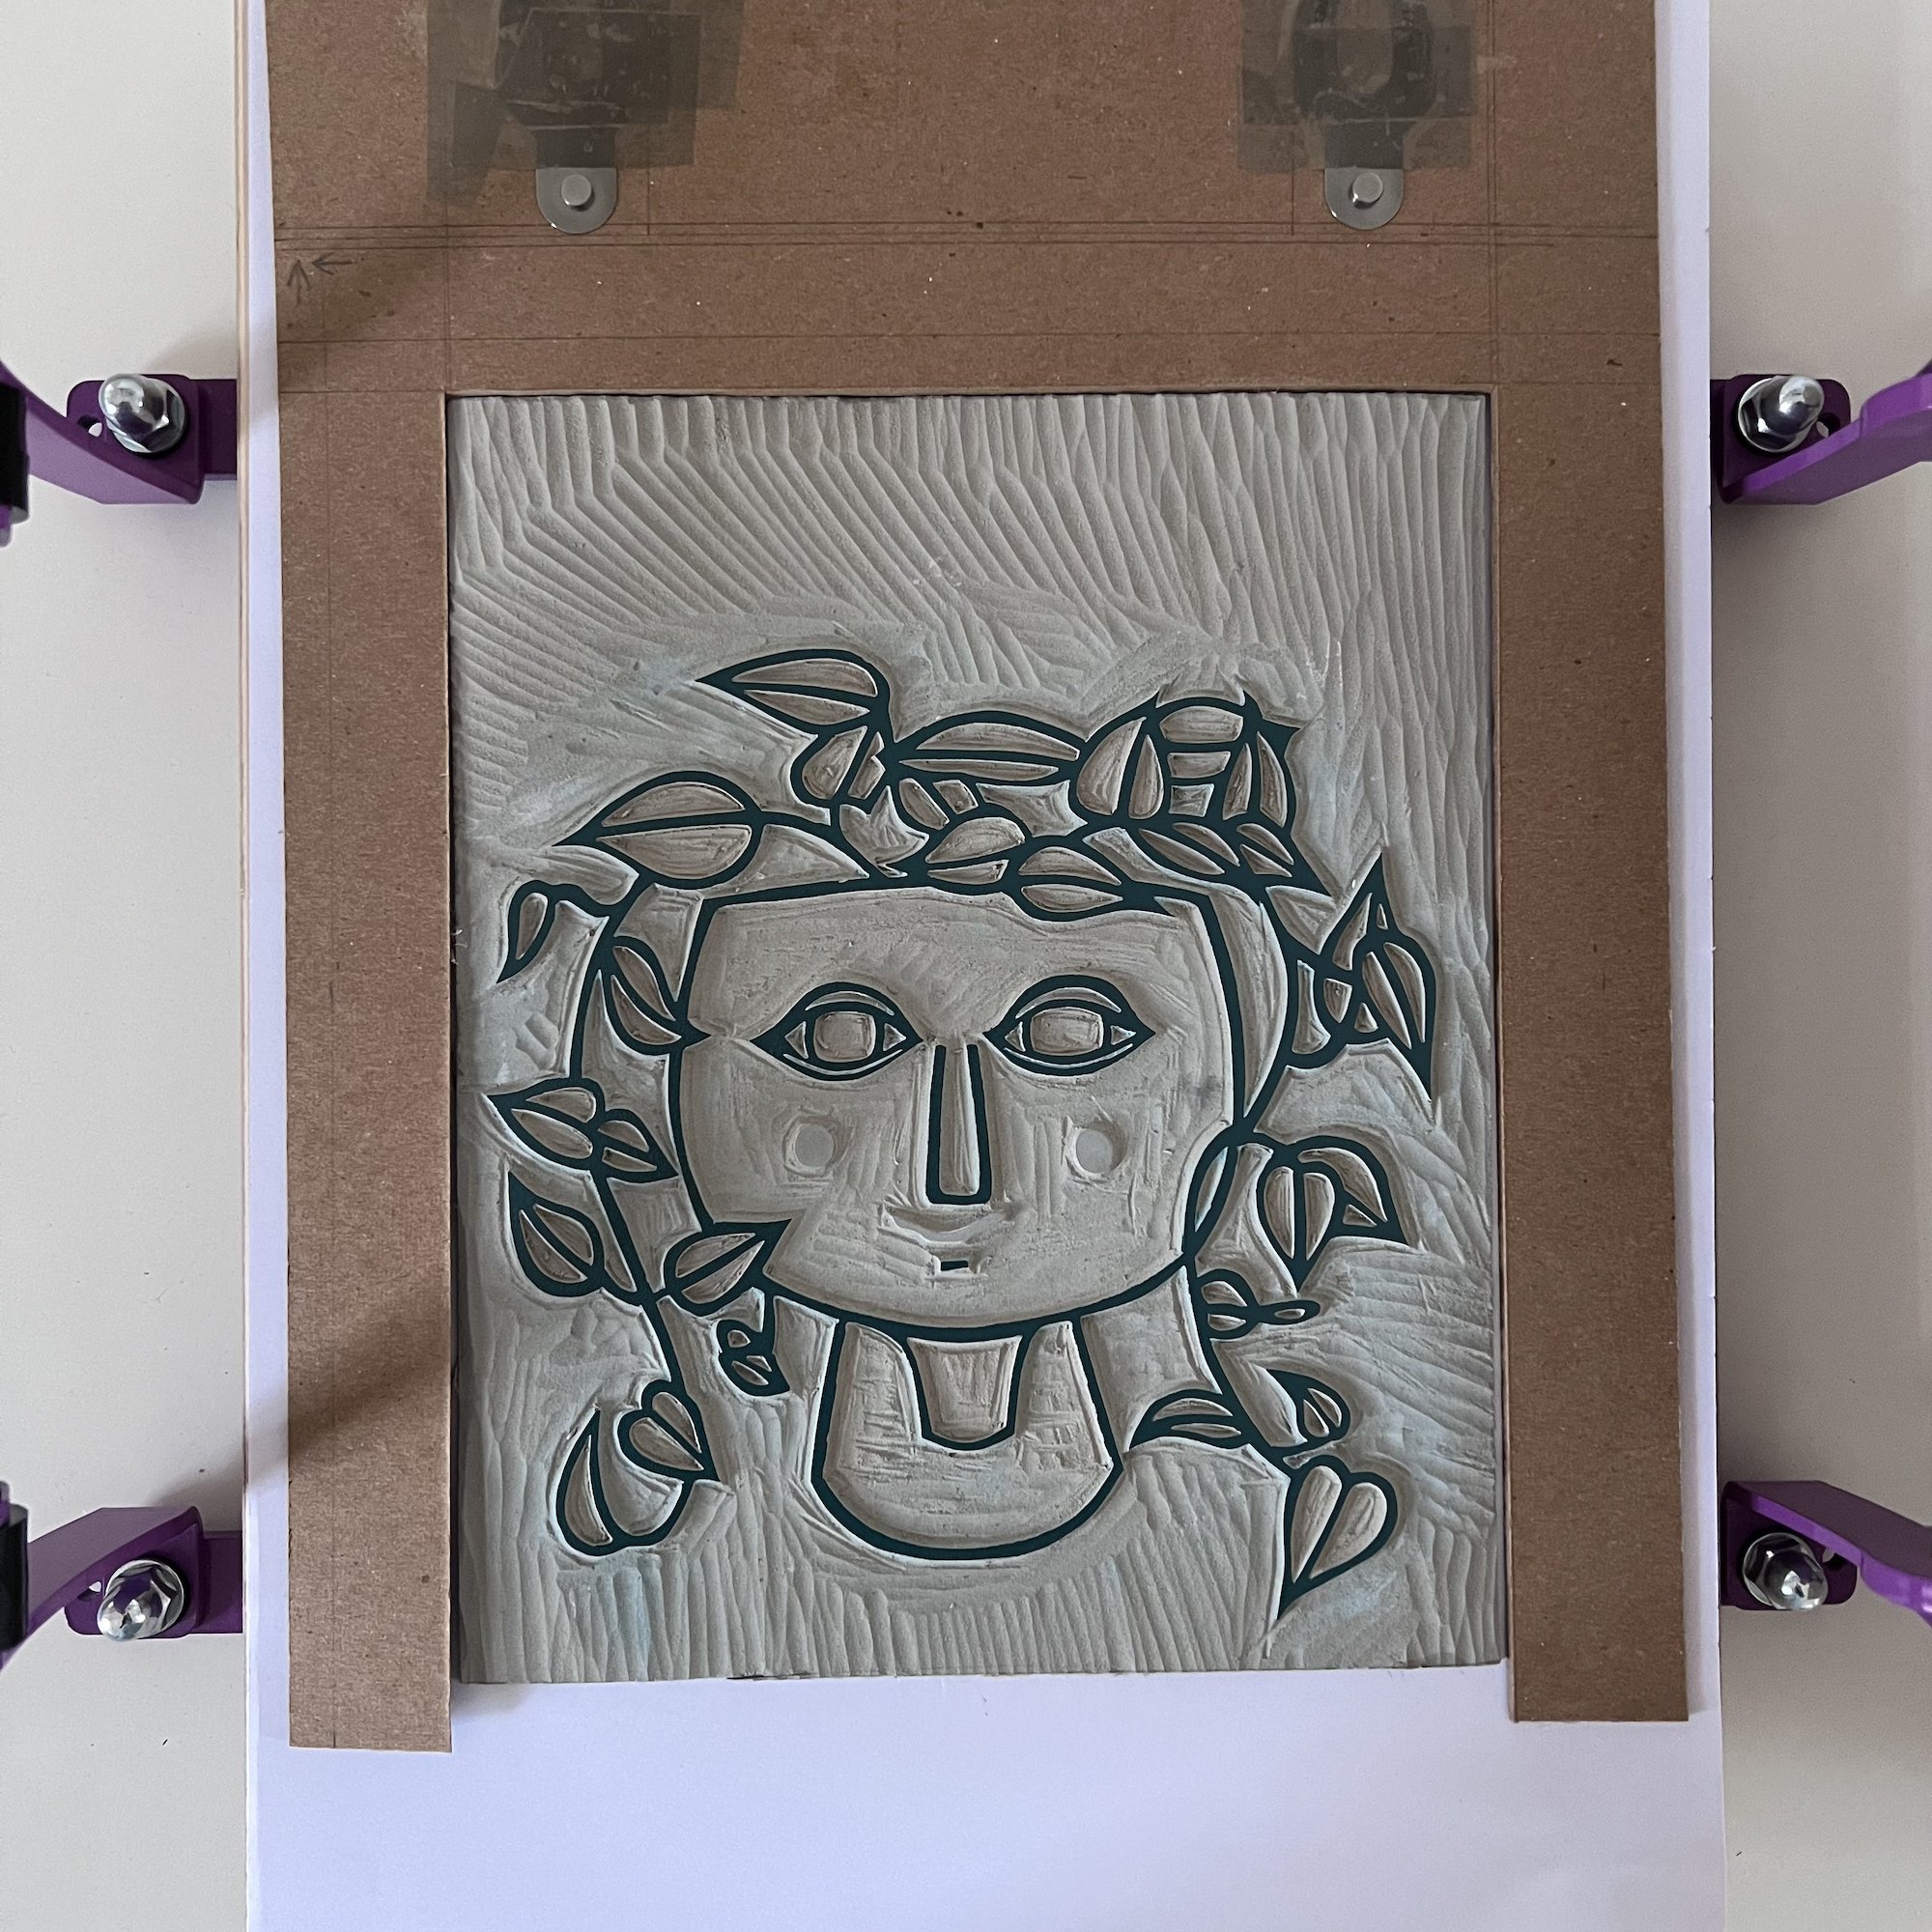
Carve your layer 3 and, when layer 2 is dry, print layer 3.
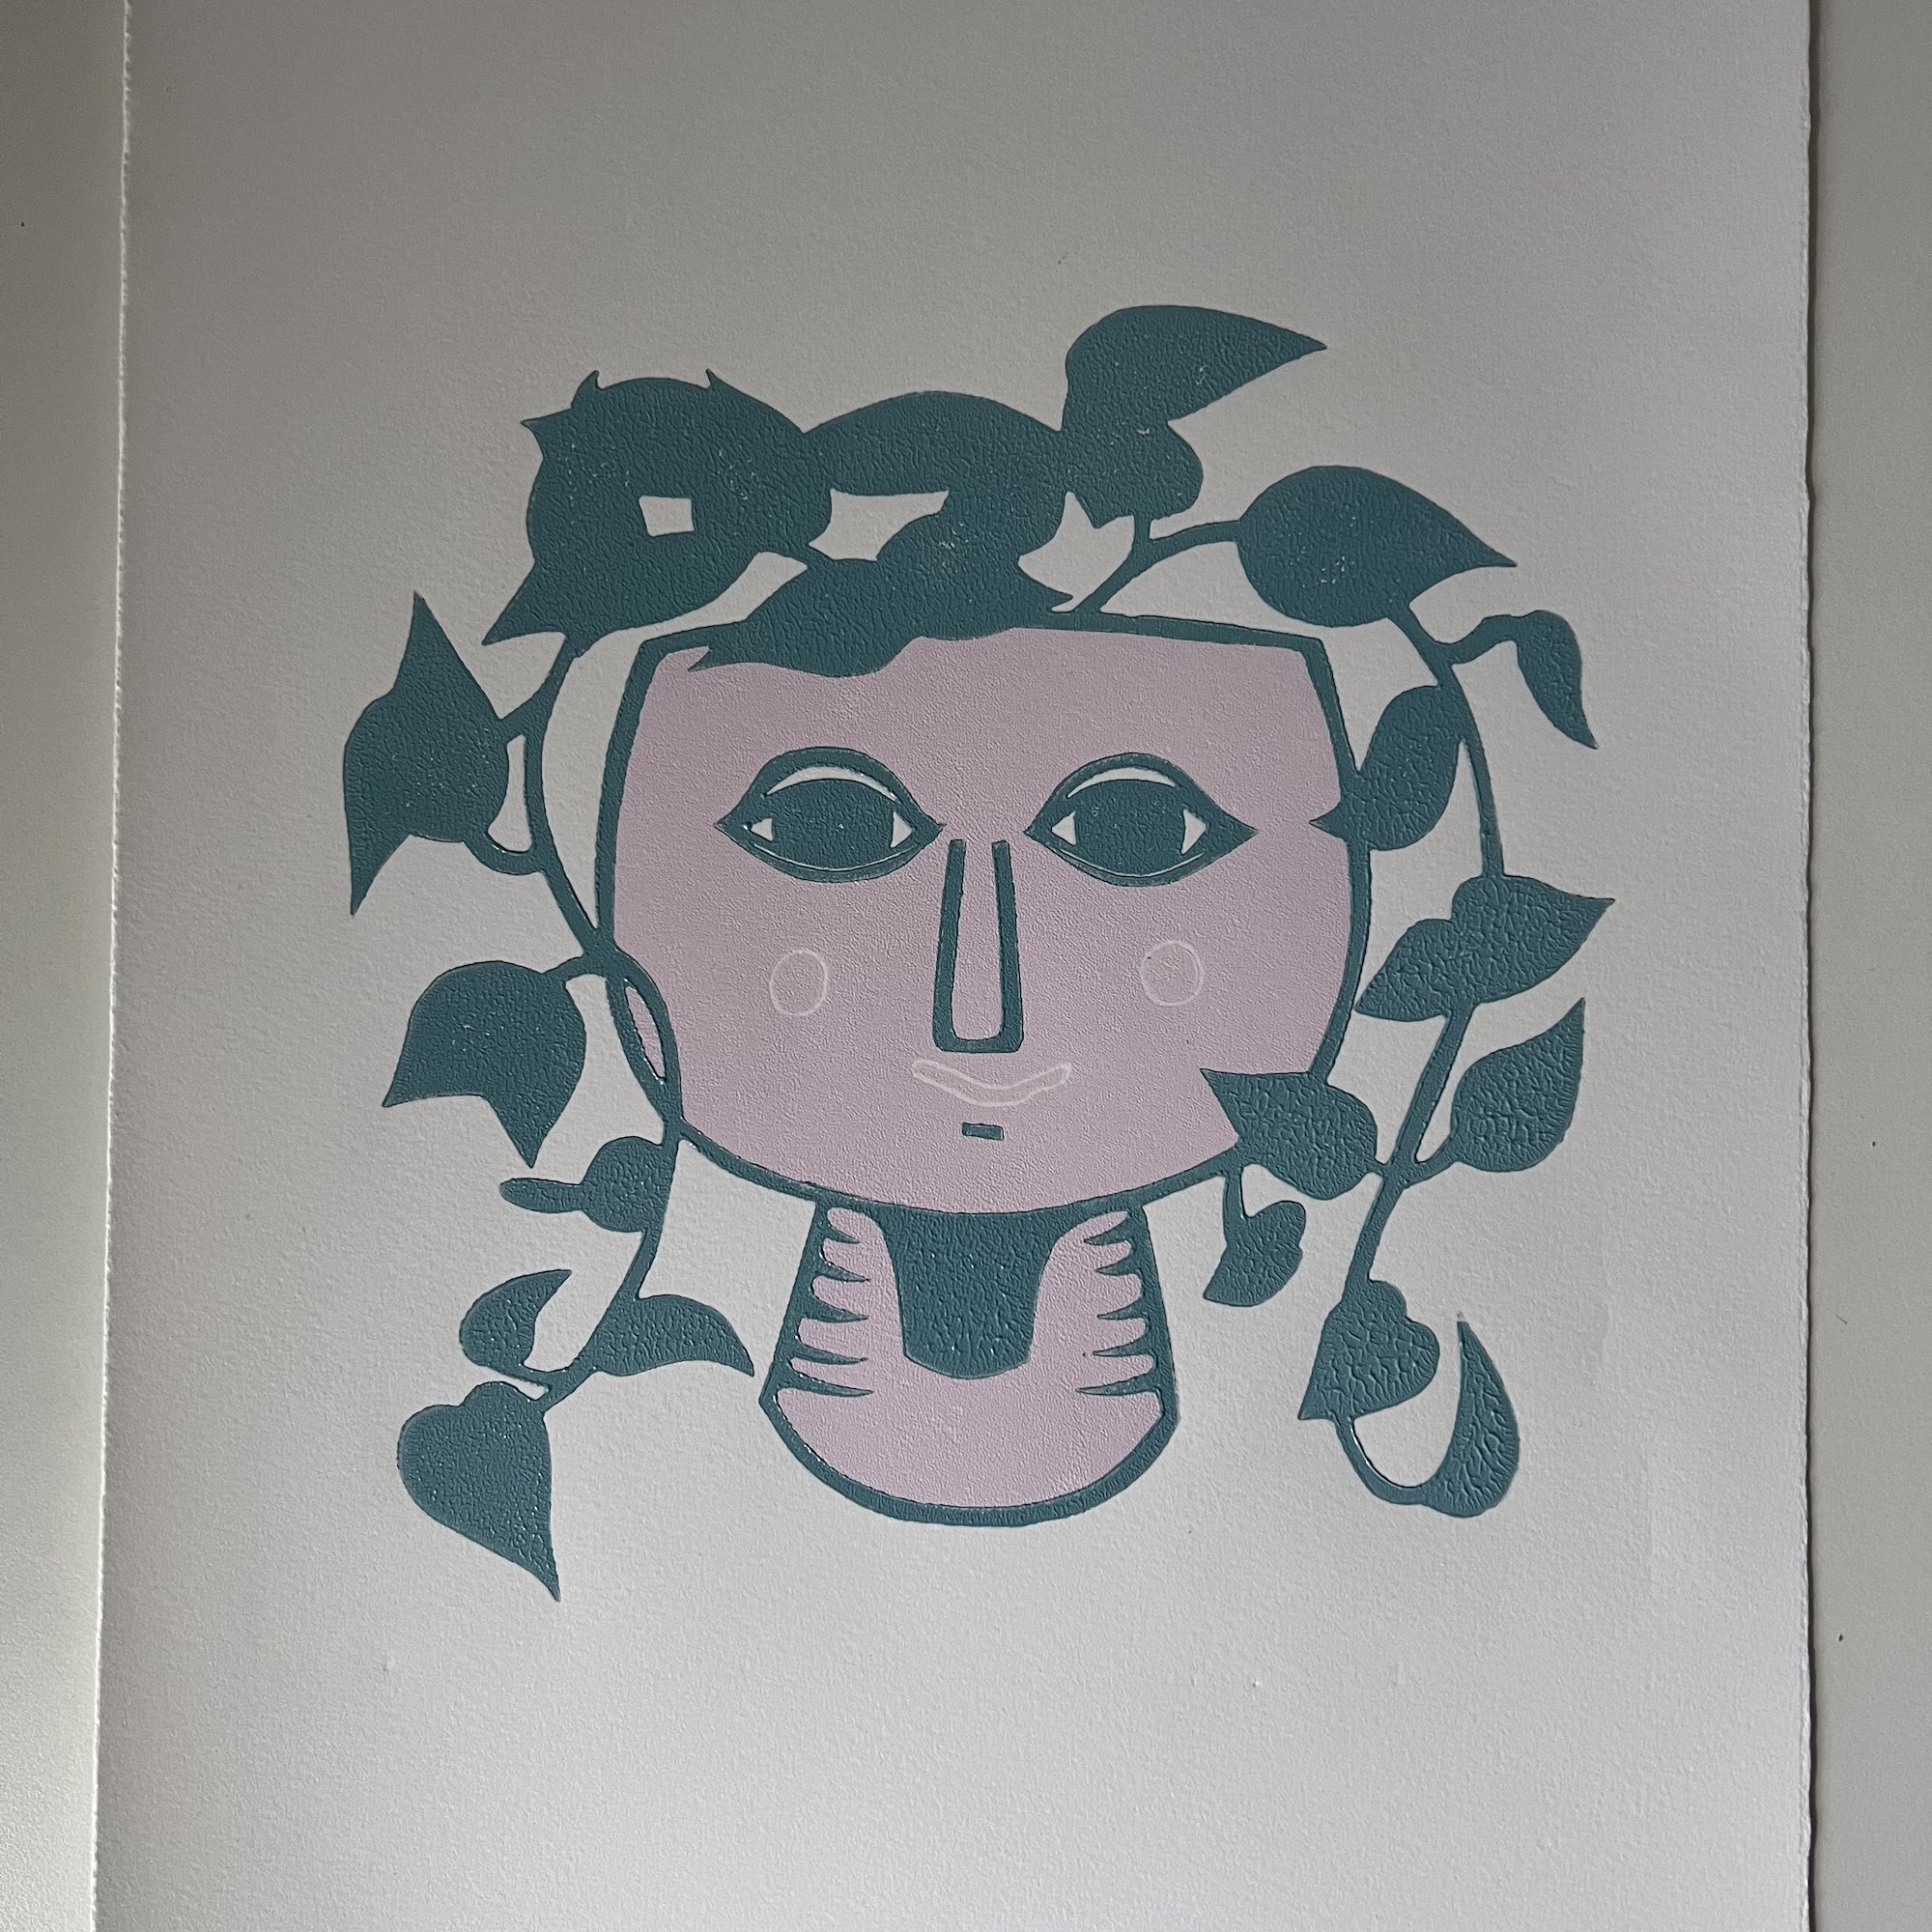
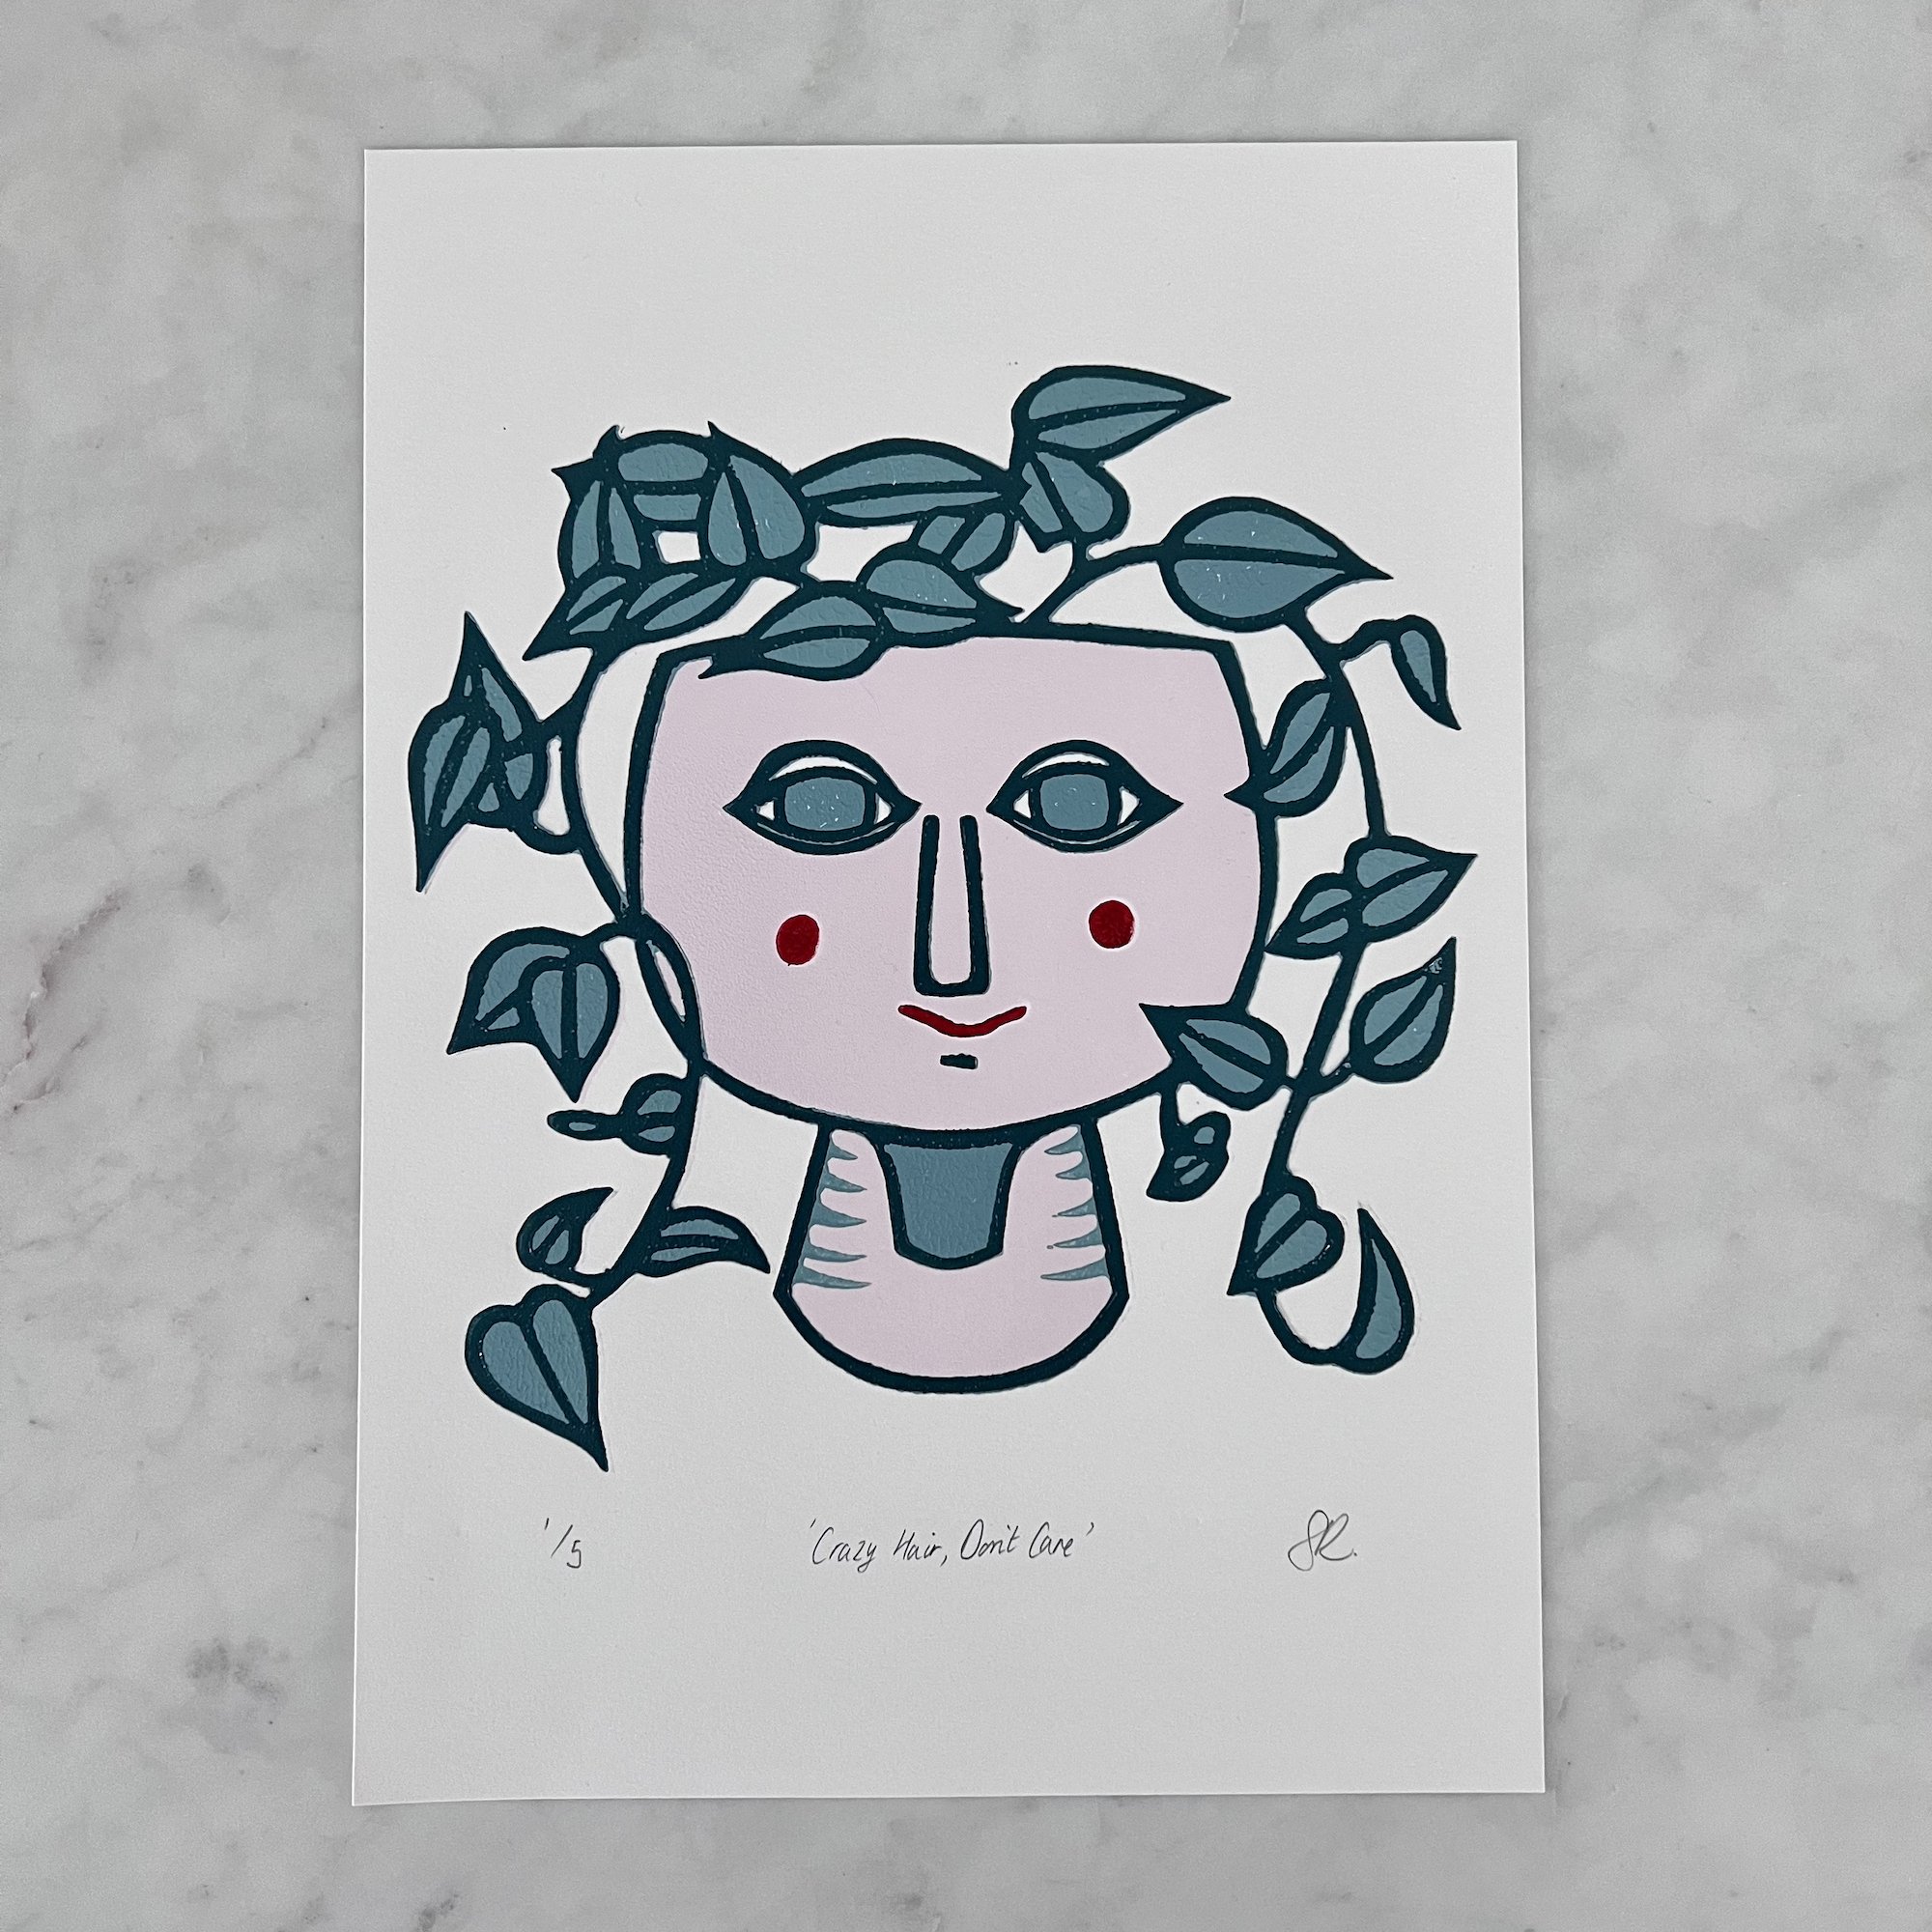
If this is a 3 layer reduction print, this final layer will be dark and most likely the outline of the print.
I added red ink to the cheeks and lips at the same time as I printed my final layer, for a little extra detail.
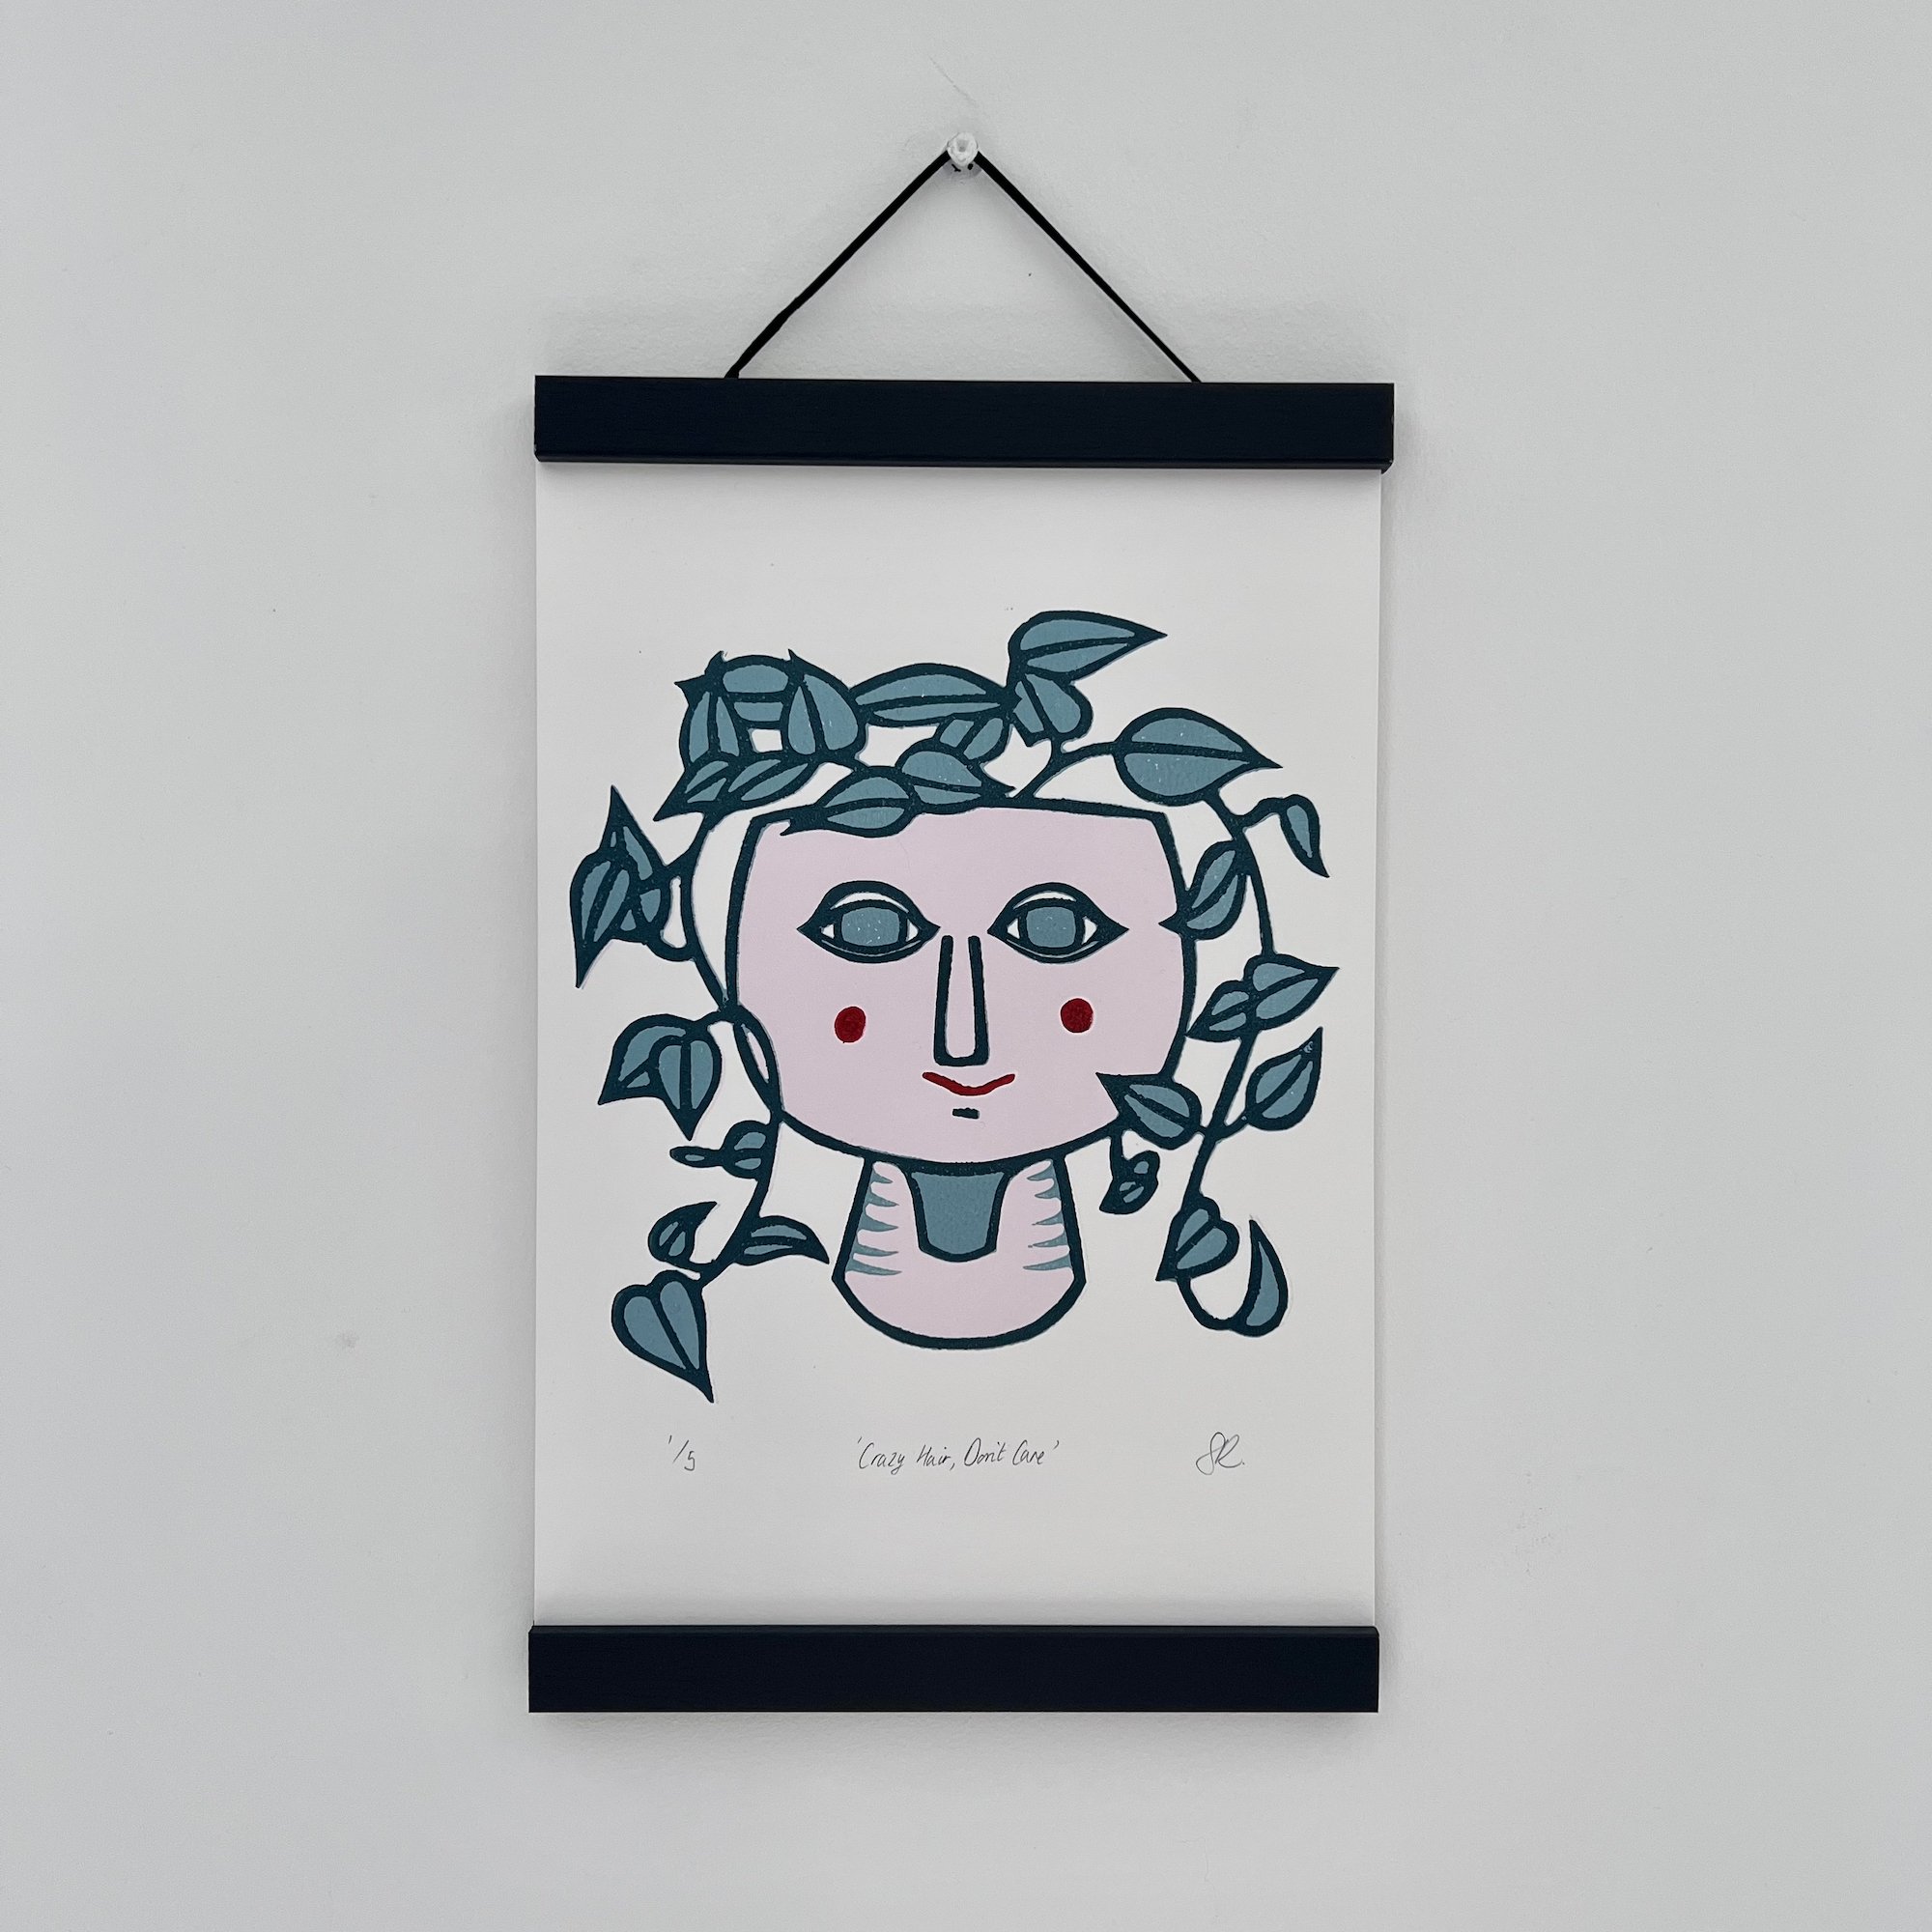
12. Your reduction lino print is finished!

I hope you have found this blog post useful. If you have any other information about reduction lino prints you think I should include here, please email me at sarahransomeart@gmail.com.

