Easy craft ideas for kids – Kandinsky Circle Art
Activity Duration: 1 - 2 hours
Why do Kids love doing Kandinsky Circles?

Kandinsky Circles is a form of circle art activity that has so much versatility and fun. While the idea of drawing circles can be very simple, it can also involve painting, cutting, gluing, and even collage. The combination of these crafts will keep kids entertained for hours, as they explore texture and colour and let their imagination to run wild.
Who was Kandinsky?
Wassily Kandinsky was a Russian painter and art theorist from the early to mid 20th Century. He is often credited as one of the pioneers of abstract modern art. Kandinsky was born in Moscow, but spent his childhood in Ukraine. His professional life saw him spend time teaching art in Munich, Moscow, and Estonia before he finally settled in France.
Kandinsky had a spiritual outlook, which he imbedded into his art forms. He believed in the relationship between colour, lines and shapes, using this to create a style that drew upon his inner feelings.
Kandinsky's art and ideas inspired many generations of artists, from his work in the Bauhaus movement to the Abstract Expressionists.
What are Kandinsky Circles?
Kandinsky was perhaps most famous for his use of squares within concentric circles, otherwise known as Kandinsky Circles. This body of work was actually a study on how different colour combinations affect the soul.
What materials are required to carry out Kandinsky Circles?

To get started, all that is required is the following:
paper or card
oil pastels, chalk, coloured pencils, felt tips or paints (any or a combination of these would work)
ruler
pencil
tissues or paper towels
Kandinsky Circles - Instructions
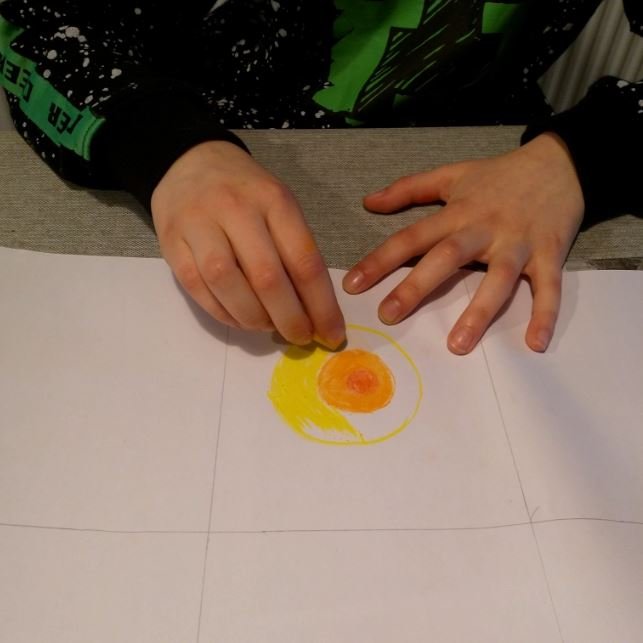
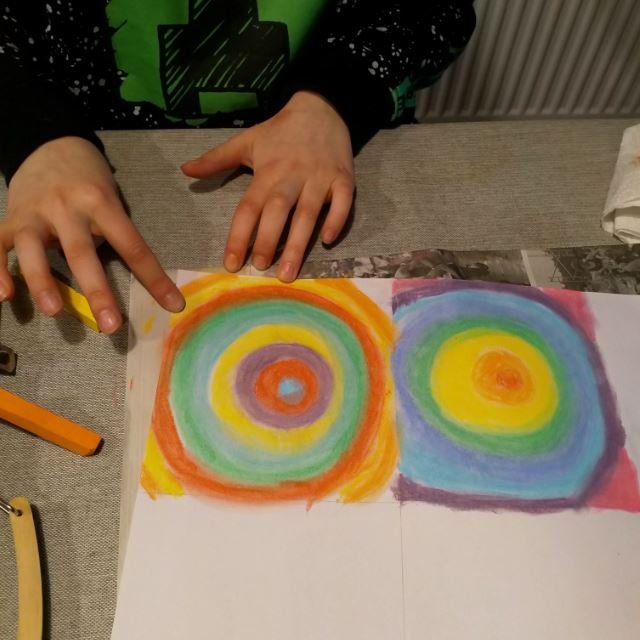
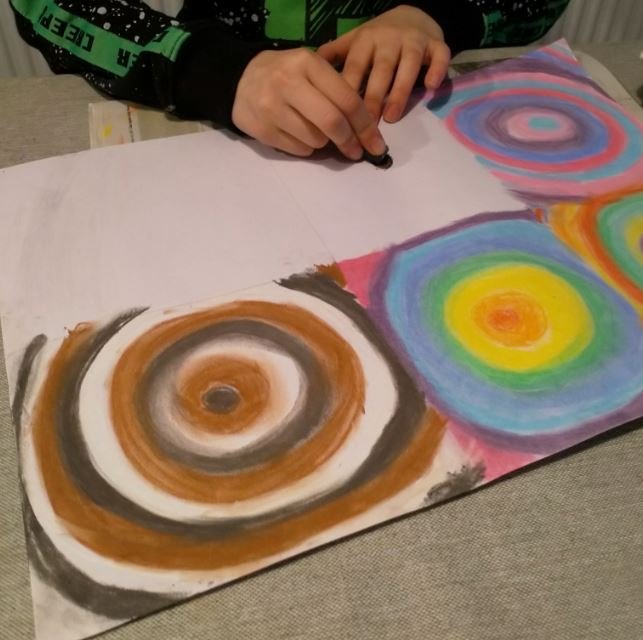
Use a pencil and ruler to divide the paper or card into squares.
Pastels or chalk work really well as they allow the colours to blend together, but colouring pencils, felt tips or paints also work.
Using the pastels, draw a circle in the middle of the square.
Using another colour, add a larger circle around the first one.
Keep adding larger circles, using different colours until the square has been filled.
Rub the edges of the circles to blend the colours together. This can be done with your fingers, or by using tissue or paper towels.

Further Colour Exploration

Once mastered, Kandinsky Circles allow children to explore and understand colour.
Kandinsky regularly used complementary colours in his artworks. Complementary colours are two colours that are on opposite sides of the colour wheel. When placed alongside each other they provide a high contrast and high impact colour combination.
Through practice, children can mix different colours together to learn the difference between primary and secondary colours. For example, the colour wheel has three primary colours: red, blue and yellow. When mixed together, we then get the secondary colours, such as, green, orange or purple.
Using this technique, and colour combinations, children can take their understanding further and begin to use this artform to convey different feelings and effects.

I hope you have found this guide helpful and enjoy this activity as much as we do. If you have made Kandinsky Circle Art, I would love to see it! You can email me at sarahransomeart@gmail.com.

