Craft Ideas for Kids - Block Printing Kit for Kids
Activity Duration: 1.5 - 3 hours
Block printing for kids is an activity suitable for 5 to 12 years olds and so much fun.
My 8-year-old daughter regularly sees me creating lino prints and has been desperate to try it herself. I’ve been reluctant to encourage her as the carving tools are very sharp and it would be easy for her to slip and hurt herself. When I came across the Essdee Block Printing Kit for Kids, it was the perfect solution, as it gave her the chance to try block printing in a safe and fun way. It was so much fun that our 5-year-old daughter could not resist and also joined in.
This is a great activity for school holidays and rainy days. Below I have provided instructions on what to do, together with a review of the Essdee Block Printing Kit for Kids.


Equipment for block printing
Apron
Old tablecloth / newspaper
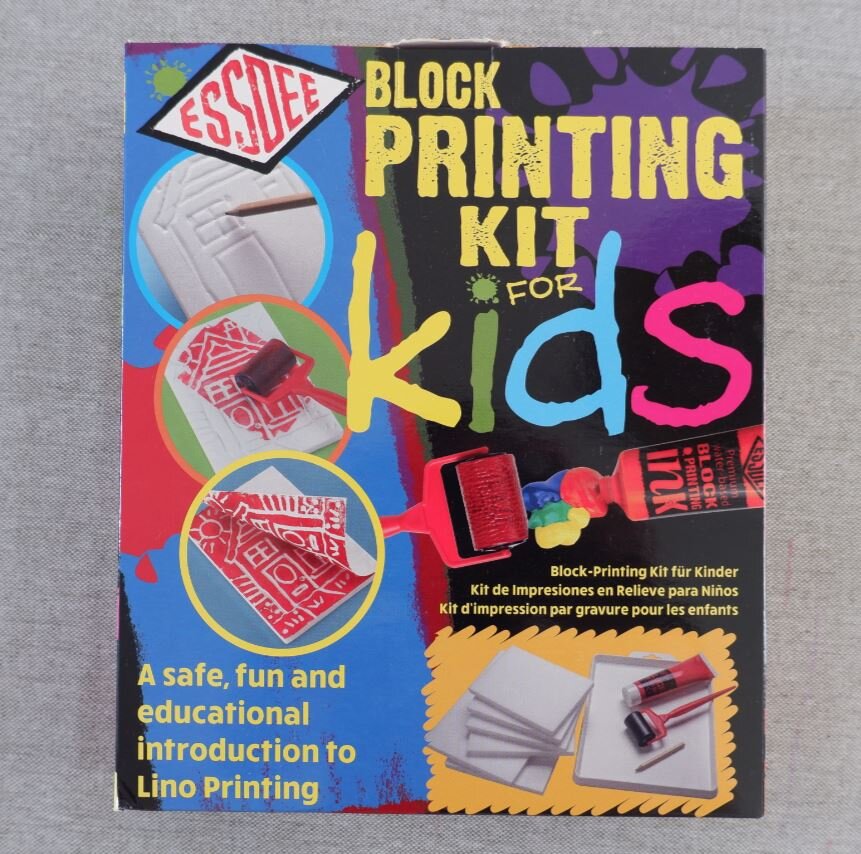
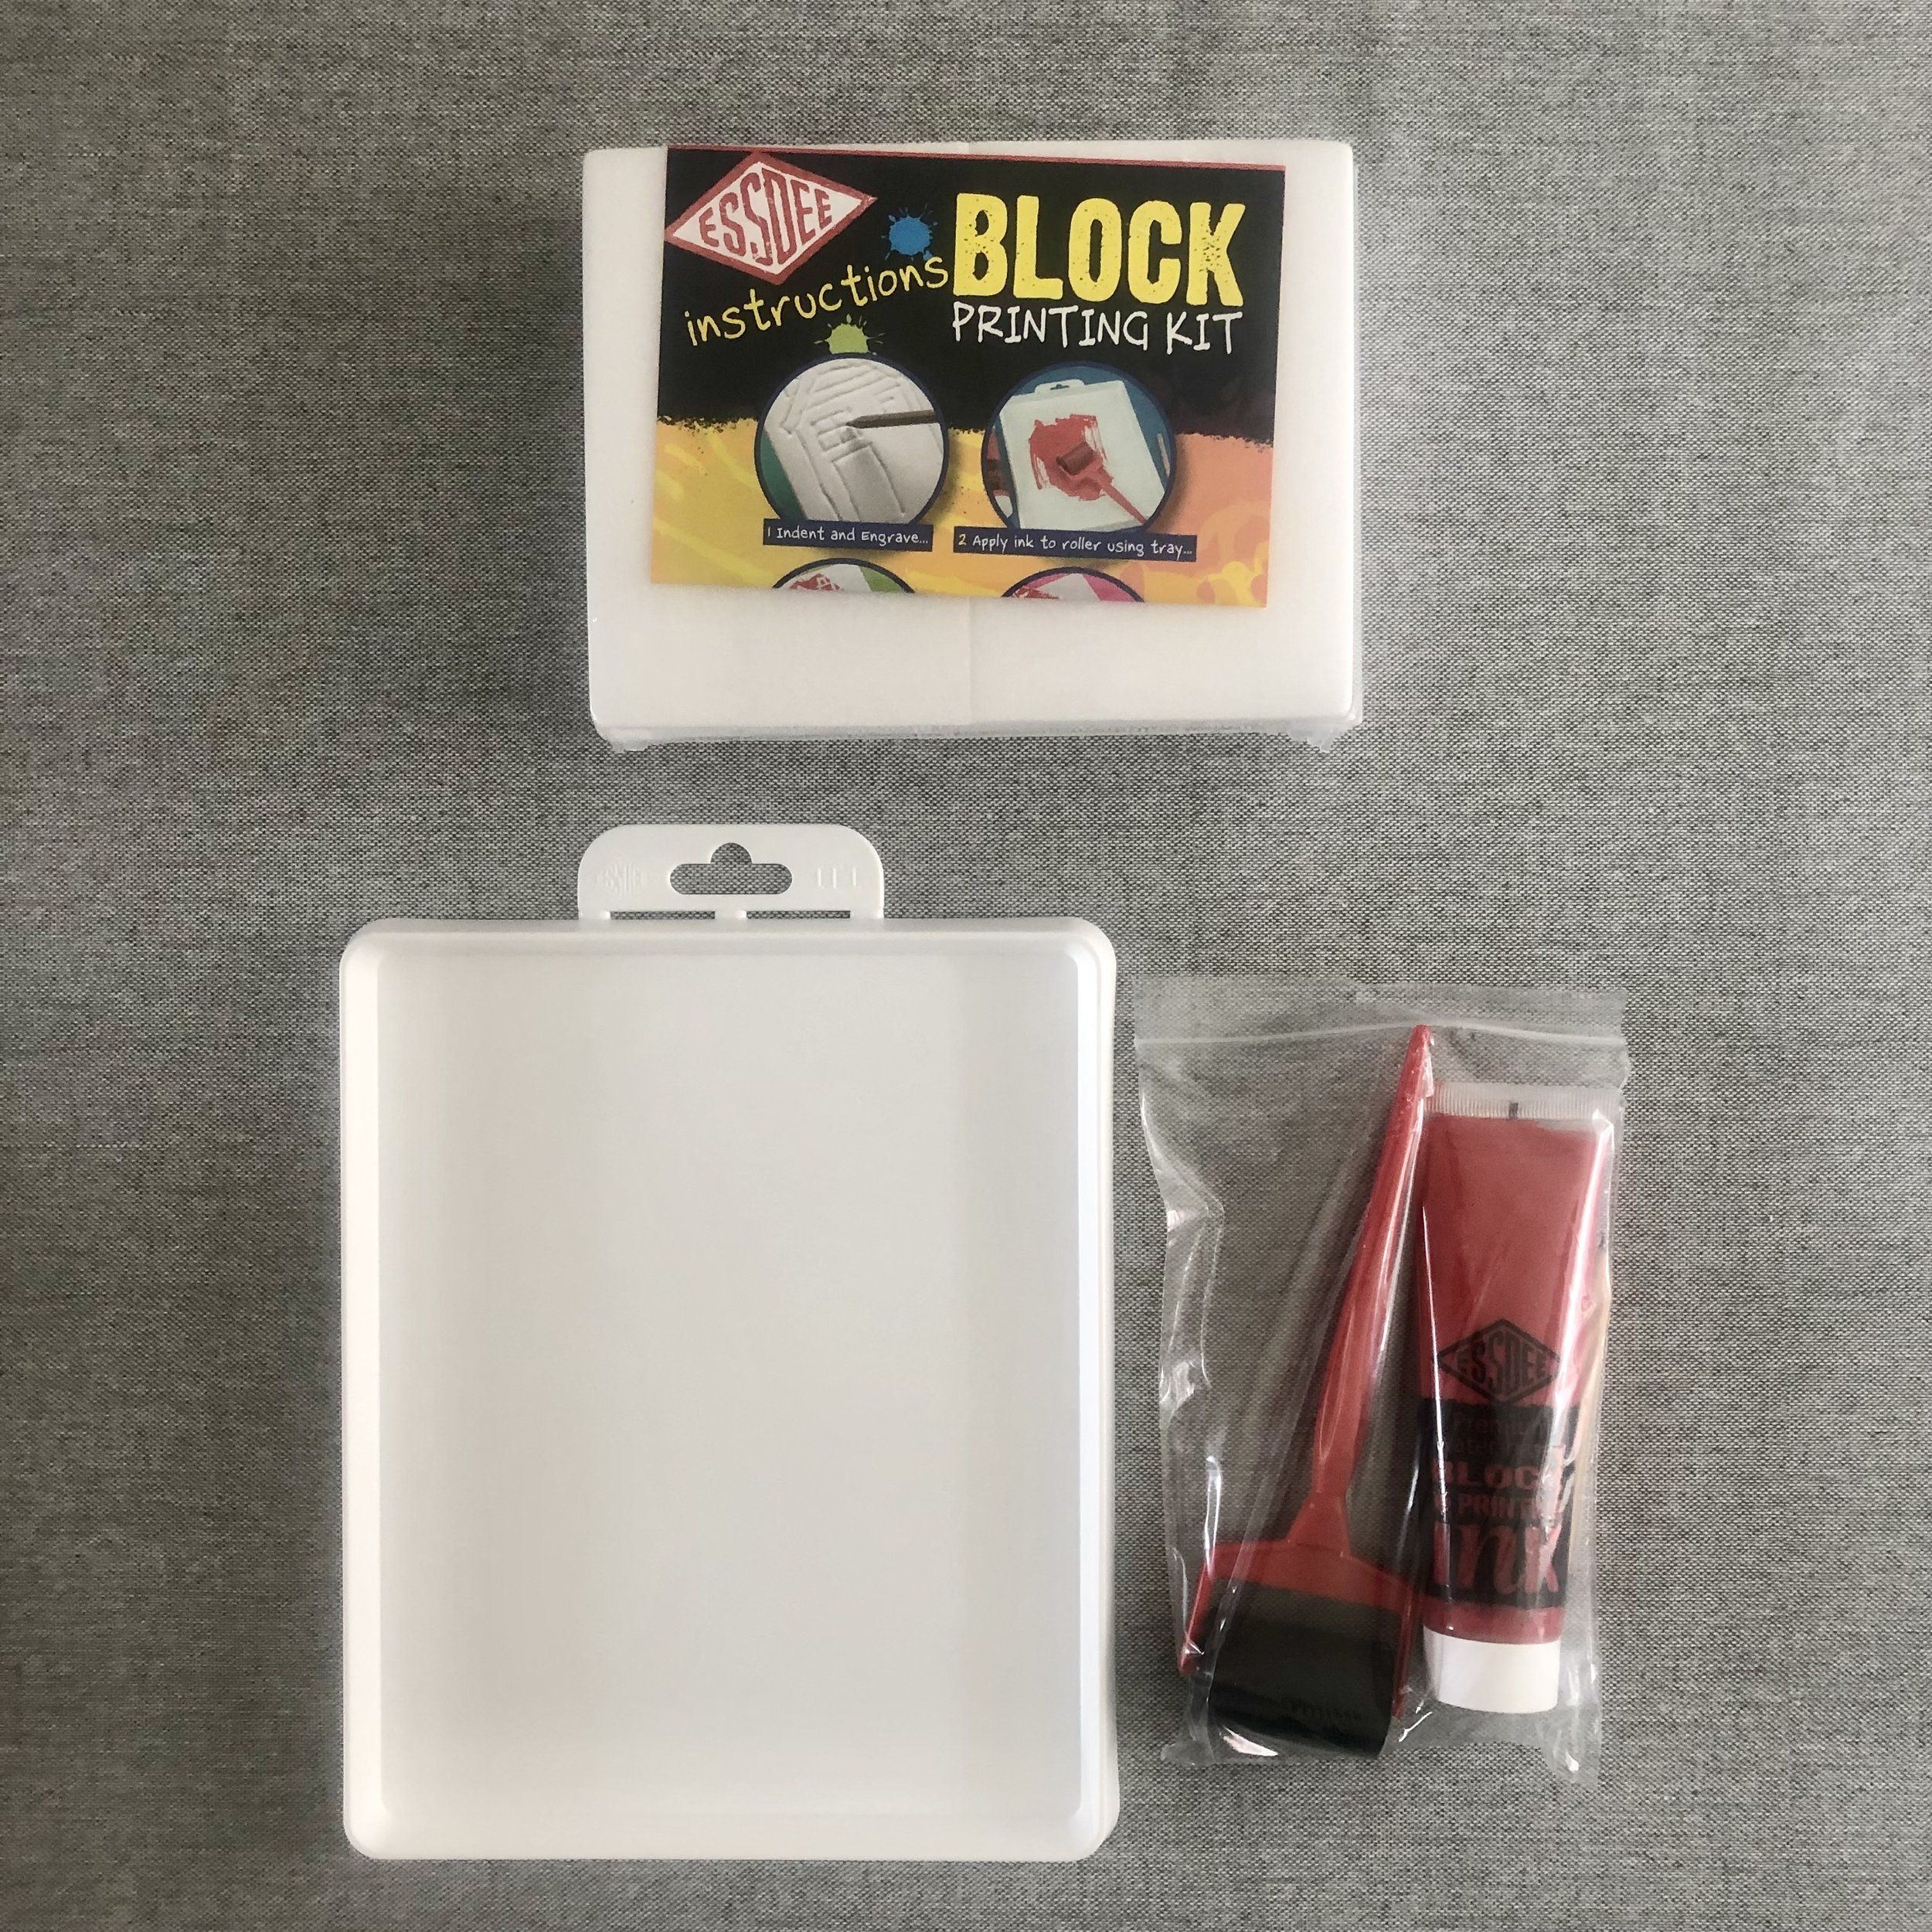
1 x Essdee Block Printing Kit for Kids
The Essdee Block Printing Kit for Kids includes:
1 x 100ml Premium Quality Block Printing Ink (Red)
1 x Ink Roller
1 x Ink Try
1 x Pencil
6 x Sheets PrintFoam
Instructions for block printing

Preparation - Put aprons on and cover the table with newspaper. I start any art activity with this vital step! While the ink is water-soluble I have found it doesn’t come out easily, so you will want to protect clothes and surfaces when using this kit.
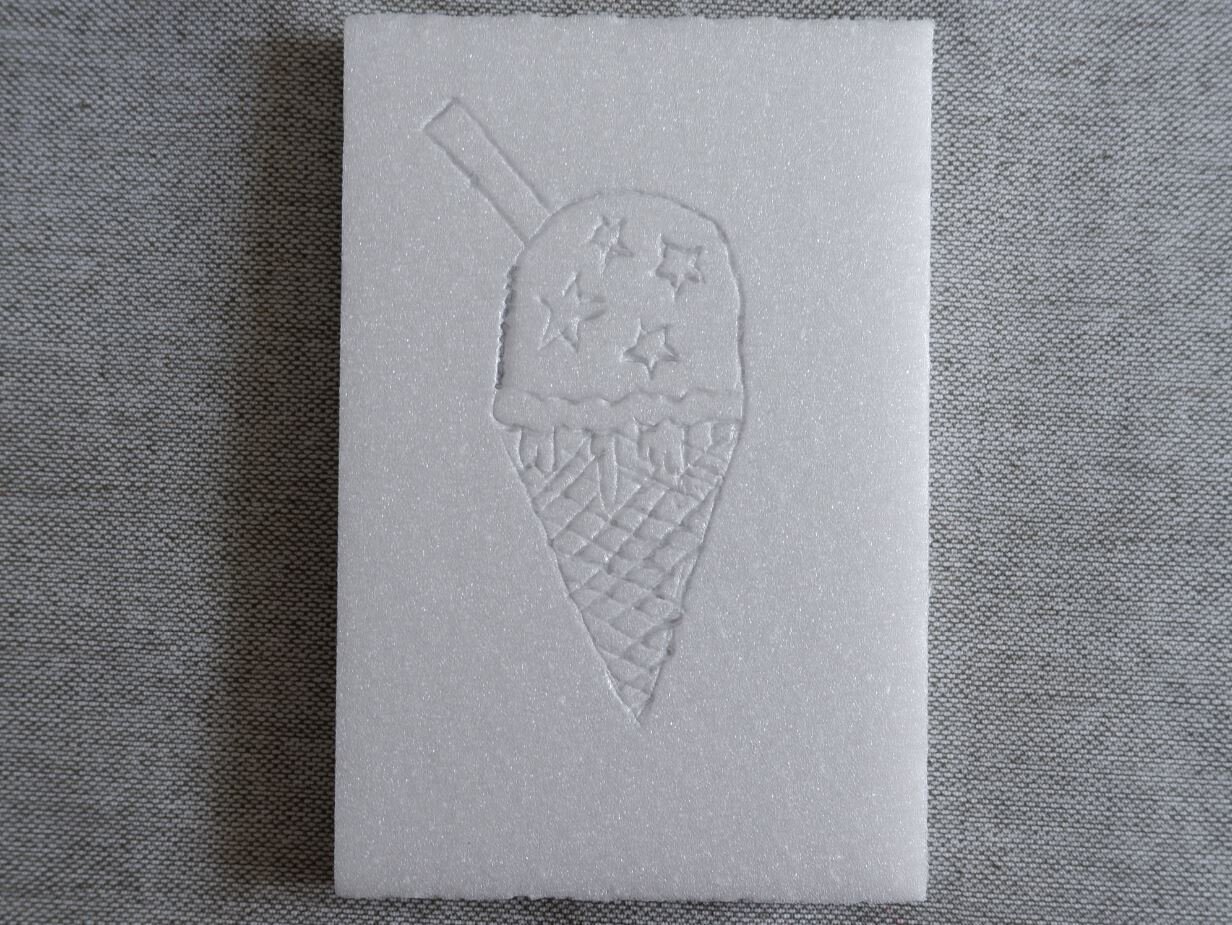
Create your design - It is possible to work directly onto the PrintFoam, but to avoid waste and disappointment, I encouraged my daughters to plan their designs on paper first.
To plan the design, first draw around your chosen sheet of PrintFoam to create a rectangle on the paper. Then ask your child to draw their design within the rectangle. This will ensure that the design will fit onto the PrintFoam. I would advise not to include too much detail, as this can get lost in the final design.
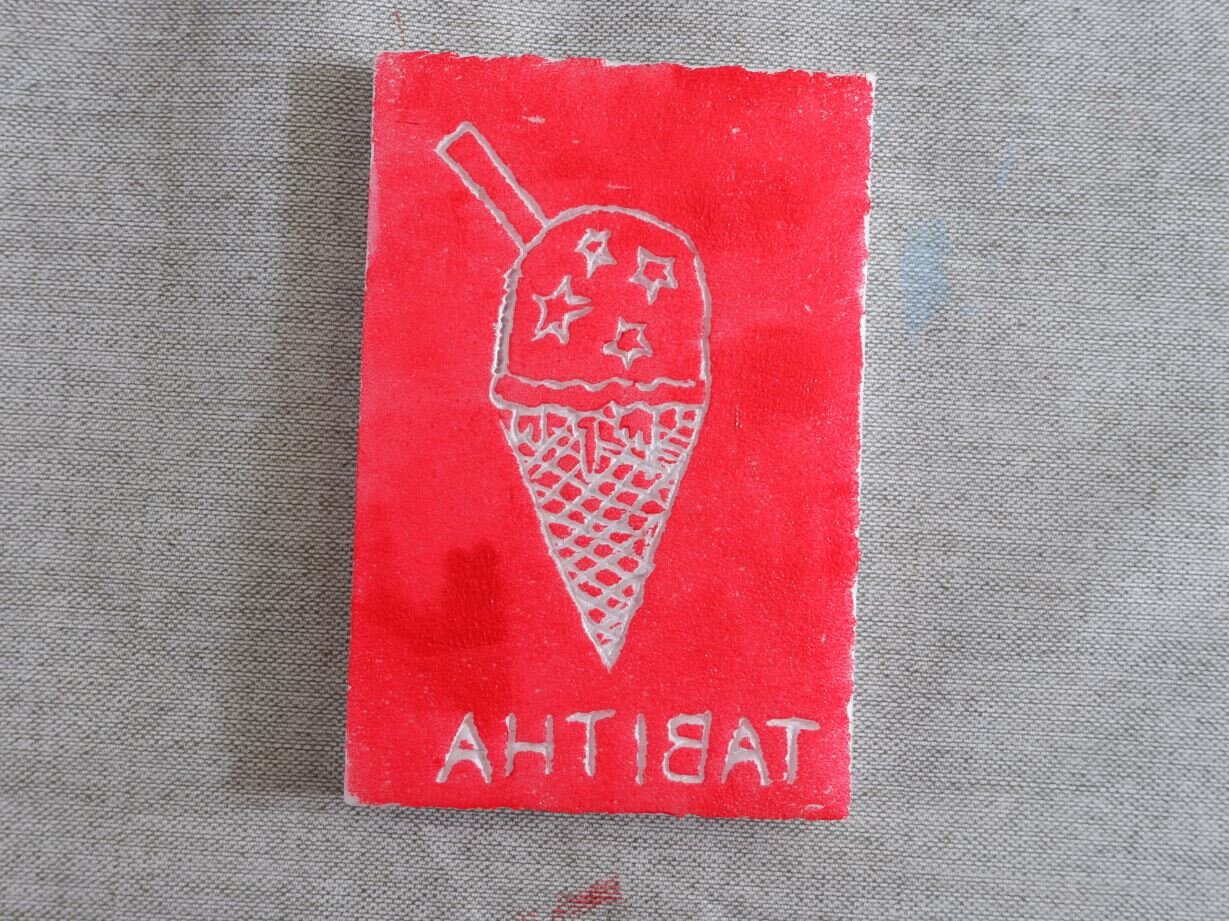
Note: any block printing design will be reversed on the final print, so if your child wants to add their name or a number, they will have to write it backwards in the design.Transfer your child’s design onto the PrintFoam - Once the design had been created, my eldest daughter then copied her design directly onto the PrintFoam. I found that my 5 year old needed quite a lot of guidance recreating her design onto the PrintFoam. Where my assistance was required, I was careful to stick to their design as closely as possible.
Once the design was on the PrintFoam, my daughters were able to apply more pressure, using the pencil included with the kit to ensure their design was fully indented into the PrintFoam.
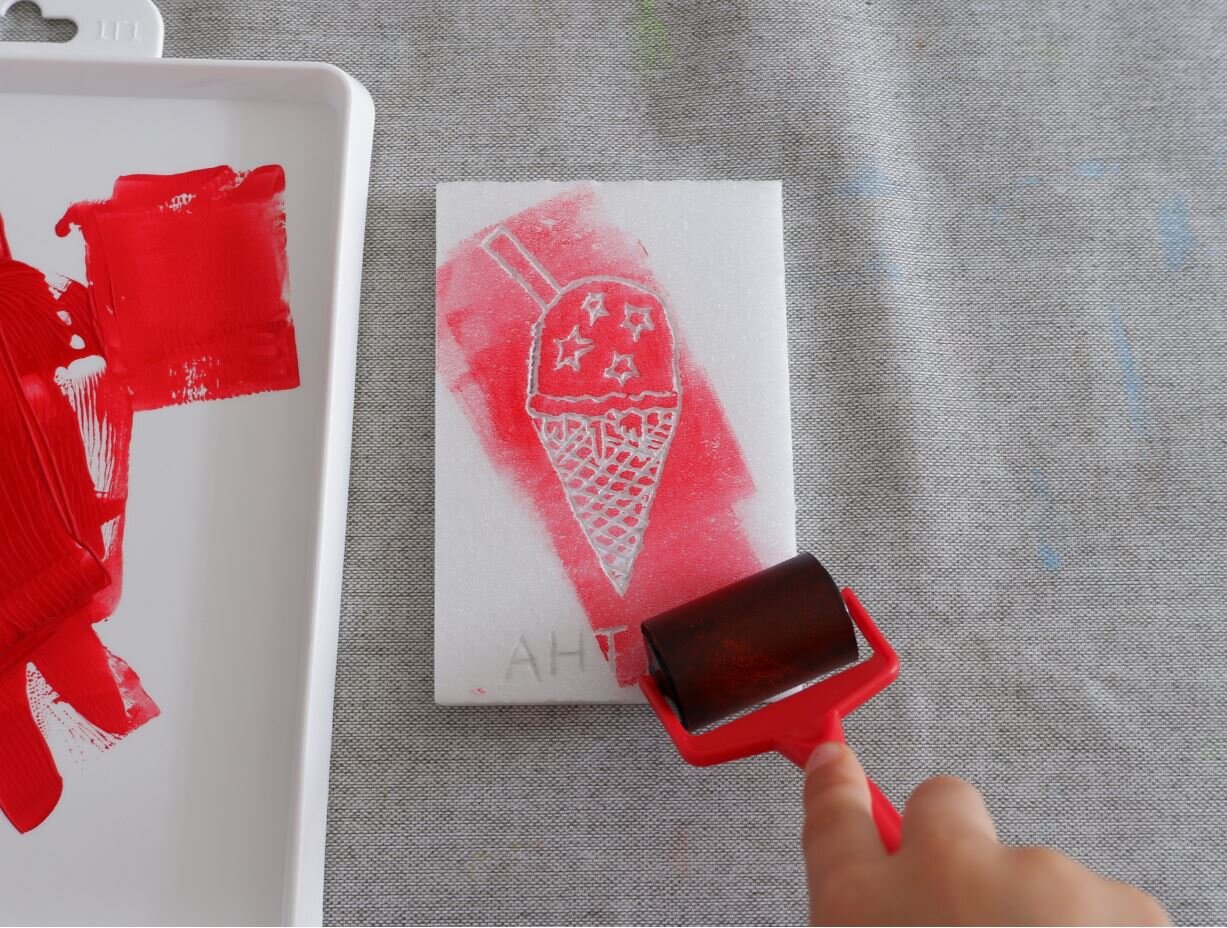
Apply ink to the PrintFoam - There is a picture of red, blue, green and yellow inks on the Esdee ‘Block Printing Kit for Kids’ box, however the kit only comes with only 1 ink tube, a 100ml Premium Quality Block Printing Ink in red (although this is stated in the product details on Amazon). If different colours are required, these will need to be purchased separately.
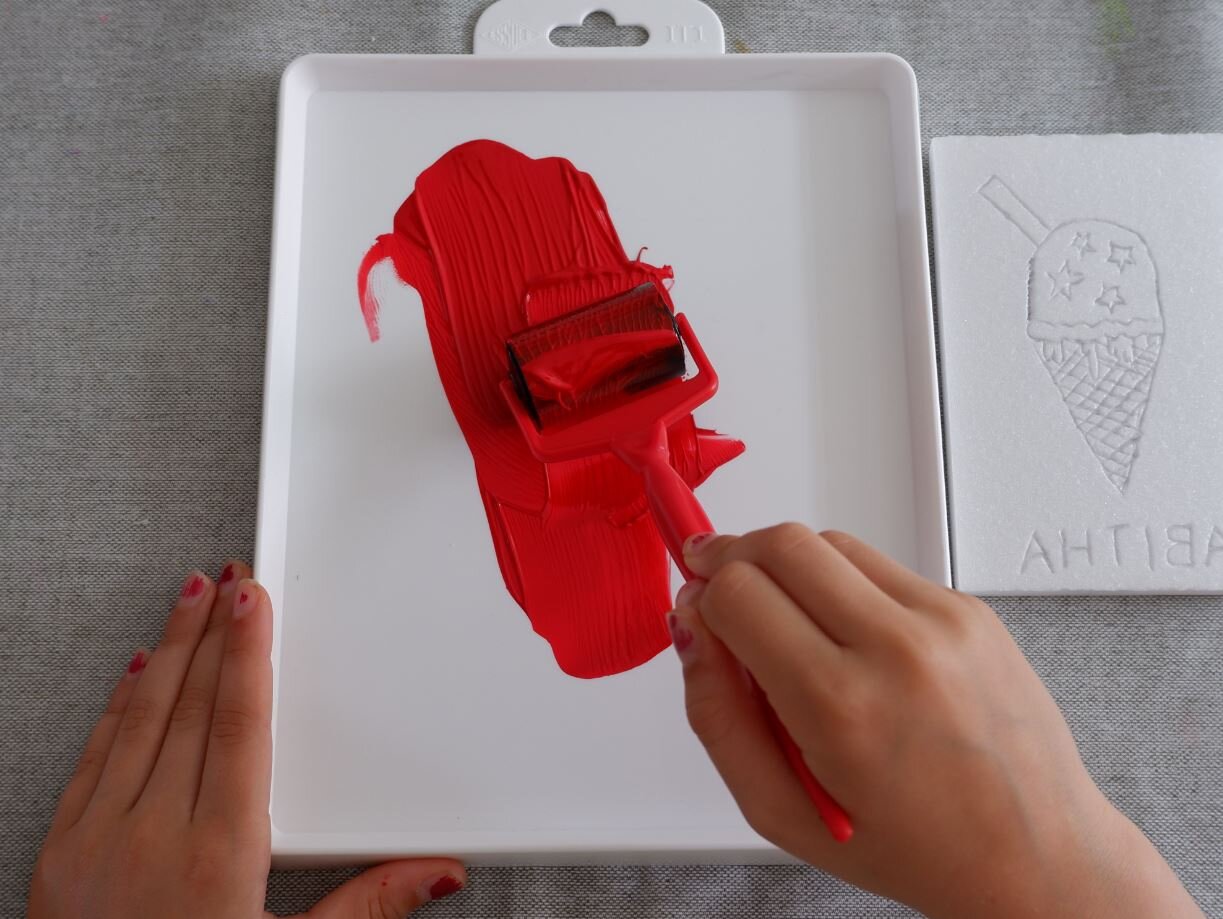
The first task here is to squeeze a small amount of ink (approx. 10ml) into the printing tray. Your child can then gradually roll the ink in the tray, lifting up the roller regularly, until the roller is covered in the ink. Add more ink to the tray, if necessary.
Then apply a number of thin layers to the PrintFoam, building up the ink gradually.
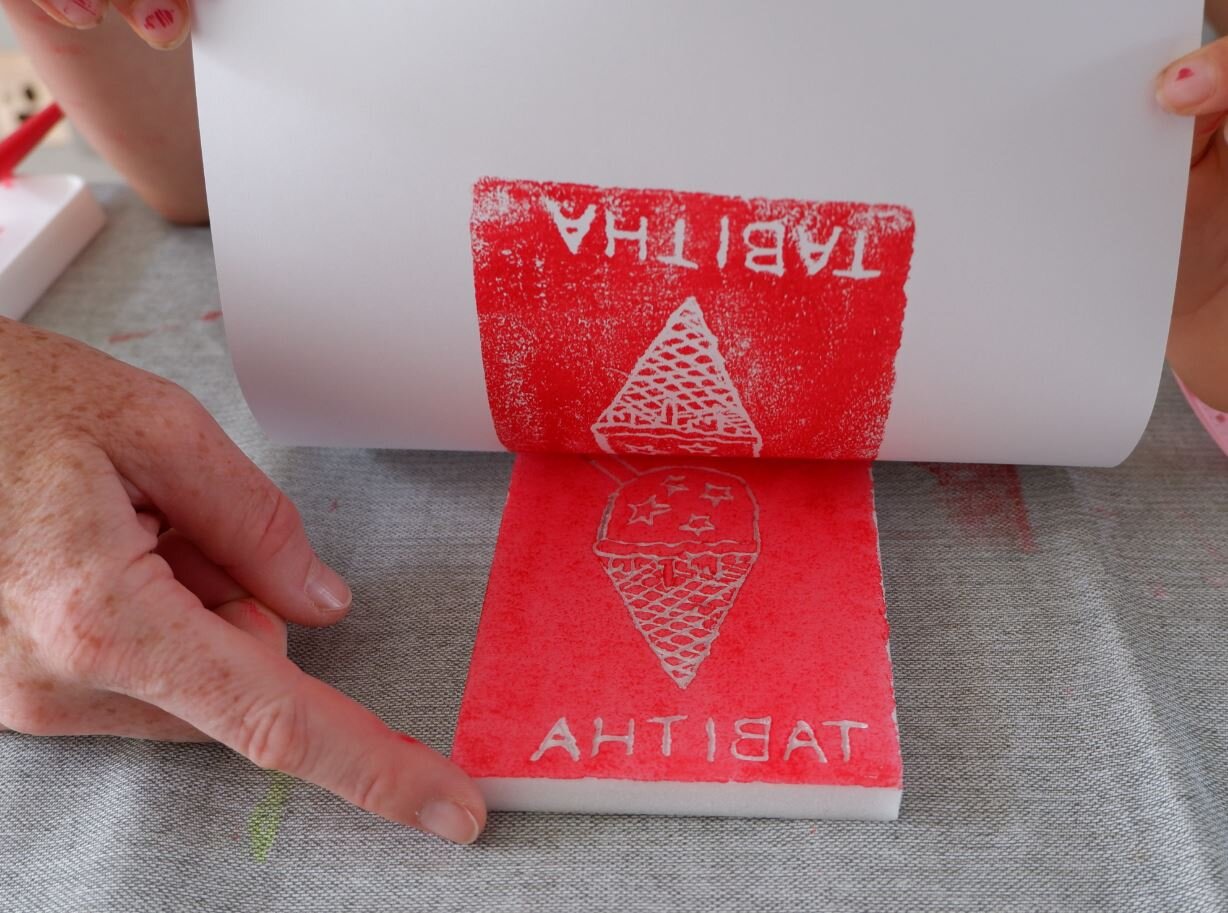
Create your print - Once you are happy with the amount of ink on the PrintFoam, it’s time to try a print. I would advise the adult to place the paper on top of the PrintFoam on behalf of the child, to make sure it is lined up in the correct place. Once the paper is in position, the child can use their hand to smooth it over their design, rubbing with the heel of their hand until it feels like the design has been transferred. If more pressure is required, try the back of a wooden spoon.
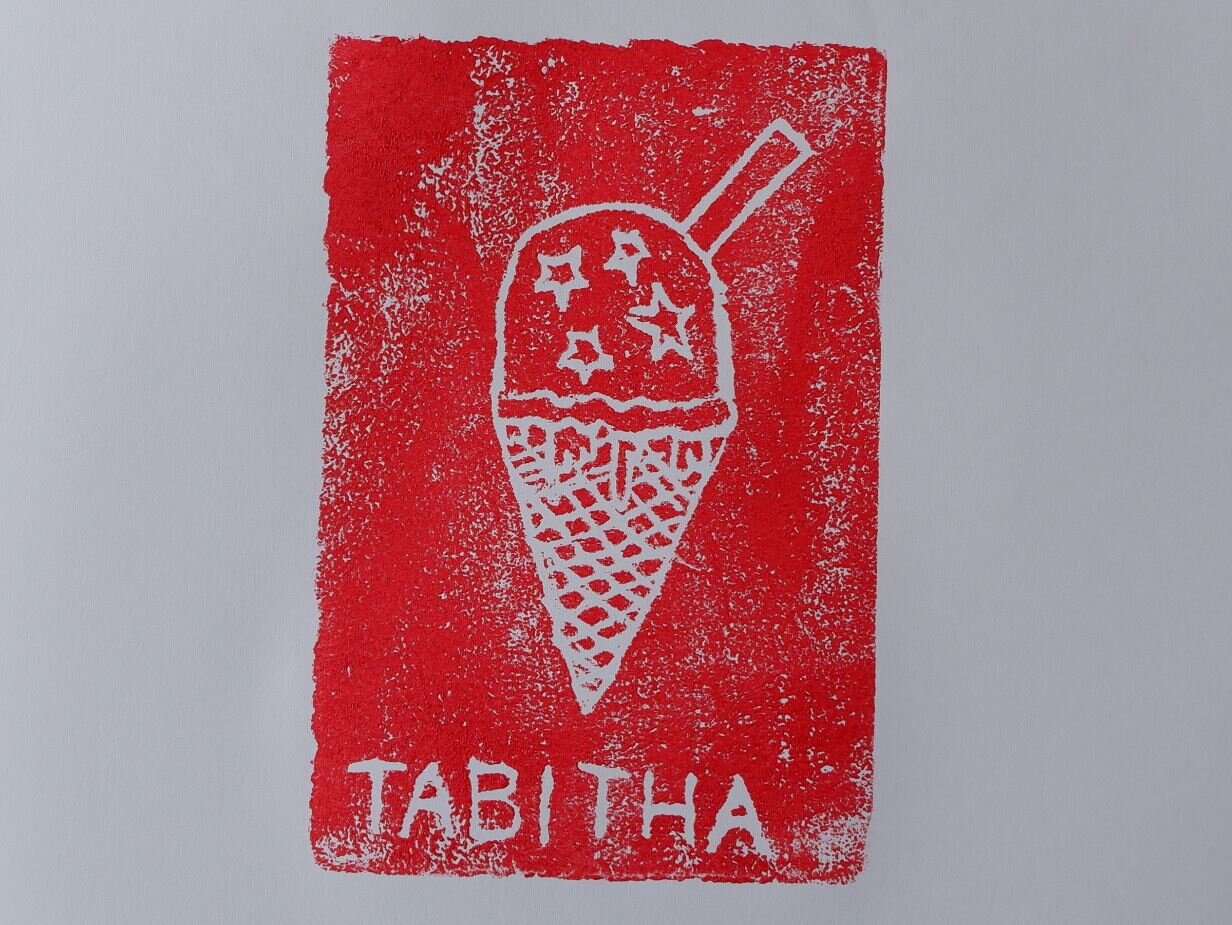
The finished print - Gently peel the print up from the Printfoam and your child has their first finished print! I often find the first print doesn’t have quite enough ink and the second and third prints come out much better. You and child and now make as many prints of the design as you want.
Repeat the printing process with new designs - There is enough PrintFoam in the kit for two children to try three different designs each. My daughters loved trying out new designs.
Cleaning-up - The inks are water soluble, which makes cleaning up a little easier. However, expect the little ones to ink on their hands and possibly their, arms, face and legs !!! The PrintFoam, rollers and tray can also be washed and reused for another time.
I found the activity took us about two hours in total. We used the PrintFoam as it came in the box, but it is possible to cut it into smaller pieces to make stamps.

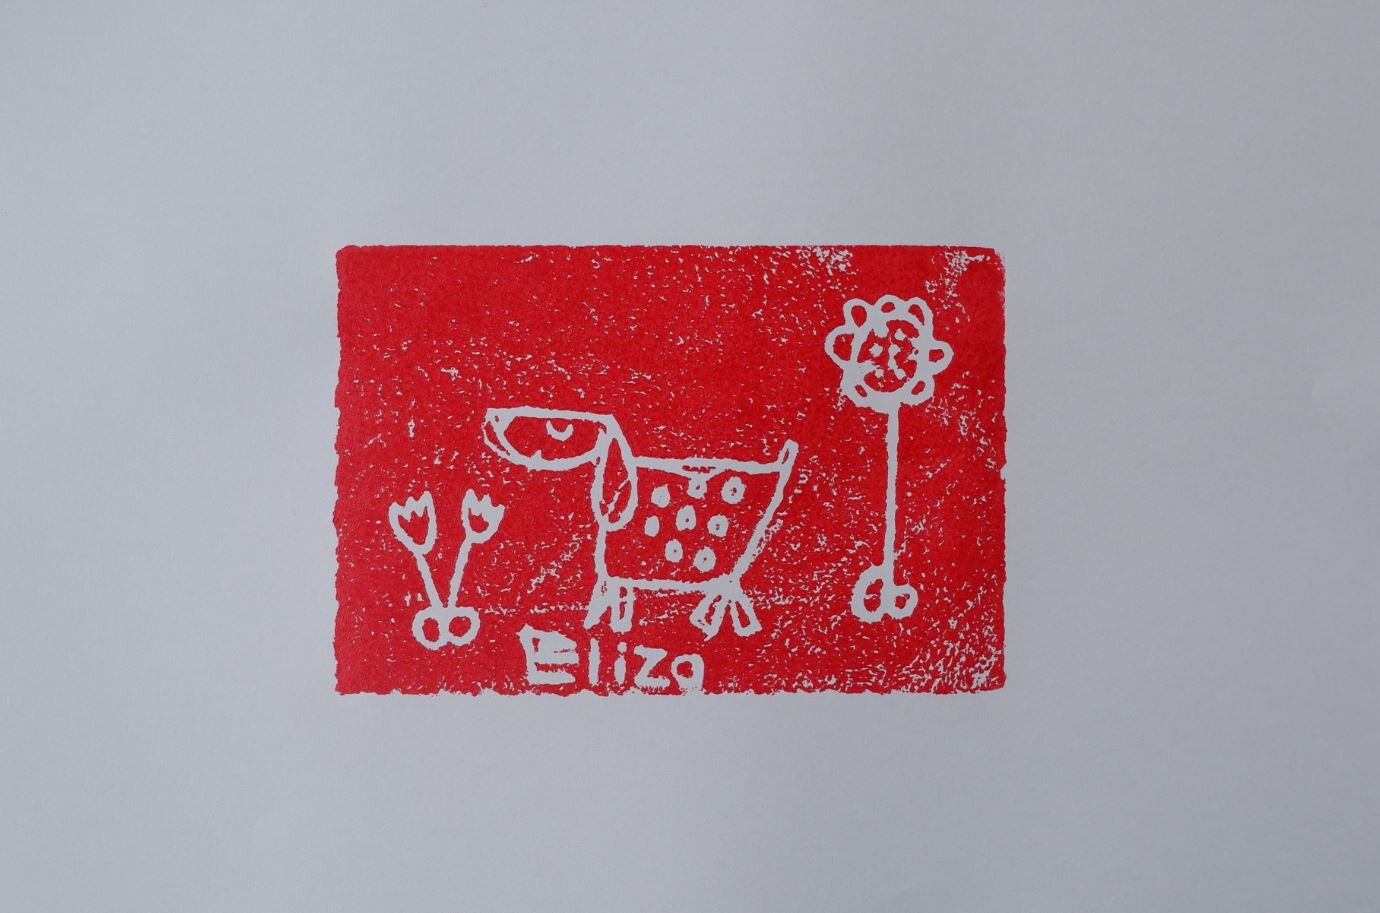
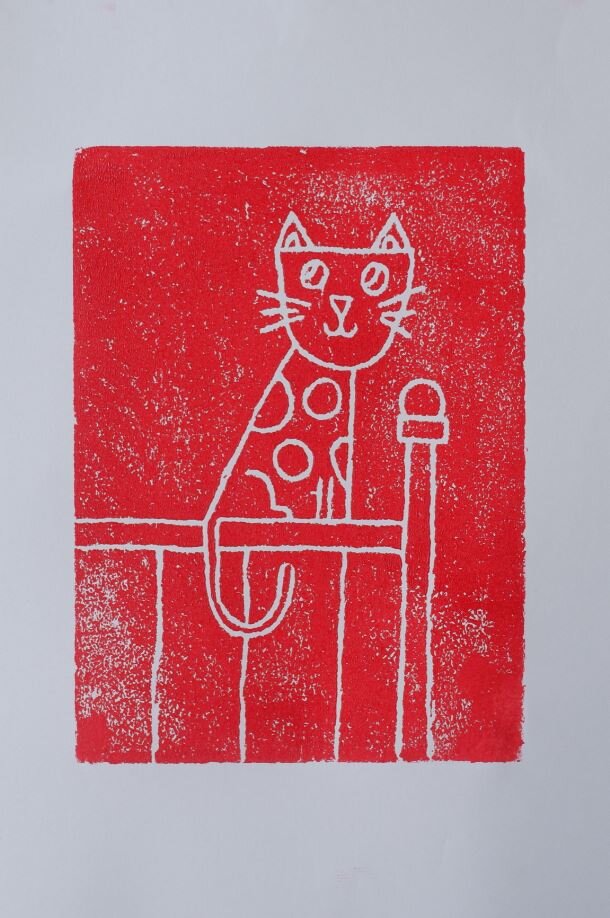
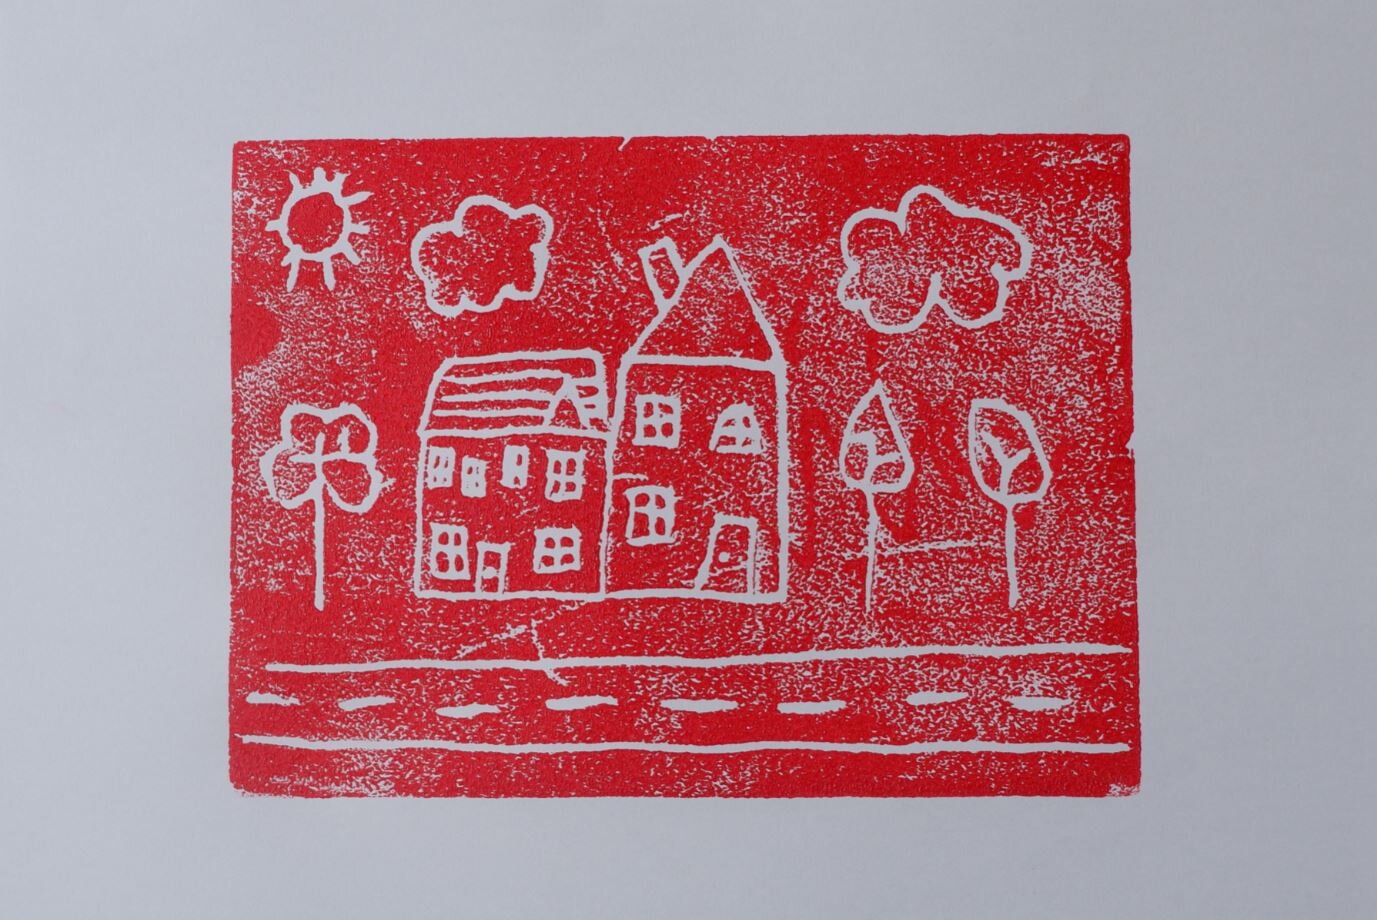
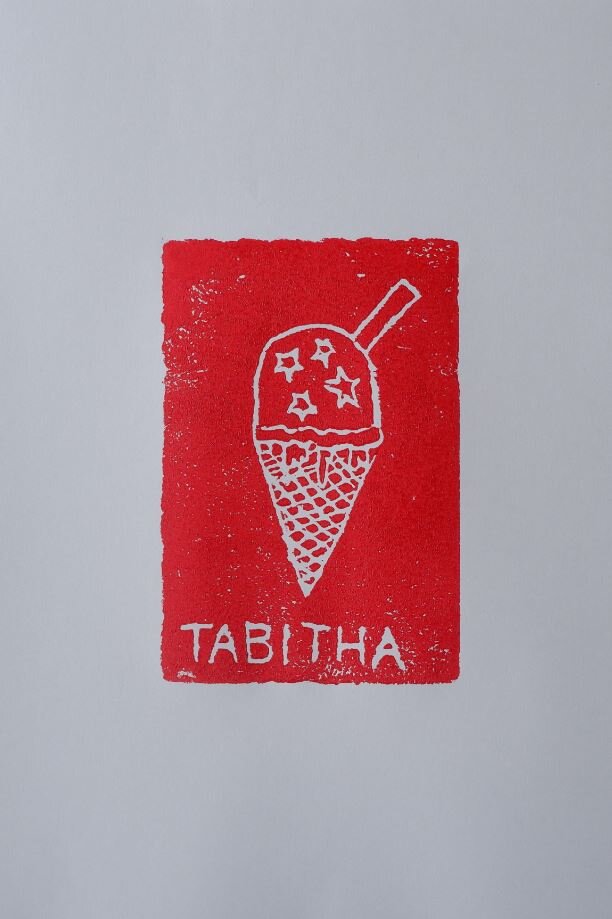
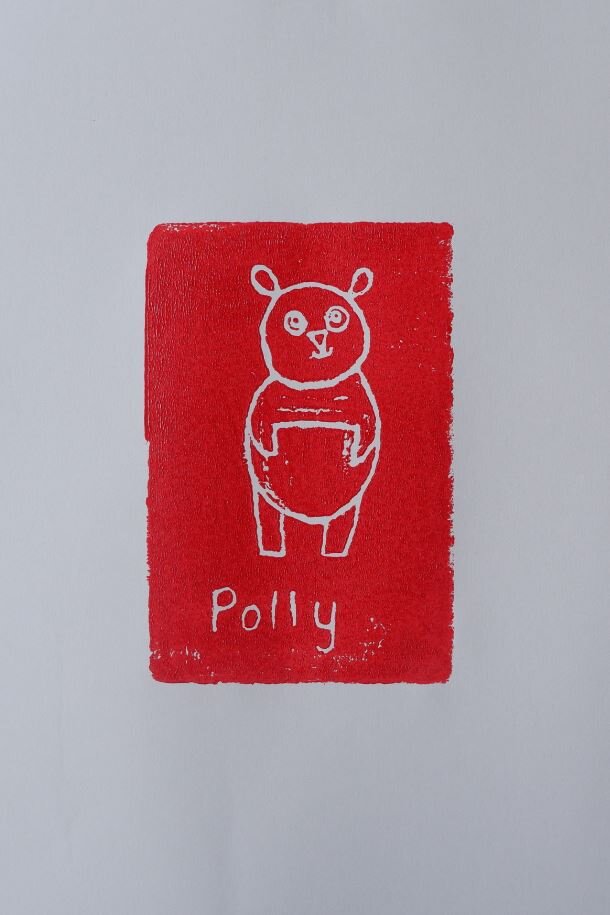
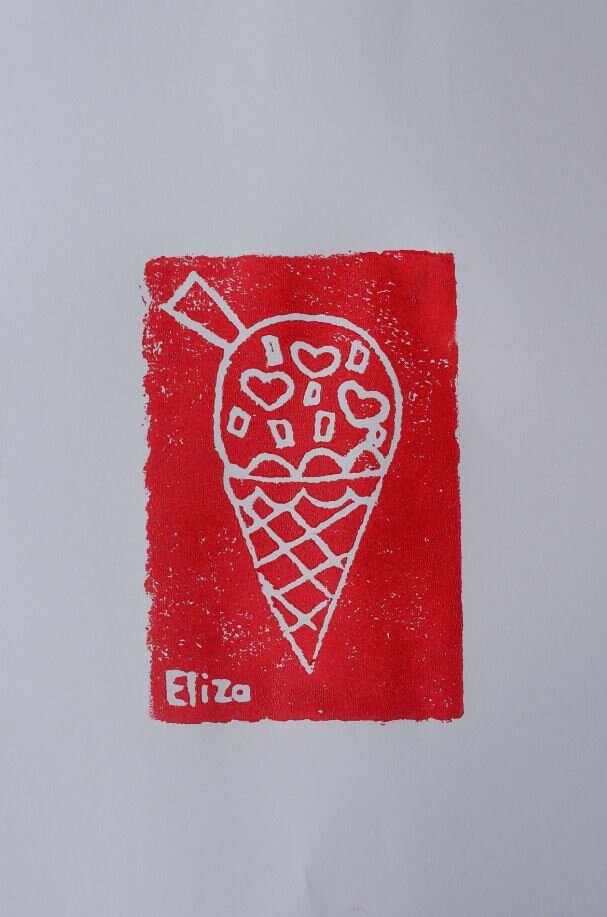
Lino Print Gallery
Extras for next time
It is possible to buy additional ink colours from Amazon to experiment with different colours. You can even mix colours and use extra rollers to create an ombre effect, for example, when making a print of a sunset. It’s also possible to buy more PrintFoam and simply re-use the rest of the kit.
Block Printing Ink Set from Amazon
The kit can be used to create colourful artwork including posters, montages, greeting cards, gifts wrapping, decorations, scrapbooks and stamps etc.
Conclusion
I would highly recommend this kit. It would have been nice to have had 2 or 3 smaller different colour tubes of ink instead of 1 large tube with only one colour and some more PrintFoam, so the kit could be used for a few more sessions. Having said this, these can be bought separately if required. Overall, it is a great introduction to Lino printing for children and young people, without the worry of using sharp carving tools. There is also plenty of opportunity to explore lino printing further, if your child enjoys the introductory session.

